Skip to content

Life Hack and DIY Lifestyle

  • Things I like
  • Life Hacks
  • DIY projects
  • Home Improvement Basics
  • About Me
  • Resources
  • Lego
  • 3D Printing

Building a basketball backboard

February 20, 2025February 20, 2025 admin

I have a basketball hoop and recently the backboard (which was plastic) started to crack. A few weeks later the plastic pieces started to fall off so I needed to replace the backboard. In my neighborhood I noticed that other people had similar issues with their plastic backboard breaking into pieces. Essentially the plastic would weaken over time due to exposure to the sun and then it would break.
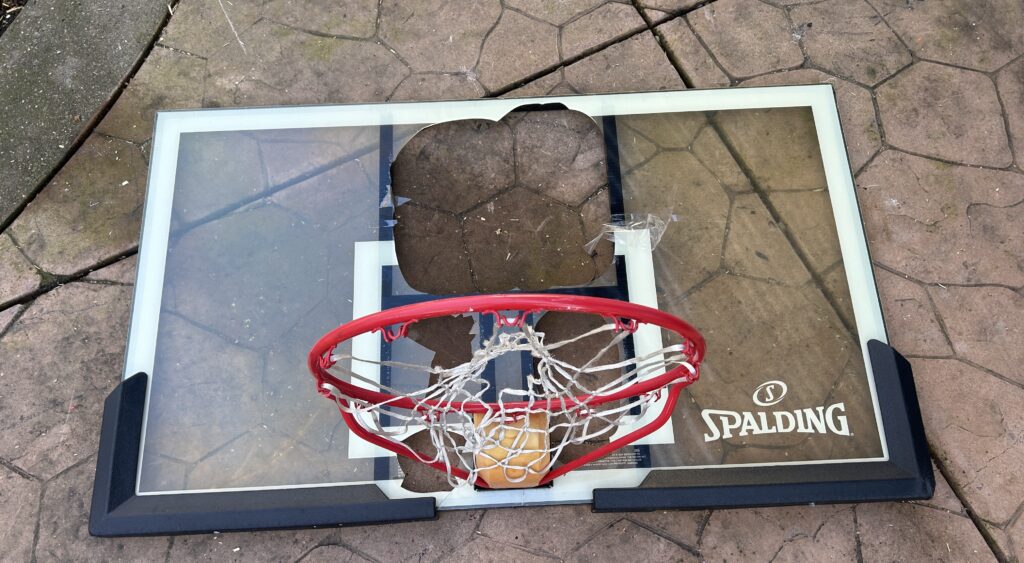
This is my old plastic backboard, which broke apart.

Therefore, I decided to replace my backboard with a wooden backboard as this would be more durable than plastic. It didn’t seem too difficult of a project so I decided to build it myself. This is the finished product, I think it turned out really well.
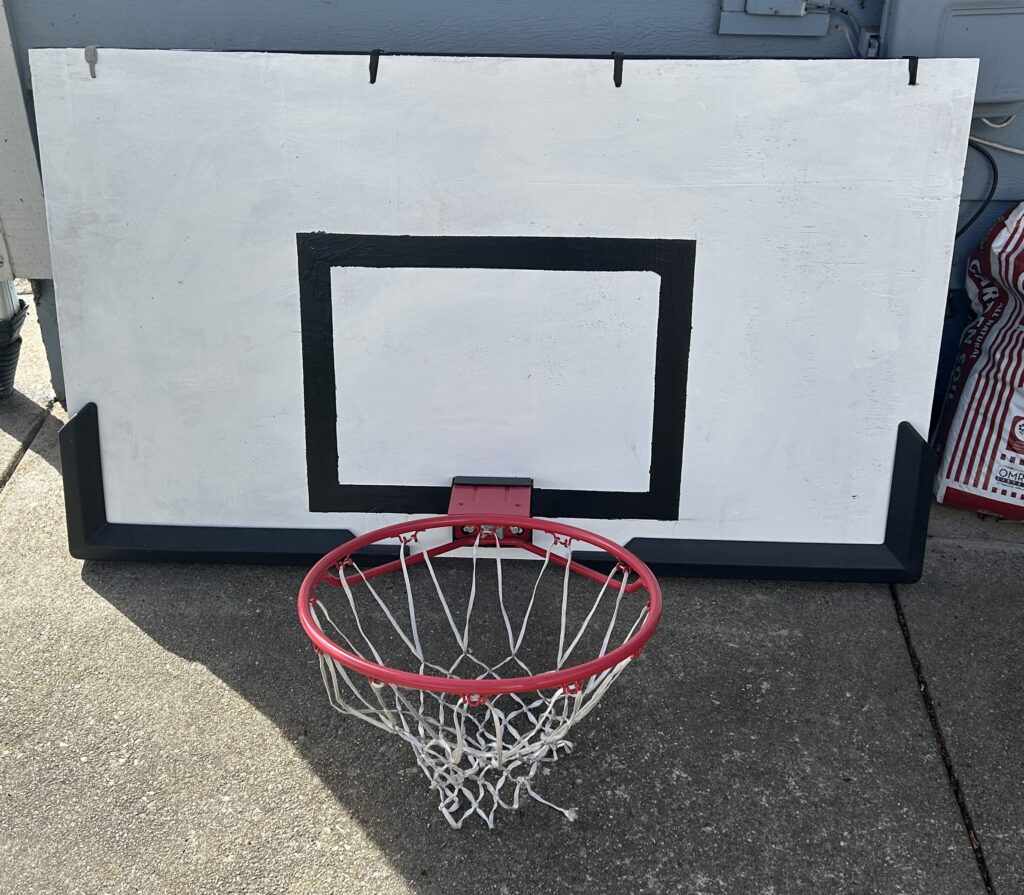
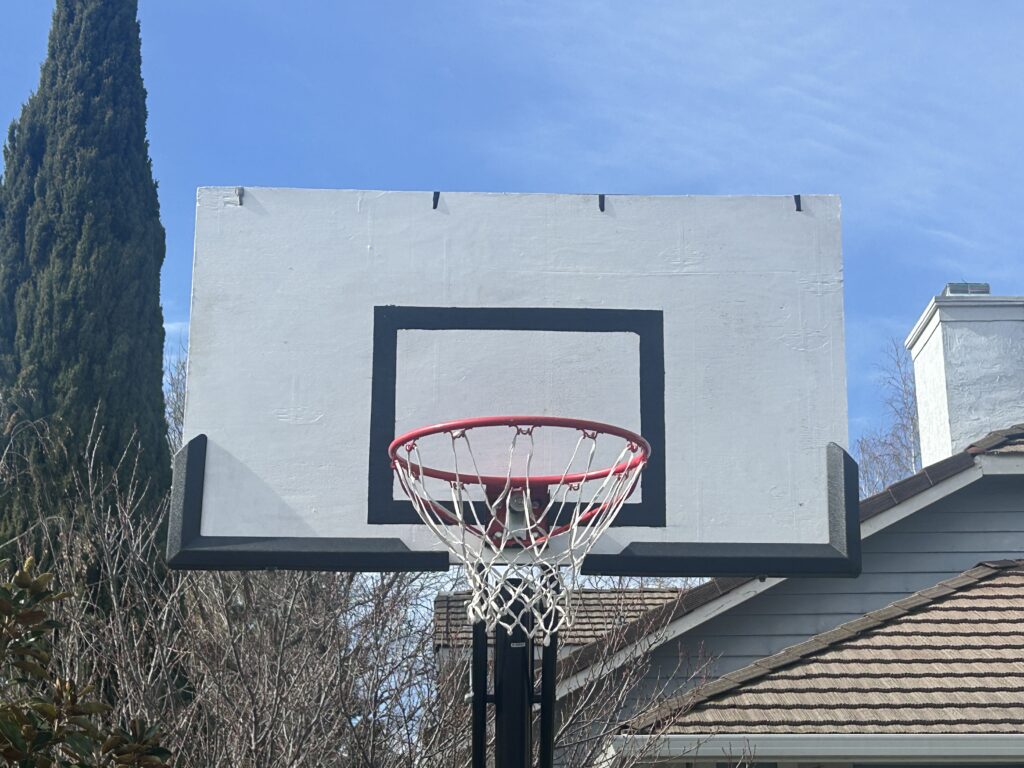
This is the finished backboard.
Here is the new backboard put in place on the hoop.

Building the backboard took the following steps:

Step 1: Remove the old backboard: Removing the backboard from the set up wasn’t that easy. I made sure to note how everything went together and not lose any pieces so I could put it back together. It turned out the plastic backboard was primarily held in place with glue. I was able to pull most of the backboard off and broke the rest off with a hammer.

Step 2: Cut the new backboard to the right size: I bought a piece of plywood to serve as the new backboard. It was 5/16 inches thick, which was at least double the thickness of the plastic it replaced. I cut the plywood to the exact dimensions of the backboard frame so that it was the exact size of the backboard it was replacing.

Step 3: Prepare and paint the backboard: I sanded the backboard smooth first. Then I drilled the four holes for the hoop. Next I painted both sides of the backboard, two coats on each side.

Step 4: Paint the “shooting square”: Next I painted the square in the middle of the backboard (I painted it black). It is actually a rectangle, not a square, but online it was said that it is called the shooting square. To make sure I got the dimensions of the square correct I made the square out of Lego, then outlined it and filled in the outline with black paint (again two coats).

Step 5: Add straps to the top of the backboard to keep it in place: The previous plastic backboard was primarily held in place with glue. It also had screws at the bottom where it connected to the hoop. When I connected the wood backboard to the screws at the bottom the top part was still loose and the whole backboard leaned. To fix this I drilled four small holes at the top of the backboard and threaded each hole with a velcro strip to secure the backboard to the metal frame. You can see the straps in the red box in the picture below, I tightened them as much as possible to keep the backboard in place.
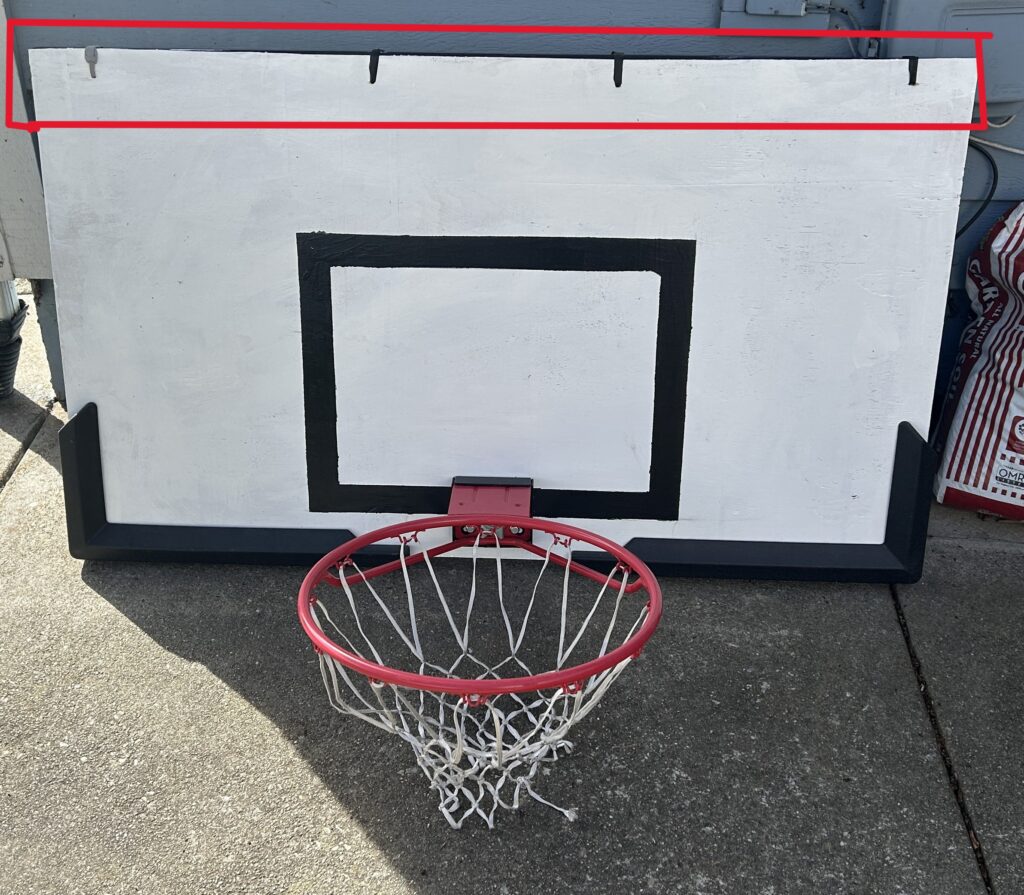
So far the straps have done a good job of keeping the backboard in place.

Step 6: Last step: Re-attach the backboard to the hoop: In this step, I basically put everything back together. The hoop was attached to the backboard and the whole thing was then attached back to the pole. I made sure to note how everything connected when I took it apart to make it easier to attach things back again. I also made sure to keep track of all the pieces.

That is the complete summary of the project. It took about 5-7 hours in total, spread over a week due to the coats of paint.

You can see a more detailed summary in the following video:
Posted in DIY projects

Things I Like – Power Washer

July 17, 2024October 24, 2024 admin

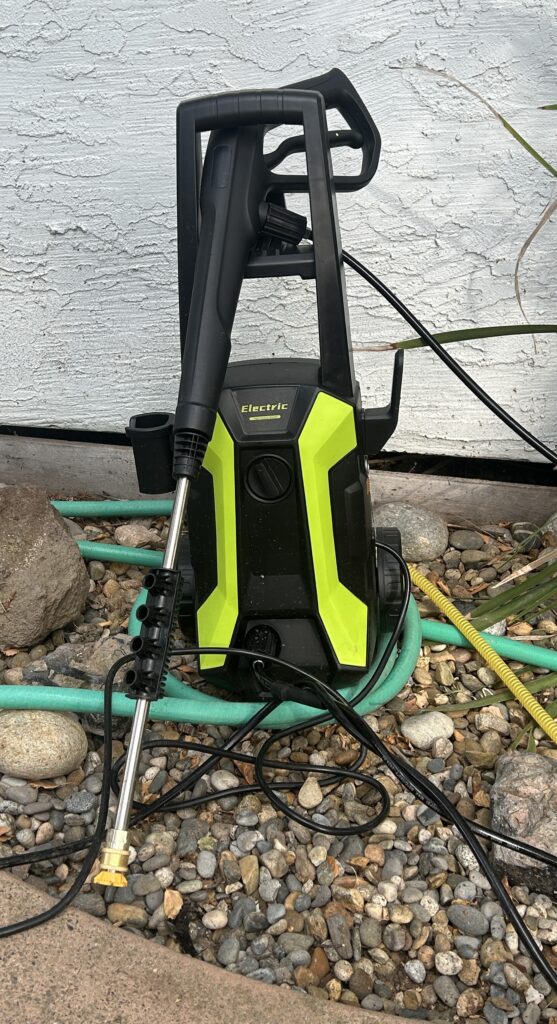
In this post I talk about a power washer I recently bought. My backyard patio area was really dirty and a standard hose wasn’t cutting it, so I bought a power washer on Amazon for $120 to see how well it would work.

I was impressed how well it cut through dirt.

This is how the power washer looks. It is pretty compact.

It was able to blast off the dirt on the concrete completely with usually just one pass. It came with four different nozzles of various widths. The wider the nozzle, the more area you could cover but also the weaker the spray. It was very easy to use, you just need access to a power outlet and a water outlet.

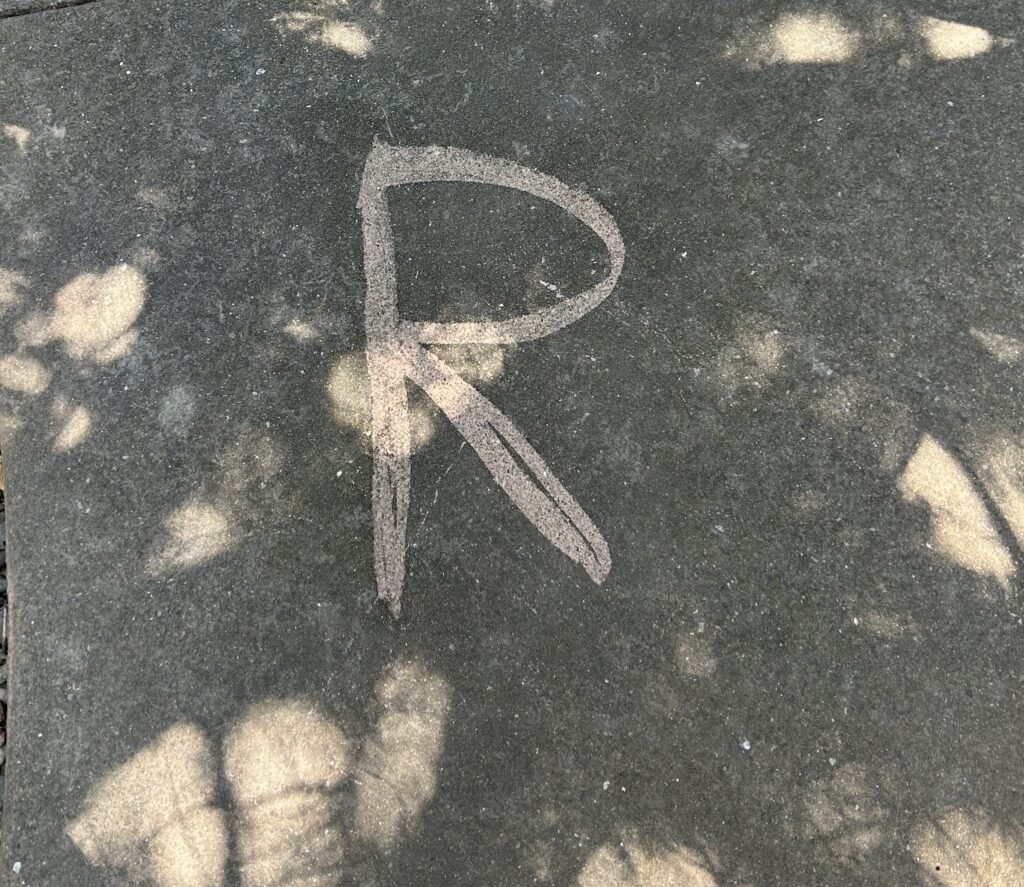
Here is a letter R I was able to carve out of caked on dirt with the power washer.

Overall I was very impressed with how well this inexpensive power washer worked and I would definitely recommend it to other. This exact model I bought can be found here: https://www.amazon.com/dp/B0CLTRQWSQ?psc=1&ref=ppx_yo2ov_dt_b_product_details

You can see more details on the washer in the following video:

Posted in Things I like

Useful 3D Print – Strainer / sifter

May 18, 2024May 18, 2024 admin

For this 3D print, I printed something similar to a colander for straining things.

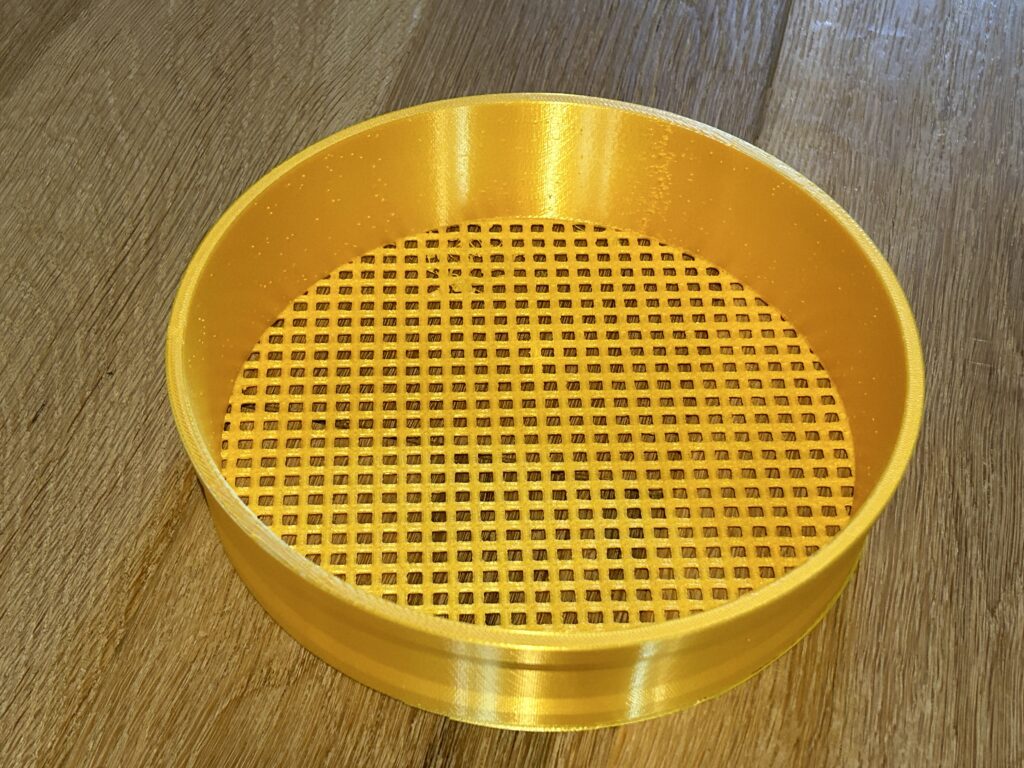
This is what it looks like, it was a very easy print.

View 1 of the strainer
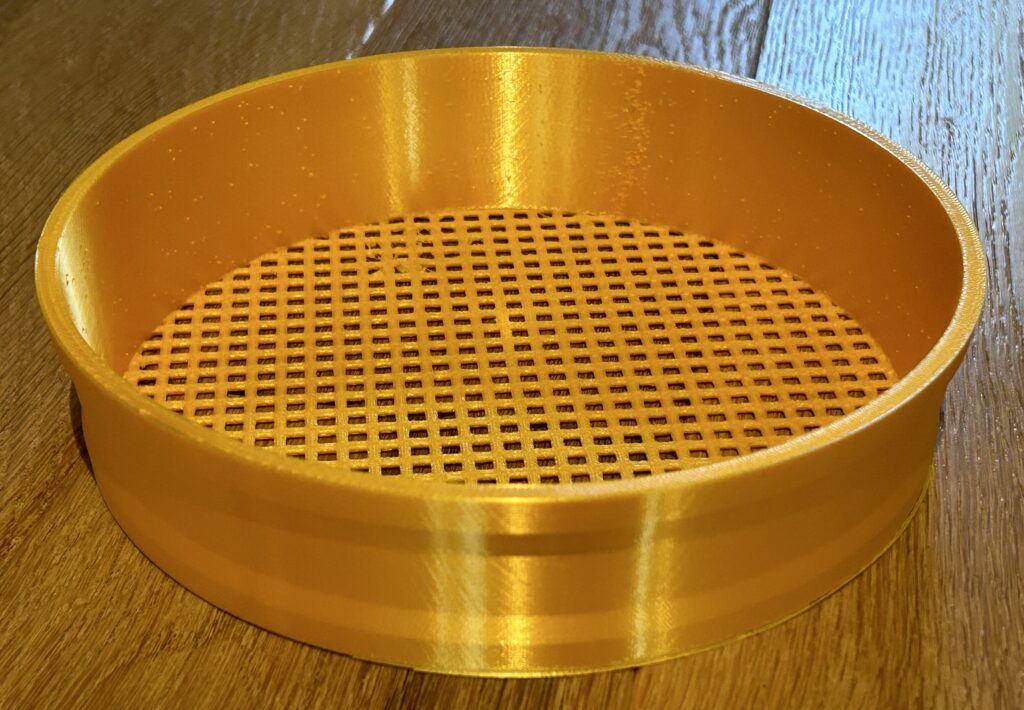
View 2 of the strainer

It could be used to sift anything. I used it to sort sand from rocks and it worked well. It was a very easy print, I just used normal setting and it printed great. Here is a link to the print code: https://www.thingiverse.com/thing:909118

The print code is for various sand toys but obviously I only picked the strainer.

Here is a video describing the print in more detail:

Posted in 3D Printing

Useful thing – 3D printed G Clamp

January 7, 2024January 7, 2024 admin

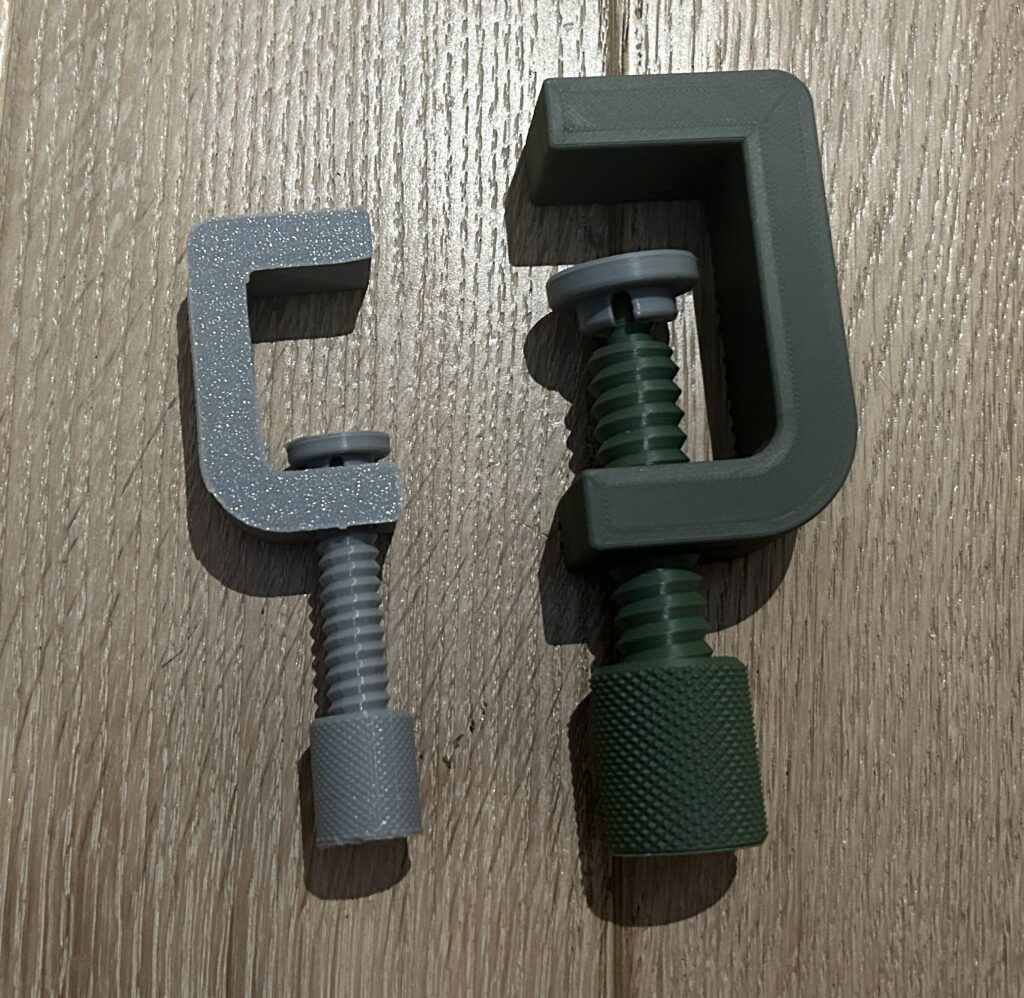
This is continuing my theme of useful 3D prints. In this one I printed some G clamps out of plastic. I actually use the metals ones for various things so wanted to see how sturdy the plastic versions would be.

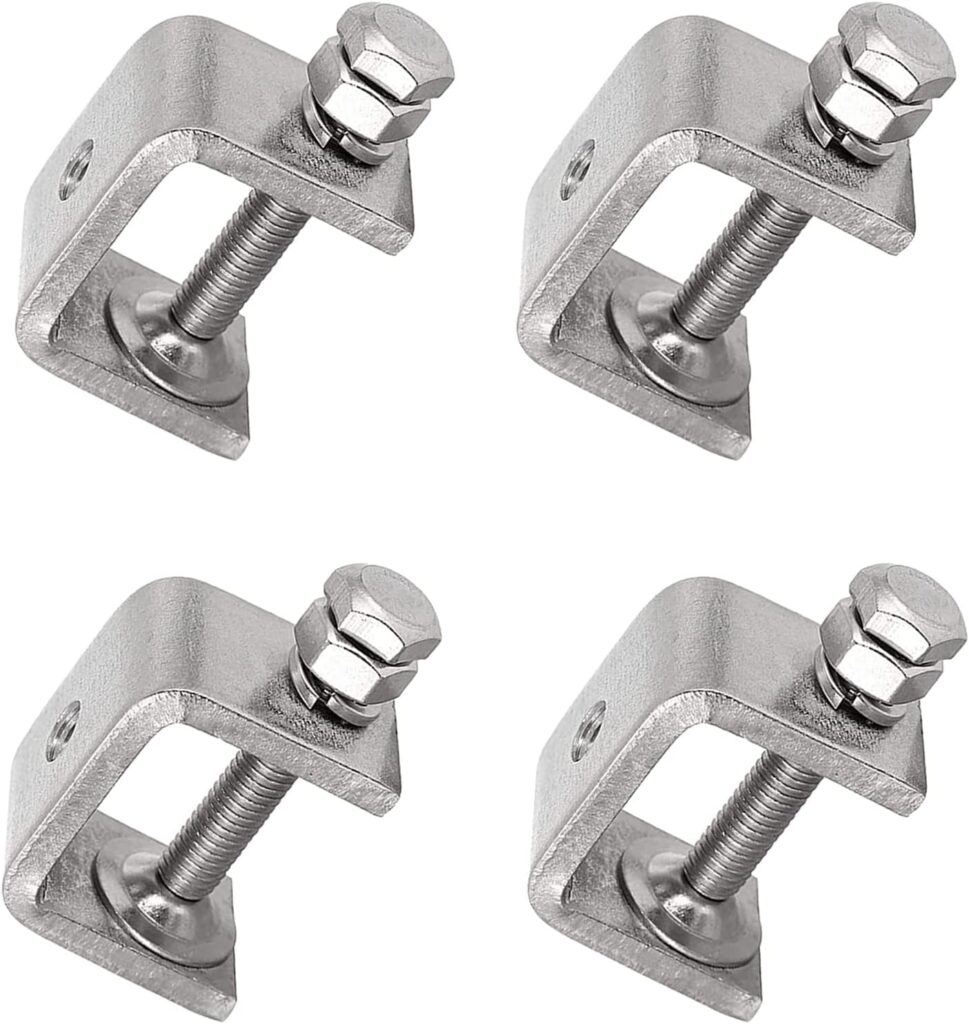
Here is a metal version of the G clamp.

I printed two, a big one and a small one, as shown in the photo below.

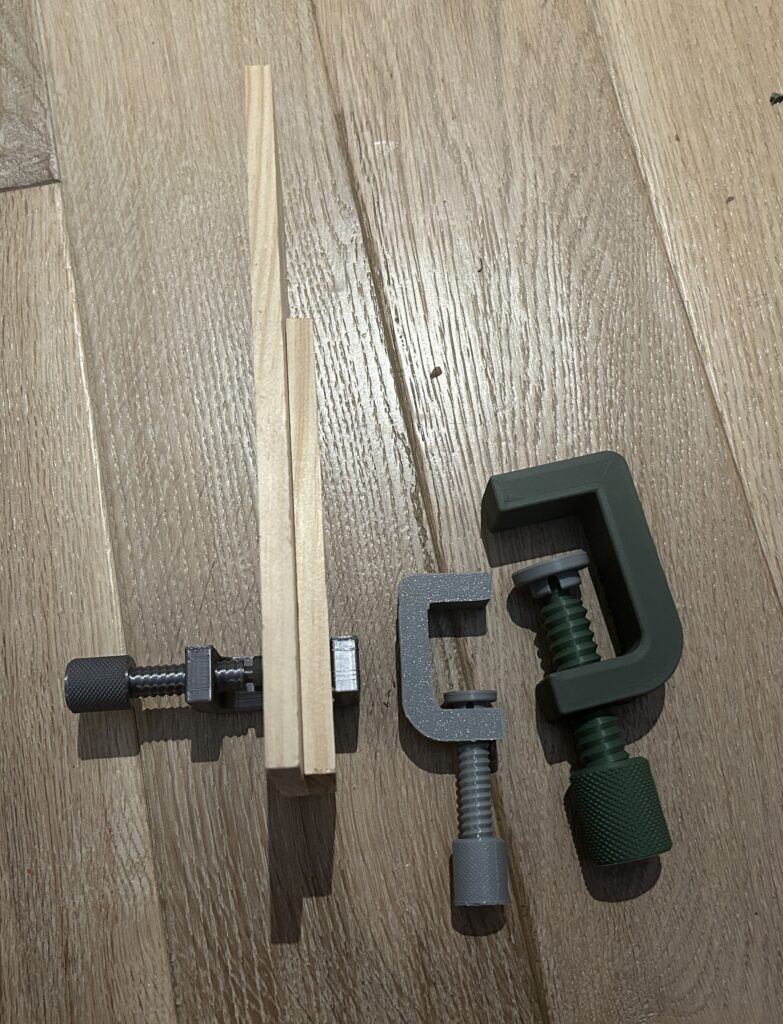
Here is an additional photo where an additional clamp is shown holding pieces of wood together.

Overview I really like these clamps. They are very sturdy and have worked well anywhere I have used them. They work just like the metals clamp you can purchase. Also, the print was very simple. I would definitely recommend them to anyone.

Here is a link to the print file: https://www.thingiverse.com/thing:1673030

Here is a video which shows the print in more detail:

Posted in 3D Printing

3D printed chip clip

September 13, 2023September 13, 2023 admin

In my latest 3D print I printed a chip clip. It was an easy print, took about an hour. It works pretty well, using tension to hold it closed.

This is the chip clip
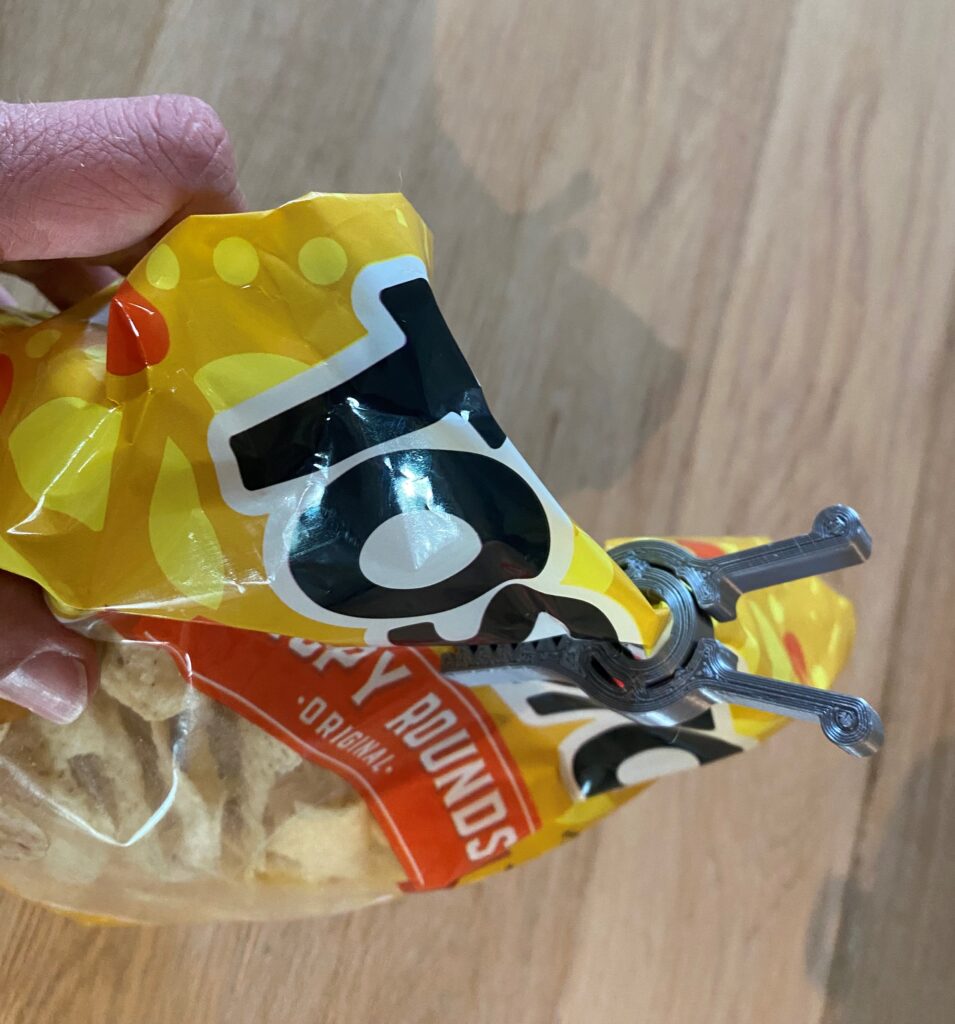
This is the chip clip holding closed a bag of chips.

A very simple print, but I like to focus on things that have an actual use. I printed it with 25% infill.

Here is a link to the print file: https://www.thingiverse.com/thing:1212828

Here is a video which shows the print in more detail:

Posted in 3D Printing

Building a basic stool

August 23, 2023August 23, 2023 admin

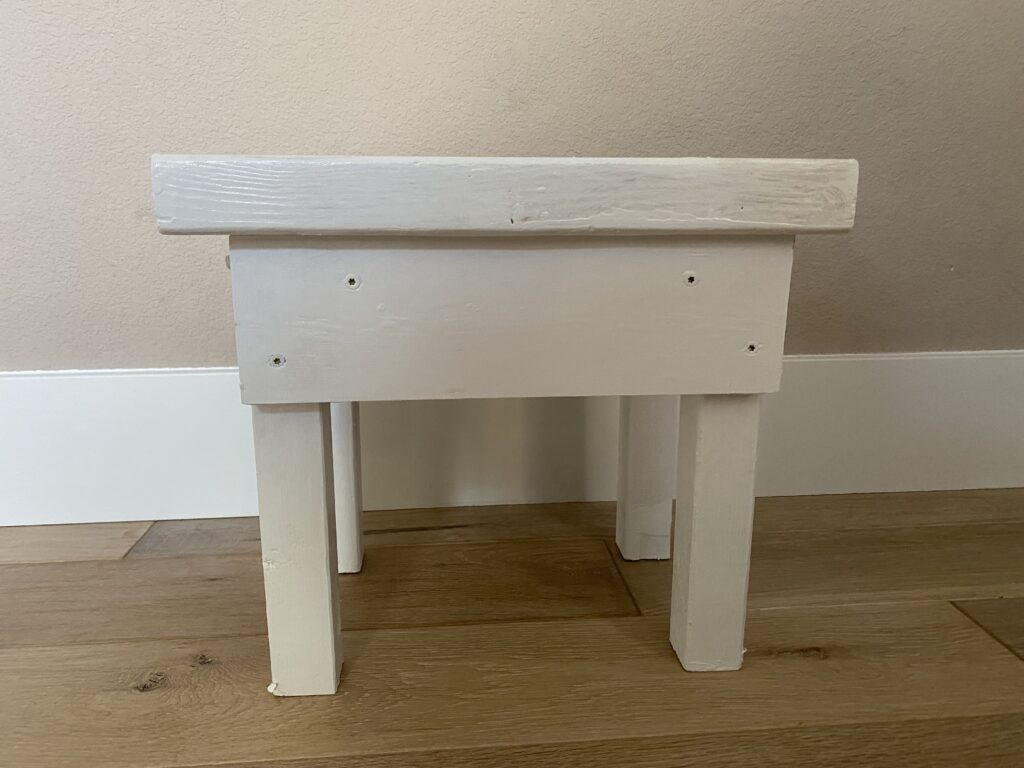
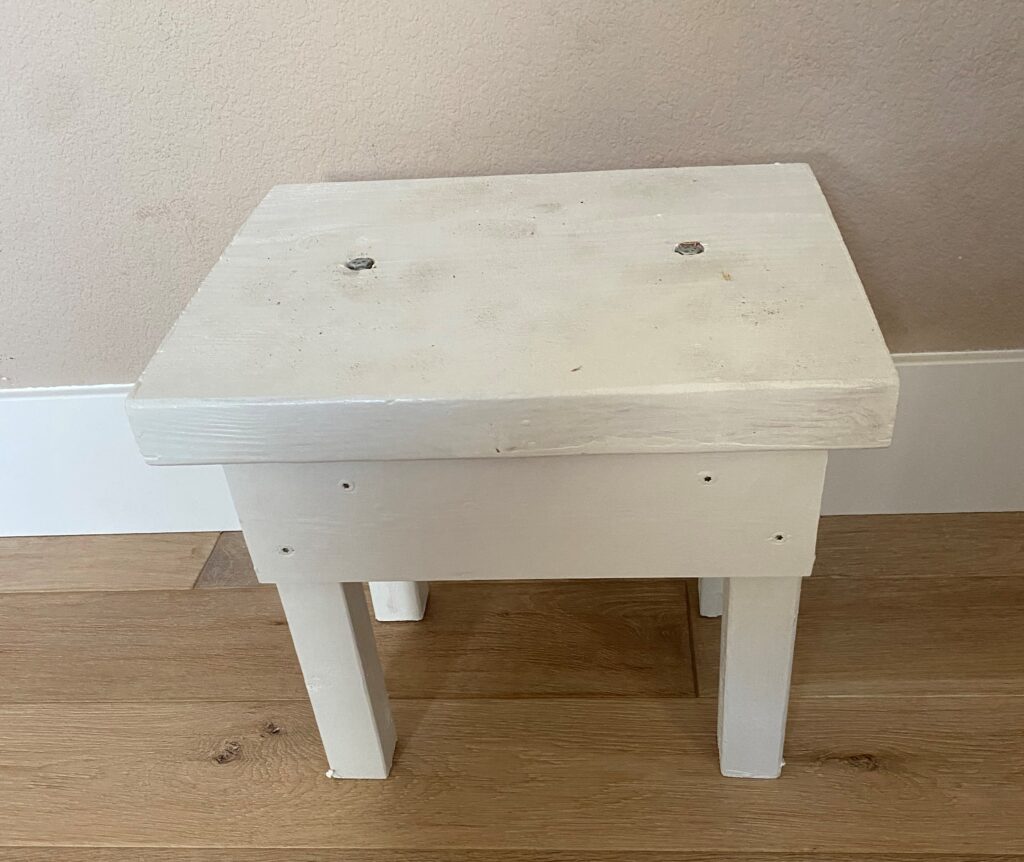
In this project I built a basic stool. A stool I owned (made of plastic) broke, so I thought I would make one of wood that would last a long time. It turned out pretty well. This is how it looks:

Stool – Front View
Stool – Top View

The steps to make it were pretty simple.

  1. Cut four legs: I cut four legs out of a 1 by 1, they were roughly 18 inches long (so the stool is about 20 inches tall, 18 inches plus a two inch top board).
  2. Cut a connector board for the legs: Each set of two legs are connected via a connector board. They are held in place with bolts.
  3. Add a side board: I added a side board to each side, which was screwed into the legs and the connector board. By being connected to two separate boards everything is held in place and can’t move.
  4. Add the top: I added the top by drilling a hole through the top and each connector board and have a bolt go all the way through (so two bolts total). I counter-sinked the bolt so that when you stand on the top you won’t feel the bolt under your feet.
  5. Sand and paint: I sanded everything so it was smooth and then painted it white.

You can see more details on the stool in the following video:

Posted in DIY projects

Remote control life hack part 2

July 23, 2023August 15, 2023 admin

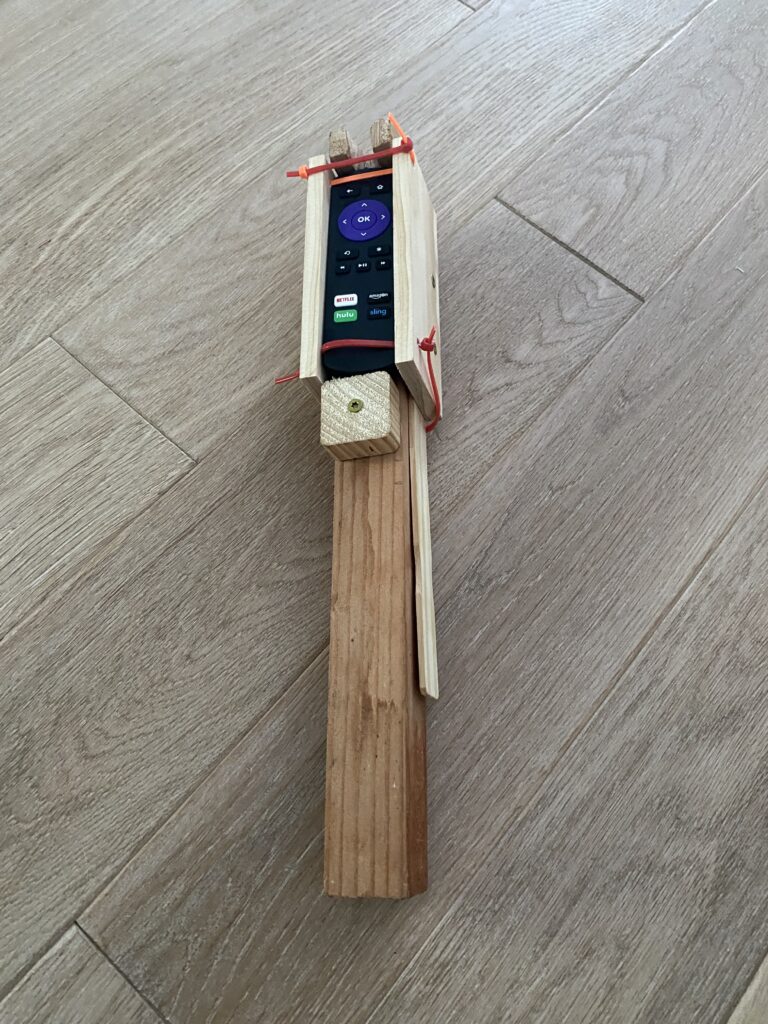
In this second installment I built a contraption to keep my Roku remote from getting lost. The issue with the Roku remote is that it is small and fragile, so it gets lost easily and breaks easily. To fix this I came up with the following thing I built:

This is what I built to keep my Roku remote from getting lost.

The construction was pretty simple. I took a board the same width as the remote and boxed it in with wood pieces on the sides, bottom and on top. For the top board I cut a whole so the signal could make it through. Then to hold the remote in place I added zip ties. Since I started using the “remote caddie” the remote hasn’t been been lost once, mainly because it is tightly held in place to a long piece of wood.

See more details in the following video:

Posted in Life Hacks

Remote control life hack

July 15, 2023July 15, 2023 admin

My kids kept losing my remotes and their batteries so I developed a life hack that would stop this from happening. It is kind of ridiculous but it has worked so far, see picture below.

This is the contraption I came up with so that my remotes would stop getting lost.

The overall design for it was pretty simple. First I started with a long board that would be easy to find. Then I took the two remotes that work the TV (one turns on the TV and controls volume, the other controls the Chromecast) and attached them. Velcro is too easy to take off, so I started with zip ties, which would have to be cut off. The zip ties went in between two sets of buttons so they would be kept in place. I used velcro afterwards to stabilize the remotes, so each remote has one zip tie and one velcro strip. One downside of the zip tie is that you have to cut the zip tie off to change the battery of the remote, but zip ties are cheap so it is not a big deal.

Anyway, I realize this remote life hack is a little absurd but it does work. I haven’t lost a remote or battery since it has been implemented. See more details in the following video:

Posted in Life Hacks

Life hack – unbreakable patio door lock

July 10, 2023July 10, 2023 admin

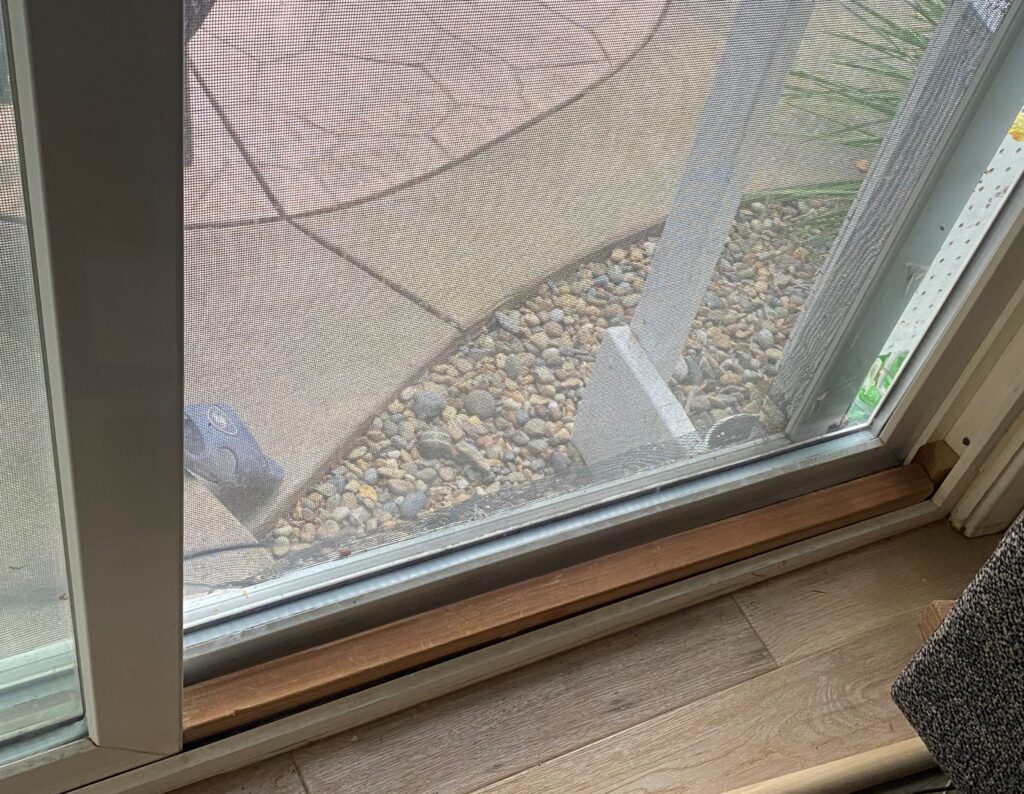
This is a very simple life hack to lock your patio door. Simple use a long board cut to length to fit the gap in the patio door, as shown in the picture below.

With the board in place it is virtually impossible to open the patio door. Also, this door “lock” should only cost about $1. See the following video for more details:

Posted in Life Hacks

3D Printed Whistle

June 15, 2023June 24, 2023 admin

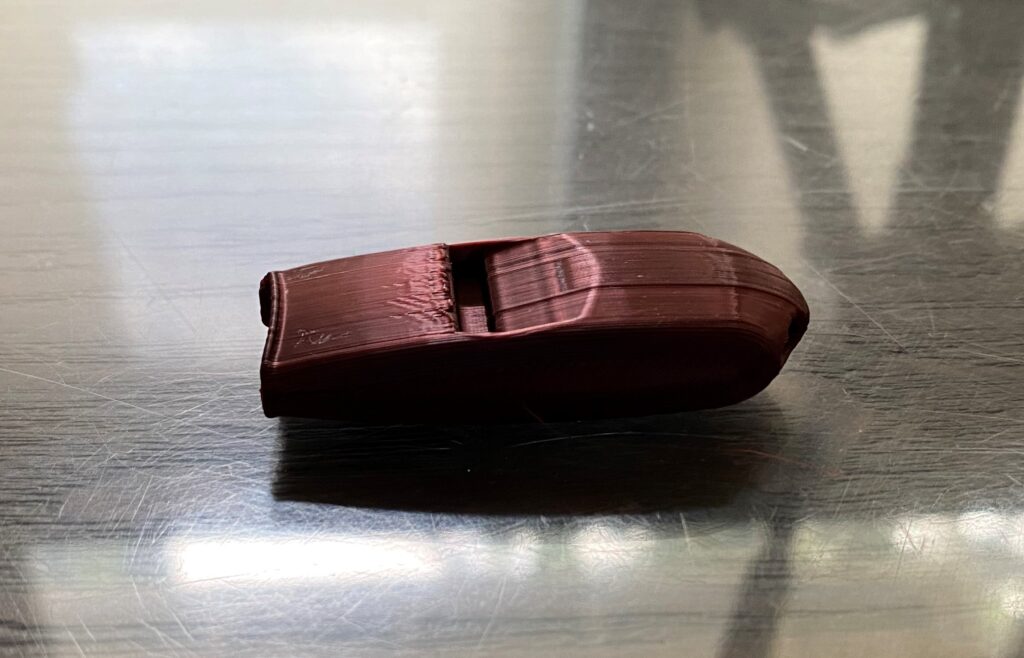
This is my latest useful 3D print, I printed a whistle. Here is a picture of how it looks.

It is amazingly loud, works really well and was a very easy print.

The print settings are simple, I used 50% infill. Here is the link to the code:

https://www.thingiverse.com/thing:2933021

See more details in the following video. Note that the volume of the whistle kind of messed up the audio in the video:

Posted in 3D Printing

Posts navigation

Older posts

Life Hack and DIY Facebook Page

Get more stuff

Subscribe to our mailing list and get interesting stuff and updates to your email inbox.

Thank you for subscribing.

Something went wrong.

We respect your privacy and take protecting it seriously

Proudly powered by WordPress | Theme: x-blog by wpthemespace.com