In this project I renovated my kid’s swing set so that it could support adults.
This is how the swing set looked before any renovations. Note that it actually had three swings but I had already removed one of the swings before taking this picture.
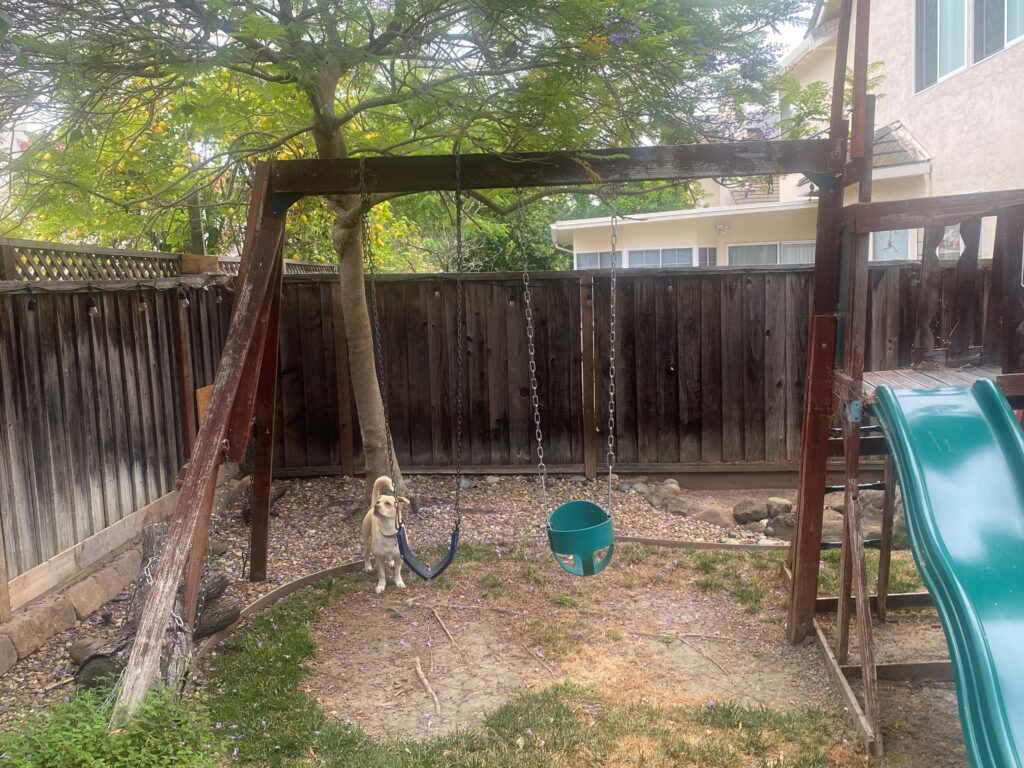
The idea was to upgrade the swing set so that it could support adults. This required the following upgrades:
1.Replace the swing chains: I wasn’t sure how much weight the current chains could support. Also, the current chains were rusted. So it seemed best to just replace them.
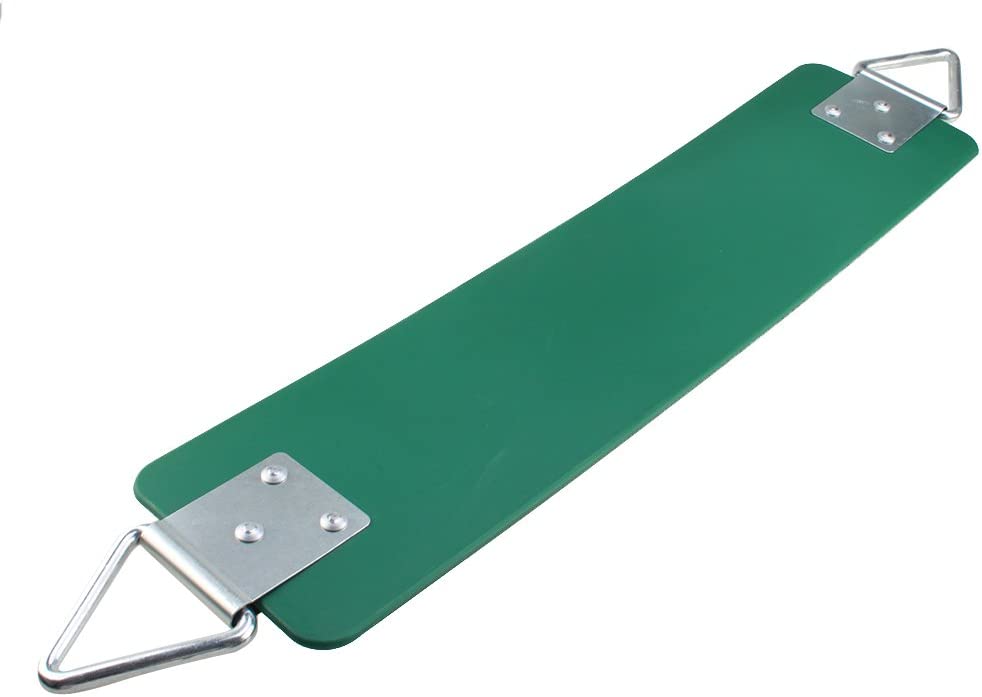
2. Replace the swing (the part you sit on): The set still had the original swings which were meant for little kids. I replaced them with stronger swings I found on Amazon.
3. Strengthen the beam the swings sit on: Previously the swings were held in by a long screw / eye bolt with a hole in it, so all the weight of the rider was on the swing. I didn’t think this would work for an adult that weights 200 pounds. So I added an additional beam on the top of the swing set and had the swing set chain go over this board.
4. Create new swing “tracks”: I created track for the swing chain to go over the support beams so the chain would not move around and damage the wood but would stay in one place.
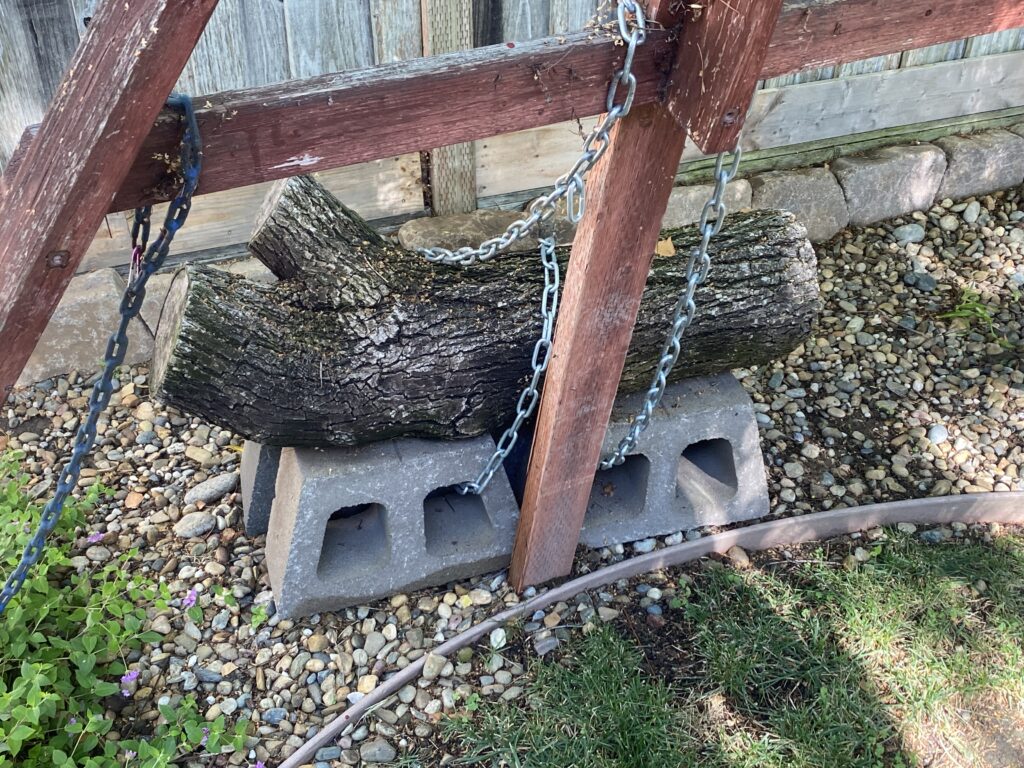
5. Stabilize the swing set: The swing set had a tendency to wobble (and even slightly come off the ground) when multiple people were on the swings. To prevent this I added more weight to the side of the swing set that didn’t have the platform.
Here are more details on each of these steps:
Step 1: Replace the swing chains: I bought new chains at Lowe’s. They were rated for 500 lbs so they should definitely be strong enough to support an adult. I bought eight foot chains lengths, which were about a dollar a foot.
I also bought chain accessories to connect the chain to itself and to connect the chain to the swing.
To connect the chain to itself I used a “quick link” (At least this is the name it is given on Lowe’s). It is a chain link which was a portion that unscrews. How it works is that you unscrew the link, connect the two pieces of chain, and then re-link them by screwing the quick link closed. To connect the chain to the swing I used what Lowes called a Spring Snap, which is similar to a carabiner.


Step 2: Replace the swing: The original swing set had a swing built for children which I don’t think could support a lot of weight. So I replaced the swings with adult swings which could support my weight which I found on Amazon.
Step 3: Strengthen the beam the swings sit on: To strengthen this support beam the swings sit on I added a extra board over the top of the swing.
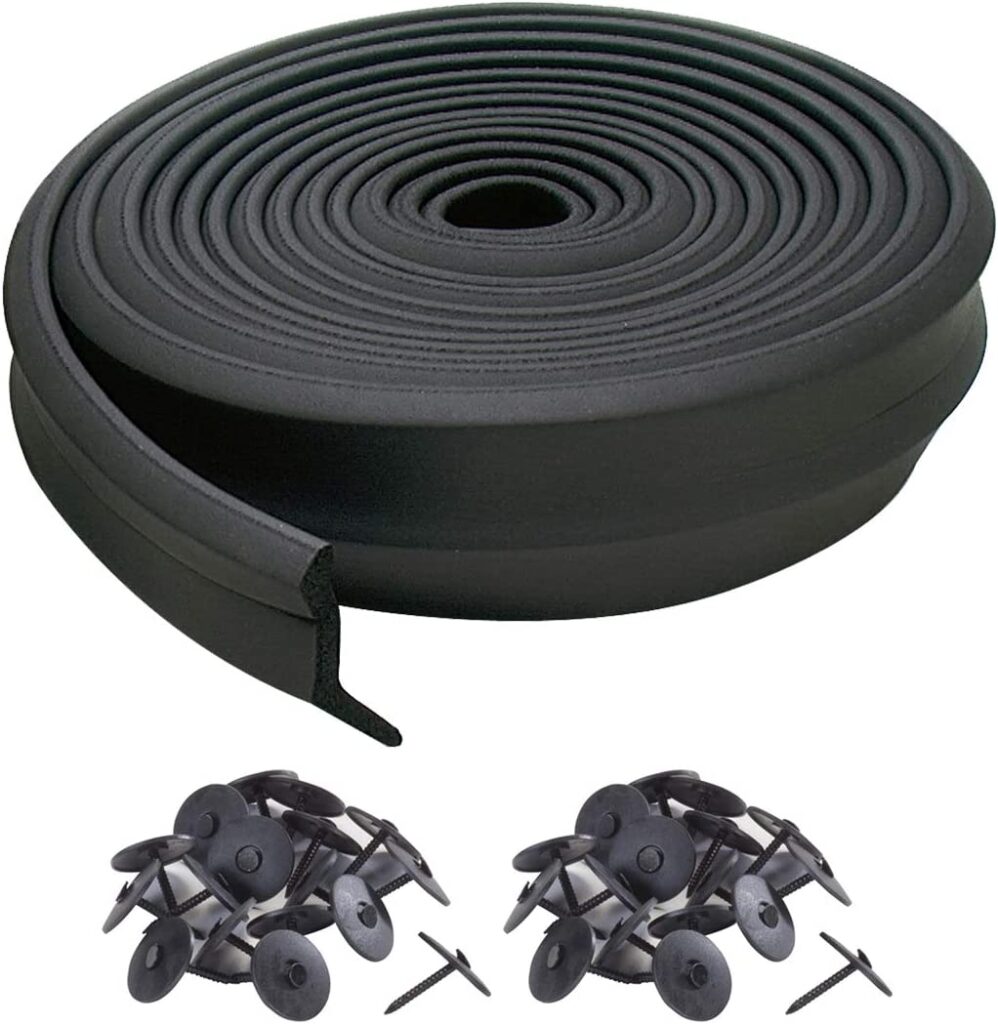
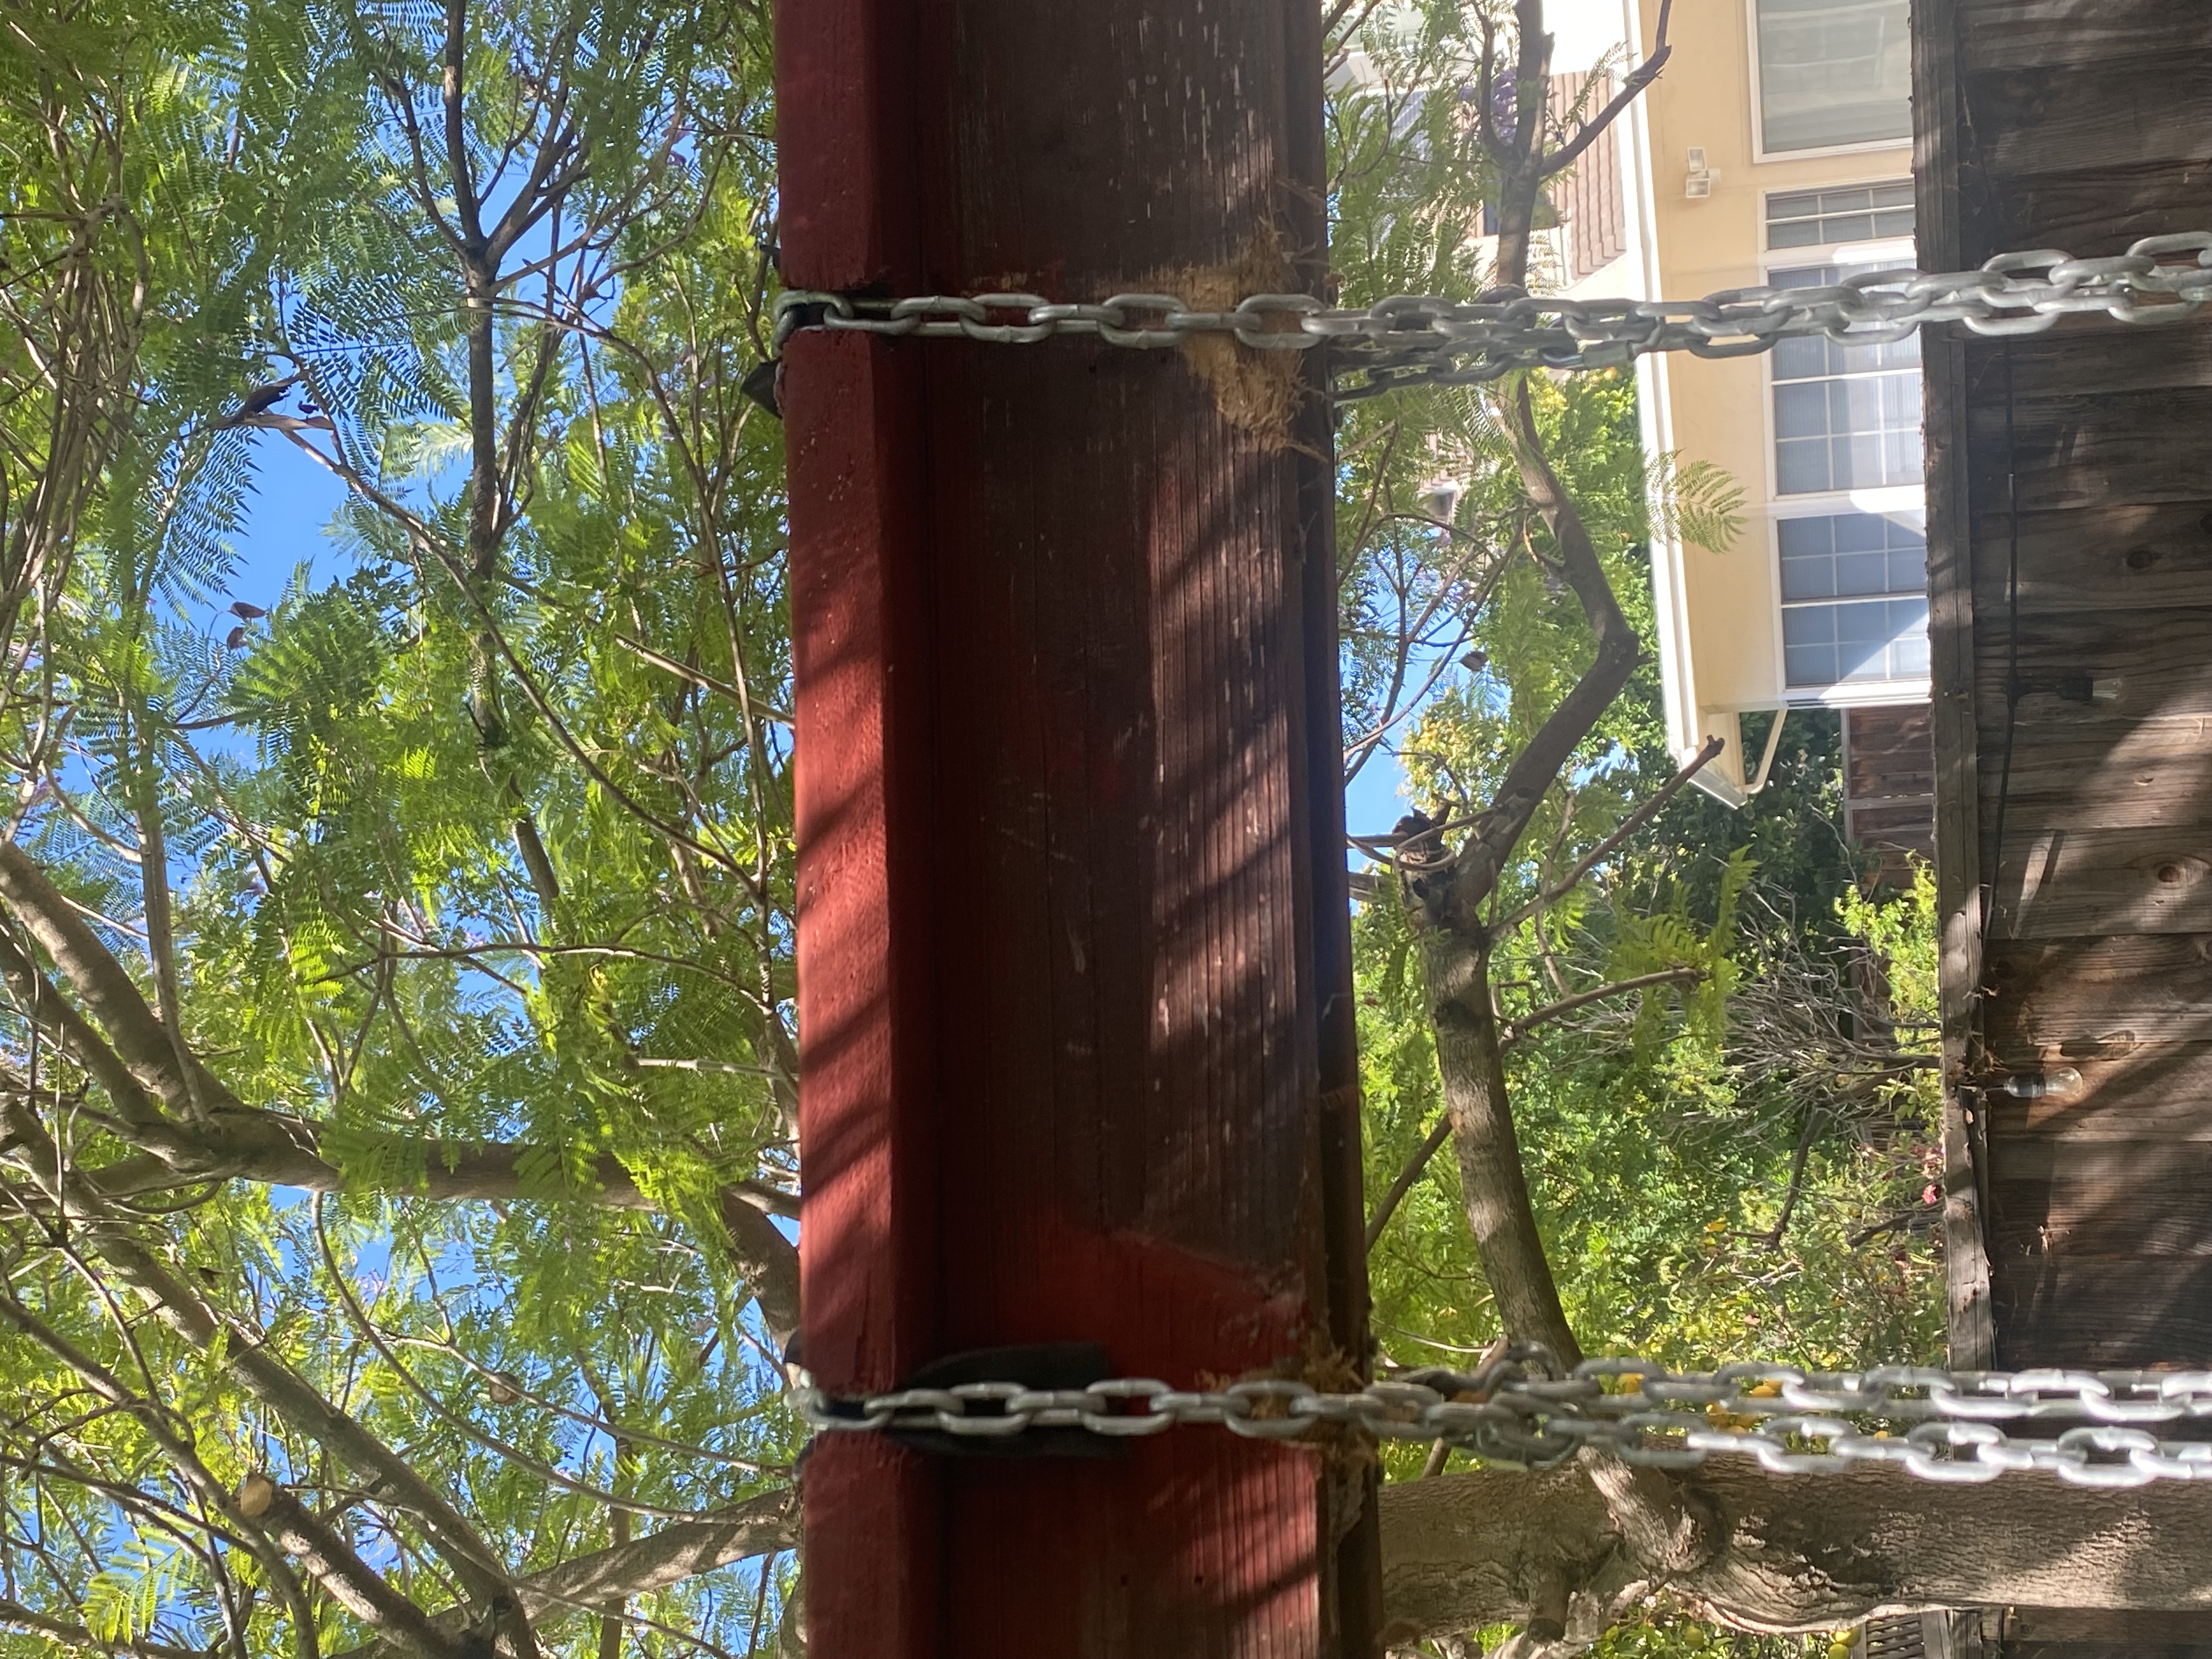
Step 4: Create tracks for the swing: I wanted to create tracks for the swing so that it would always swing in a straight line and the swing would always contact the same portion of wood. To create the track I first drilled hole with a spade bit. The goal was for the swing chain to go through these holes. Then I put a track of rubber down on the area where the swing chain would contact the wood. This way the swing would not damage the wood as it swung, but would instead put pressure on rubber, which hopefully could take the weight. The rubber I used to make the track for the chain is actually meant to be used on the bottom of garage doors. I bought it on Amazon, you can see details in the picture below.
I had the chain go over the rubber and through the holes I drilled to keep the chain in place. This is how the final product looked. You can see the drilled holes and the chain going through, which is supported by the rubber.
Step 5: Stabilize the swing set: As I mentioned before, when the swing set had multiple people on it the swing set would shift and parts of it would even come off the ground. To make it more stable I bought four cinder blocks which weighed 40-45 pounds each. They also only cost $5 each. Next I put a chain through the cinder blocks and attached the same chain to the swing set. This is how it looked in the end:
This was the final step. After this I was done. It was a decent amount of work but it turned out pretty well. See more details in the following video: