Skip to content

Life Hack and DIY Lifestyle

  • Things I like
  • Life Hacks
  • DIY projects
  • Home Improvement Basics
  • About Me
  • Resources
  • Lego
  • 3D Printing

Author: admin

DIY Project / Life Hack – Creating a backdrop for conference calls

November 20, 2019November 20, 2019 admin

One of the issues I have run into with working from home is the need to be on camera in a room which might be used by others, who would appear in the background. In particular, our office space in the house has a closet behind it which my wife or I would need to use to get clothes or other items, resulting in one of us appearing in the webcam shot of the other.

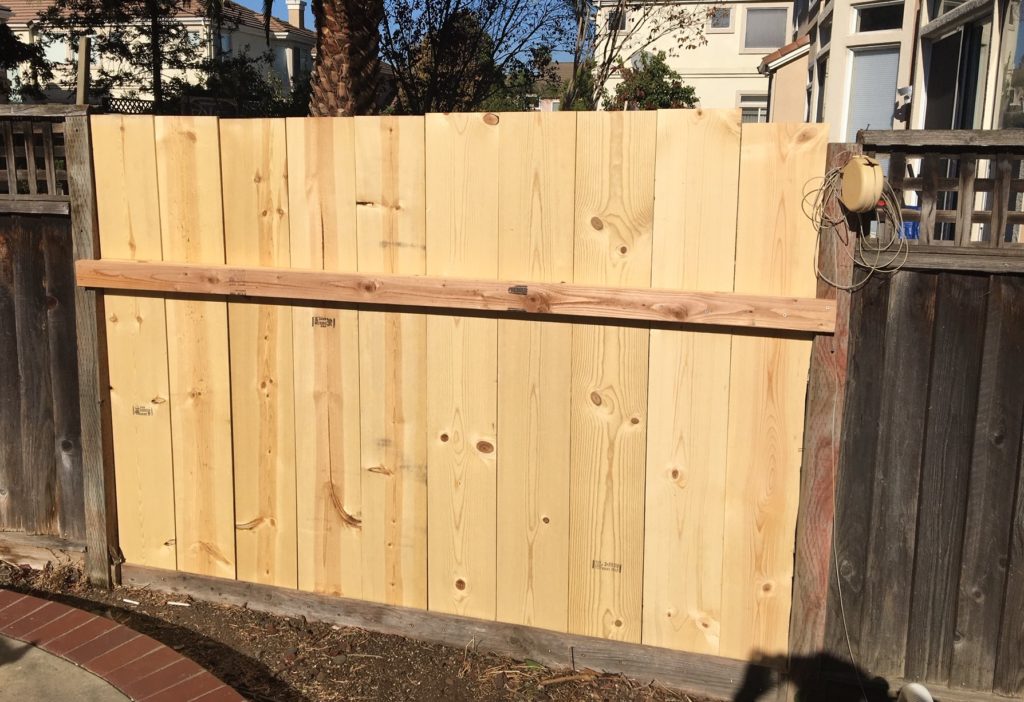
I wanted to come up with a way of adding a screen or backdrop to cover the closet so we could use the closet while the other person is on the webcam and no one would know. The photo below shows what I came up with.

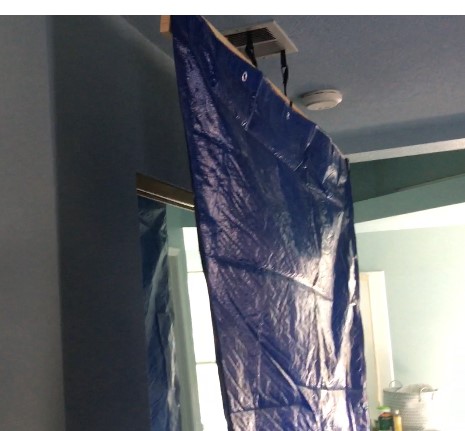
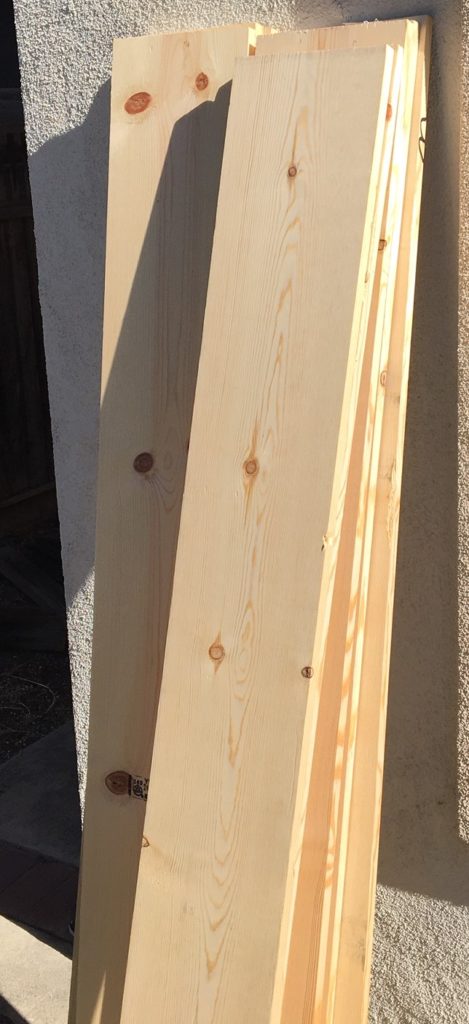
The backdrop is a thick tarp attached to a board via screws. The tarp is then hung up to the ceiling with Velcro strips attached to the board attached to the tarp, which connect to Velcro strips I tied to the heating vent in the ceiling. I love Velcro strips, you can learn more about Velcro strips in my blog post found here. The thick blue tarp I bought I found on Amazon here: Tarp Cover Blue, 2-Pack Heavy Duty Waterproof, Great for Tarpaulin Canopy Tent, Boat, RV Or Pool Cover!!! (8X10, Heavy Duty)

The backdrop works pretty well, below shows how it would look from a webcam perspective with and without the tarp.

No backdrop
With backdrop

I created a video summarizing the steps to create the backdrop and how the backdrop looks which is below:

This video summarizes the backdrop project.
Posted in DIY projects, Life Hacks

Home Improvement Basics – Different type of tape

November 17, 2019November 19, 2019 admin

One thing you will encounter when you get into home improvement is all the various types of tape. Some have specific uses (such as electrical tape) while other are more multipurpose (such as duct tape). This post provides details on some of the types of tape you might encounter.

Duct Tape: You probably are already familiar with duct tape. What makes duct tape so strong is that is is made with fabric, which increases the strength of the tape. Duct tape can be used for almost anything home improvement wise except for electrical work as it could catch fire. Growing up I was used to duct tape only coming in the color gray, but now it comes in a variety of colors.

You can find a six pack of duct tape in various colors here: GIFTEXPRESS 6 Assorted Colored Duct Tapes – Multi Purposes Bright Colors Tapes Great for DIY Art Home School Office Assorted Colors 2″ Roll by 10 yds

On the show “Mythbusters” they made a boat using duct tape as shown below. This shows the usefulness and strength of duct tape.

Painters tape: Painters tape is tape which can be put easily on and off surfaces without and marks being made to the surface the tape is applied to. It is primarily used for painting application (so you can paint one surface without accidentally painting another surface) but can be used for various other things. I discuss painters tape in further detail in a blog post found here.

Electrical tape: Electrical tape is a special type of tape made of a rubber like substance. It is needed for various electrical application (covering an electric wire, etc.) as it will not catch fire, unlike other types of tape. You can find electrical tape at any hardware store, it can also be found on Amazon here: Scotch 700 Electrical Tape, 03429NA, 3/4 in x 66 ft

Here is an example of electrical tape

Pipe tape: Pipe tape, also referred to as teflon tape, is a special tape of tape you put on pipe threads to give them a better fit and prevent water leakage. The tape is very common and inexpensive, and can be found at any hardware store along with being found on Amazon here: LASCO 11-1033 PTFE Pipe Sealant Tape, 1/2-Inch x 100-Inch, White

In this picture you can see pipe threads being applied to a pipe to create a more secure fit.

Posted in Home Improvement Basics

DIY Project – Building a Fence

November 13, 2019November 13, 2019 admin

For this project, I replaced a section of fence which had fallen down. The complete section had fallen down and the only remaining pieces were the fence posts and a board which spanned the bottom of the section.

This is the missing fence section, you can see the fence posts on each side.

To replace the fence section I chose boards 9 inches wide and 6 feet tall which I would stack across the missing span of fence section.

These are the boards I used for the vertical section of fenceto

To keep the fence stable I also bought a 2 x 4 to go horizontally across the span of new fence, which would be screwed into each individual board. The old fence also had a top board with a groove in the middle to fit the boards in. I wanted to use this board as another method for keeping the fence stable.

When the project is finished the fence will be very sturdy as it will be held in place in three different areas:

-Held in place by the base board at the bottom of the fence (with two torque screws per vertical wood plank)

-Held in place in the middle of the board with the 2 x 4 (with two torque screws per vertical wood plank)

-Held in place by the top board which is on the top of the vertical plank boards (held in place by the groove in the middle of the board)

Once the plan was set, creating the fence was pretty straight forward. I cut the boards to size, as the top of the fence was about 5.5 feet but the board were 6 feet tall. Then I placed in the boards spanning the missing section and attached them to the base board and the board at the middle height of the fence. This resulted in the fence looking like the following:

As shown in the picture, the boards heights were uneven. Much of this was due to the ground being uneven, as it sloped downwards. Therefore, I had to trim the top of the boards to match the downward slope so that the top board would fit properly. To trim the top of the boards I used a small circular saw which could be operated with one hand, as opposed to the more bulky, larger circular saws. This is the exact circular saw I used, it worked pretty well and I would recommend it, you can find it here on Amazon: WORX WORXSAW 4-1/2″ Compact Circular Saw – WX429L

This is the Worx circular saw which cane be operated with one hand, unlike many circular saws which require two hands.

After cutting the boards to the appropriate height I was able to attach the top board. This was the final step and then the fence was complete. I was pretty happy with the result, you can see the end result of the project in the picture below. In the picture the slant is more apparent now that the top board is attached.

And that’s it, replacing the fence section has been completed.

Posted in DIY projects 1 Comment on DIY Project – Building a Fence

Things I like – Shop Vac

November 9, 2019November 11, 2019 admin

One of the most useful things I have bought for my workshop area is my shop vac.  A shop vac is just a very strong vacuum.  It is a vacuum which is so strong that it can vacuum water, it is much stronger than your normal house vacuum.  I actually bought my shop vac to vacuum some water due to a leak in my clothes washer, but ended up using it many other places.  It is great for vacuuming saw dust, which you will create plenty of if you end up doing a decent amount of sanding or sawing due to you DIY activities.  Also, I use it a lot to clean up my cars, especially since my kids normally make a mess of the cars. The shop vac is so strong that it will vacuum up basically anything which can fit in the suction hose. A shop vac is pretty inexpensive, the one I bought was only about $100 and it has worked well for the past 3 years.  You can find the shop vacuum I purchased here on Amazon: CRAFTSMAN CMXEVBE17595 16 Gallon 6.5 Peak HP Wet/Dry Vac, Heavy-Duty Shop Vacuum with Attachments

Here is a picture of a shop vac (without the hose attached)

The only real downside of the shop vac is that it takes up a lot of room so make sure you have sufficient storage space before you buy one. Either way I highly recommend you buy one if you don’t have one.

This video I make shows the power of a shop vac.

Posted in Things I like

Sanding Basics

November 7, 2019November 7, 2019 admin

One of the least fun (but necessary) components of many woodworking projects is sanding the wood used. Sanding is necessary to make the wood smooth and eliminate splinters. Also, if you are refinishing furniture, you might need to sand off the previous finish / paint color before applying a new color. For example, we took some of old furniture and wanted to paint it black (it was previously a tan color). However, the old paint was covered by some kind of clear coat. We first tried to remove the old paint with a stripping gel, but this only resulted in removing a minimal amount. The exact stripping gel we used can be found here: Citristrip QCSG801 Paint & Varnish Stripping Gel. In the end, the easiest way to remove the previous paint was to sand it off using low grit (highly abrasive) sandpaper (more on grit later).

Getting Started: Before you start sanding you need to make sure you have the proper protective gear. You will want some sort of eye protection and some sort of respiratory protection, so that the saw dust created from sanding doesn’t go in your eyes or your lungs. For eye protection you can either use safety glasses or safety goggles. I use safety goggles as they provide better protection than safety glasses. With safety glasses saw dust can still find its way into your eyes, you are much better protected with safety goggles. The safety goggles I actually use can be found on Amazon here: DEWALT DPG82-11/DPG82-11CTR Concealer Clear Anti-Fog Dual Mold Safety Goggle

Here is an example of safety goggles, necessary for eye protection while sanding
Here is an example of safety glasses. As you can see they provide less protection than safety goggles.

You will also want a respiration mask to cover your nose and mouth, so that you avoid breathing in any of the debris you create while sanding. You will want a respiration mask that is N95 or better. The ‘N95’ designation means that when subjected to careful testing, the respirator blocks at least 95 percent of very small (0.3 micron) test particles. 

Here is an example of a respiration mask

Manually Sanding: To manually sand wood you would need a sanding block like the one shown below. To use it you wedge the sandpaper in the two opening and then push back and forth until the wood is at the smoothness you desire. I wouldn’t recommend manually sanding except for the smallest of job as it is very tedious.

This is an example of a manual sanding block

If you use an electric sander you will have various types of sanders to choose from. I compare the different types of electric sanders on a previous blog post which can be found here.

Sandpaper: Sandpaper comes in various grit levels. Grit is basically how abrasive the sandpaper is, the lower the grit rating the more abrasive the sandpaper. For example, I purchased a multi-pack of sander discs for my random orbit sander and the grit rating of the discs ranged from 60 to 220. The 60 grit rating disc would be used to remove paint or other coating, while the 220 grit rating disc would be used to finish polishing of a board so that it is fully smooth to the touch. You can see a comparison of the two below.

The picture above compares a 60 grit sanding disc (left side) to a 220 grit sanding disc (right side). You can see the difference in abrasiveness of the surfaces.
Posted in Home Improvement Basics

DIY Project – Bench with built in shelf

November 1, 2019November 19, 2019 admin

In this project I built a bench with a built in shelf. The shelf could be used for anything, I personally use it as a shoe rack.

The finished project – bench with built in shelf

The construction of this project is fairly straight forward, the steps are listed below.

Step 1: Determine the dimensions you would like for your bench (height, width and depth): For my bench the dimensions were 20 inches high, 36 inches wide, and 9 inches deep.

Step 2: Create the top of the bench: This step was pretty simple for me, as I used a single board and cut it to the proper length. Make sure the board(s) you select are strong enough to support a few people’s weight. This is the board I used (shown after being sanded and stained).

Step 3: Attach the legs: For my legs I just attached two 2 x 4’s to each side. If you want you could use a wide single board for each side instead, just make sure the legs are strong enough to support weight.

Step 4: Create the supports for the shelf: In the bench I made I created a cross board for each set of legs to keep the legs in place. Then I had the bolt which extends through the cross board serve as the support for the shelf. You could drill holes in the legs and use pegs to make the height of the shelf adjustable if you wanted to go that route.

Step 5: Add the shelf. For my bench this step was very easy as I just cut a board like the one on the top that was the correct length to be the shelf.

Step 6: Sand and stain (or paint) all the surfaces. You should sand the surfaces, at the very least sand the top section which people will actually sit of as you want that to be smooth. The other sections are less important to sand but sanding them will give the bench a more finished look. It may be easier to sand and stain each piece before you attached it to the shelf.

And that’s it, you have made a bench with a built in shelf!

A video summarizing the project can be found here:

Posted in DIY projects

Painting Basics

October 30, 2019October 30, 2019 admin

In this post I will provide some of the basics on painting, which is an aspect of many home improvement projects.

Painting vs Staining: You might be wondering what is the difference between painting and staining. In a nutshell, painting involves covering the wood with paint where afterwards you cannot see the underlying grain of the wood. When staining, you cover the wood with a stain which covers and protects the wood, but you are still able to see the underlying grain of the wood.

For example, if you look at the simple but stylish bench project on this blog here you’ll notice that you can still see the grain of the bench, which was been stained.

Oil Based vs Water Based Paint: When choosing paint, the main decision is between oil based and water based paint. In general oil based paint is a little more durable than water based paint. However, to clean oil based paint off of any surface or off your paint brushes you have to paint thinner or a similar substance to get the paint off, which can be very annoying and time consuming. I for one just throw the brushes away since it is too much effort to clean them if oil based paint has been used. With water based paint, you can simply use water to clean the surfaces or clean the brushes. In general I have found water based paint is fairly comparable to oil based paint. Due to this and how much less effort is needed to clean water based paint, I almost always use water based paint.

Paint Can Basics: This is very simple, but I wanted to point out a few things when using a paint can. First, to open a paint can you can use a flat head screwdriver (which is a little clunky and often misshapes the can), or you can use a handy tool created simply for opening paint cans. The tool kinda looks like a key and can open a paint can very easily. I keep a few as they get easily lost.

Here is the paint can opener tool

You can find a five pack of these paint can openers here on Amazon: 5 Pack Paint Can Opener, Bottle Opener, Metal Paint Can Opening Tool, 5 Pack Steel Paint Can Tool with 2 Built To Last! Brand Gear Ties

Once you get the paint can open you will want to stir the paint so that the paint has an even consistency. When you buy the paint they will normally give you a few paints stirrers. You could also buy paint stirrers in bulk, a pack of 200 paint stirrers can be found here on Amazon: SHLA Group HDPS10 1 Gallon 200 Pack Paint Sticks That are for Crafts and Mixing, 200 Pack, 200 Pack

Lastly, to close a can of paint you put the cap back on top of the can and hit the cap a few times with a hammer. Make sure the can lid does not have any paint to avoid splattering the paint.

Paint Brushes: When choosing paint brushes you get what you pay for. I used to buy cheap paint brushes. However, what would often happen was that the bristles would come out while I was painting and get stuck in the paint. Then I would have to pull they out, or if I didn’t notice until too late they would be stuck in the paint and I would have to sand them out and paint that section over again. To avoid this extra hassle I started buying higher quality brushes. Purdy is a good brand, you can find a three pack of these brushes on Amazon here: Purdy 140853100 XL Brush 3 Pack

Posted in Home Improvement Basics

Life Hack and DIY Project- Pegboard Belt / Tie Rack

October 26, 2019October 26, 2019 admin

A long time ago I bought a pre-made belt rack, which was a horizontal piece of metal with a bunch of hooks. The issue I had with the belt rack was that often things wouldn’t fit right, such as being too big to fit. Also, I couldn’t adjust the spacing of the hooks on the rack at all.

A simple solution I came up with was to make my own belt/tie rack out of pegboard as shown below:

The pre-made belt rack I am referring to looks like the following picture:

This is a typical pre-made belt rack.

Creating the pegboard belt rack was very easy, I just cut some pegboard to size, attached it to the wall and insert pegboard hooks where needed. One thing to remember is not to screw the pegboard flush into the wall, you want the pegboard about a centimeter from the wall so that the hooks can fit in the holes and come through the back. You can purchase pegboard hook sets on Amazon, which provide hooks in various sizes. You can find a good set of assorted pegboard hooks on Amazon here: Pegboard Hooks Assortment, 54Pcs Pegboard Hook Organizer Accessories Set with 20Pcs Peg Locks.

Here is an example of the various types of hooks you will get in this type of set:

The pegboard belt rack has two advantages over the pre-made belt rack.

  1. It’s cheaper as pegboard it very inexpensive
  2. It’s easily customizable, unlike the pre-made belt rack. For example, you can easily adjust the spacing of the hooks, or swap out a hook for a different type of hook and so on

Here is video summarizing the steps to create the pegboard belt rack.

Hope you find this life hack / DIY project useful. As always, if you have questions e-mail me at lifehackanddiycontact@gmail.com.

Posted in DIY projects, Life Hacks

Electrical Work Basics

October 25, 2019October 29, 2019 admin

The goal of this post is to provide readers background on some of the basics of the electrical systems in their house.

Fuse Box: Before doing any electrical work in your house you will want to know where the fuse box is. The fuse box contains switches to turn power on and off to various sections of the house. If your lucky your fuse box will have labels indicating which switch is associated with which section of the house. However, these labels might not be accurate, so be sure to double check (my fuse box has labels but most of them are wrong). Whenever you are doing any electrical work make sure to turn off the power to the area you are working on via the fuse box.

This is a typical fuse box (this is my actual fuse box)

Even if you think you have turned off the electricity to the area you are going to work on, it is good to double check that the area is not receiving any electricity. An easy way to do this is to use a non-contact voltage tester, which I describe further in a post found here.

Working with Wires: When doing electrical work (say replacing a hallway light fixture) you will likely be dealing with three types of wires:

  1. A “hot” (current-carrying) wire. This wire is usually black.
  2. A neutral wire. This wire is usually white and provides the return path for the current provided by the hot wire.
  3. A ground wire. This wire is a safety feature and is often green or a copper color.

You’ll notice when connecting and disconnecting wires that they are often connected with a nut of some sort. This nut is called a wire nut, and it has metal inside it to connect the two wires, and it twisted on until the wires are securely connected. An example of how a wire nut looks (with the metal connection visible) is in the photo below.

GFCI Outlets: When doing electrical work at some point you will run into ground-fault circuit interrupter (GFCI) outlets. The GFCI outlets are basically there to prevent electrocution and are normally installed in areas where water is often present such as bathrooms and the kitchen. An example of what a GFCI outlet looks like is below:

The GFCI will measure the difference in the amount of electricity flowing into the circuit to that flowing out and quickly to trip or shut off the circuit if there is a difference. Therefore instead of tripping the circuit in the circuit breaker, it will be tripped at the actual outlet. This is why the outlet has the reset and test buttons. After the outlet gets tripped you can turn it back on with the reset button. Also, you can test that the outlet is working properly with the test button. Once I called an electrician because the lights in my bathroom were not working. All he did was hit the reset button on the GFCI outlet, but I still had to pay him $120.

Posted in Home Improvement Basics

Life Hack – Making Sure Your X-Mas lights stay in place

October 22, 2019October 22, 2019 admin

I used to put my Xmas light on nails outside my house, but they would occasionally fall off due to wind or some other reason. Then I got the idea of using velcro strips to hang the lights to the nails. The velcro strips keeps the lights in place, as they have a small hole which is just the right size for the nail head. I would wrap the velcro strip around the light and then hang the strip on the nail through the velcro strip hole. An example of how this looks is below. Since I have started using velcro strips I haven’t had my lights come out once. More of the many uses of velcro strips can be found here: https://lifehackanddiy.com/things-i-like-velcro-strips/

X-Mas lights attached to a nail with a velcro strip
Here you can see several velcro strips being used to connect the lights to the nails.
Posted in Life Hacks

Posts navigation

Older posts
Newer posts

Life Hack and DIY Facebook Page

Get more stuff

Subscribe to our mailing list and get interesting stuff and updates to your email inbox.

Thank you for subscribing.

Something went wrong.

We respect your privacy and take protecting it seriously

Proudly powered by WordPress | Theme: x-blog by wpthemespace.com