Skip to content

Life Hack and DIY Lifestyle

  • Things I like
  • Life Hacks
  • DIY projects
  • Home Improvement Basics
  • About Me
  • Resources
  • Lego
  • 3D Printing

Author: admin

Plumbing Basics

October 21, 2019October 24, 2019 admin

I wanted to provide some plumbing basics to give readers a high level background on plumbing in their house.

Follow the water trail: The trail followed by water to reach your house is typically the one shown below.

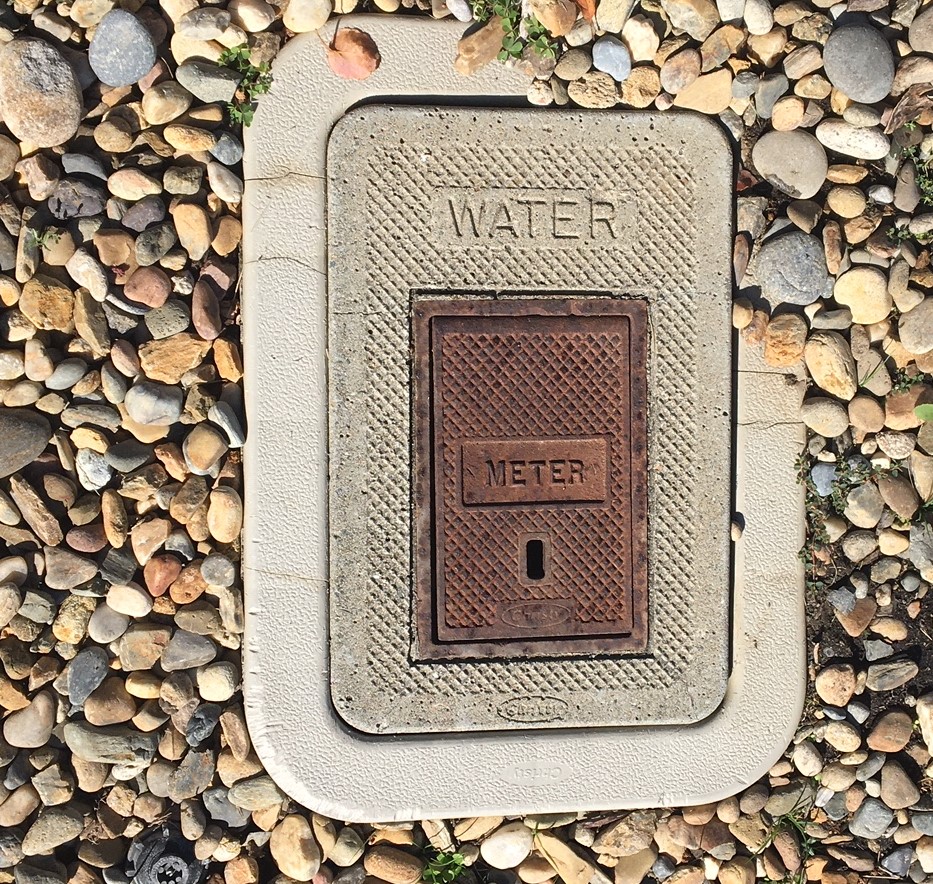
1. There is a water meter somewhere outside your house, usually near the front. This water meter is read by your water provider when they prepare your bill. Near this water meter is usually a water shut off value. If you turn this valve you will shut off all water going to your house.

Here is the water meter to my house. If you open the metal door you will see a meter tracking my water usage and a shut off valve for my house.

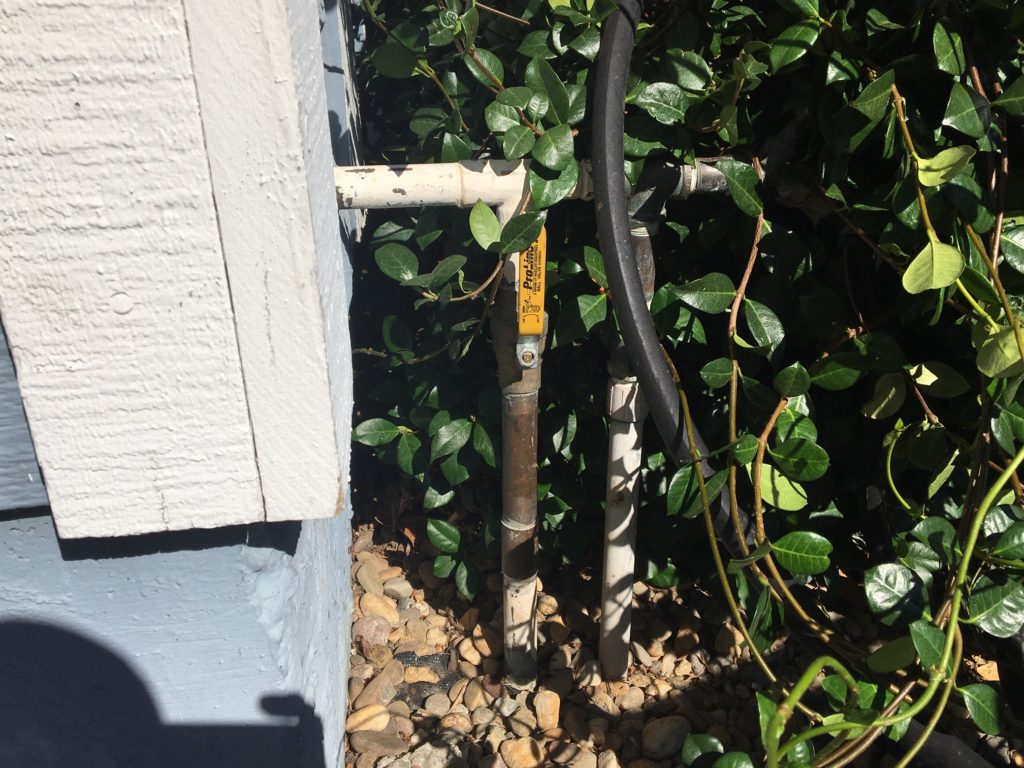
2. Most houses also have a separate shut off value (not maintained by the water department) outside of there house which controls all of the water flow to their house. If the valve is shut closed no water will reach the house. These value come in several varieties, and may require several turns if it is a knob, or only a quarter or half turn if it is a switch type of valve.

Here is the main shut off value to my house, which can be found in the front yard. A 90 degree turn and it turns off all water to the house.

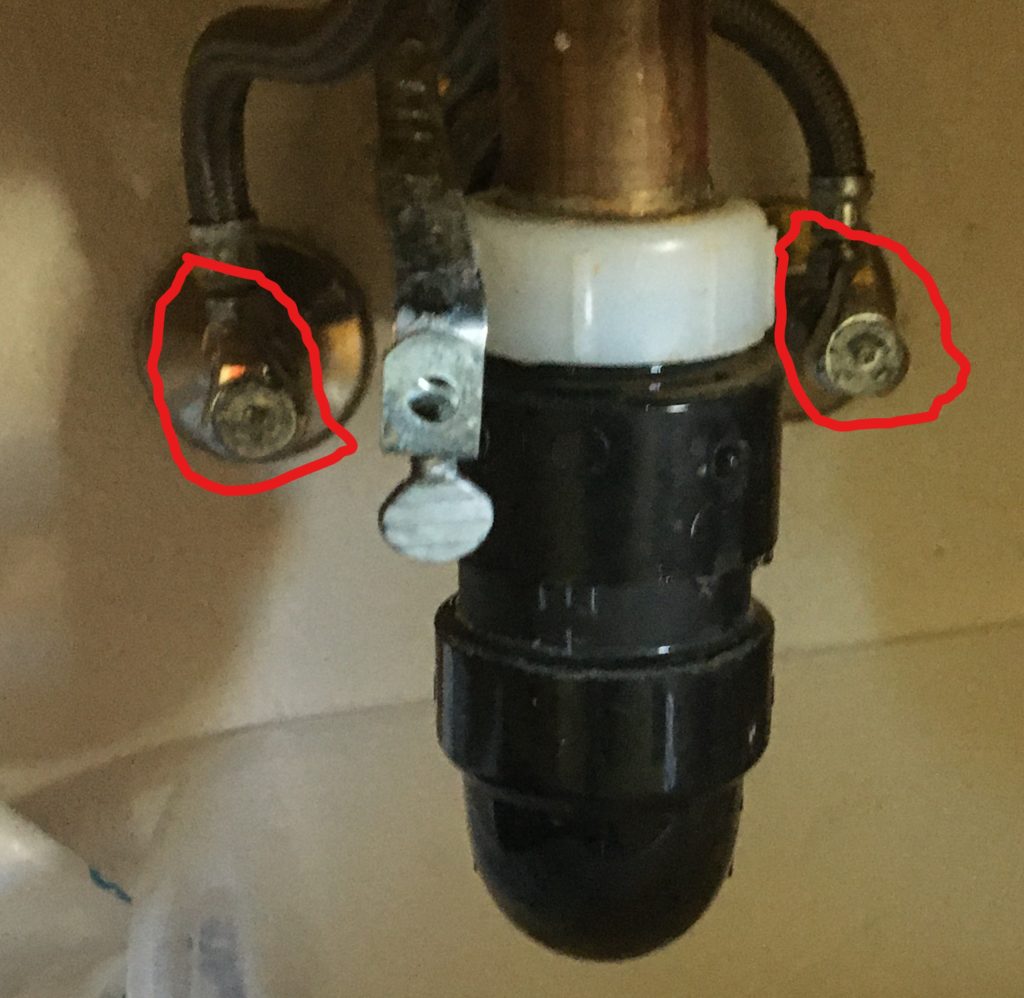
3. There are shutoff values within your house to the various water sources (showers, toilets and faucets). Faucets usually have two shut off values, one for cold water and one for hot water. The individual shut off valves allow you to turn off water to certain areas (such as a sink) without having to turn off water to the entire house. Shut off valves for inside your house usually come in several turn (you have to turn the knob several time) or quarter turn (you turn the knob 90 degrees and the water is off) varieties. Quarter turn shut off valves are preferred due to their ease of use. When I had to replace several shut off values in my house due to corrosion I replaced all of them with quarter turn shut off valves.

Here is an example of quarter turn shut off valves, see the valves circled in red.

Caulking: What is caulking? Caulking is a cement like substance put between two surfaces to keep them watertight. You will notice caulking in your kitchen and bathrooms among other places.

The circled areas above are caulk.

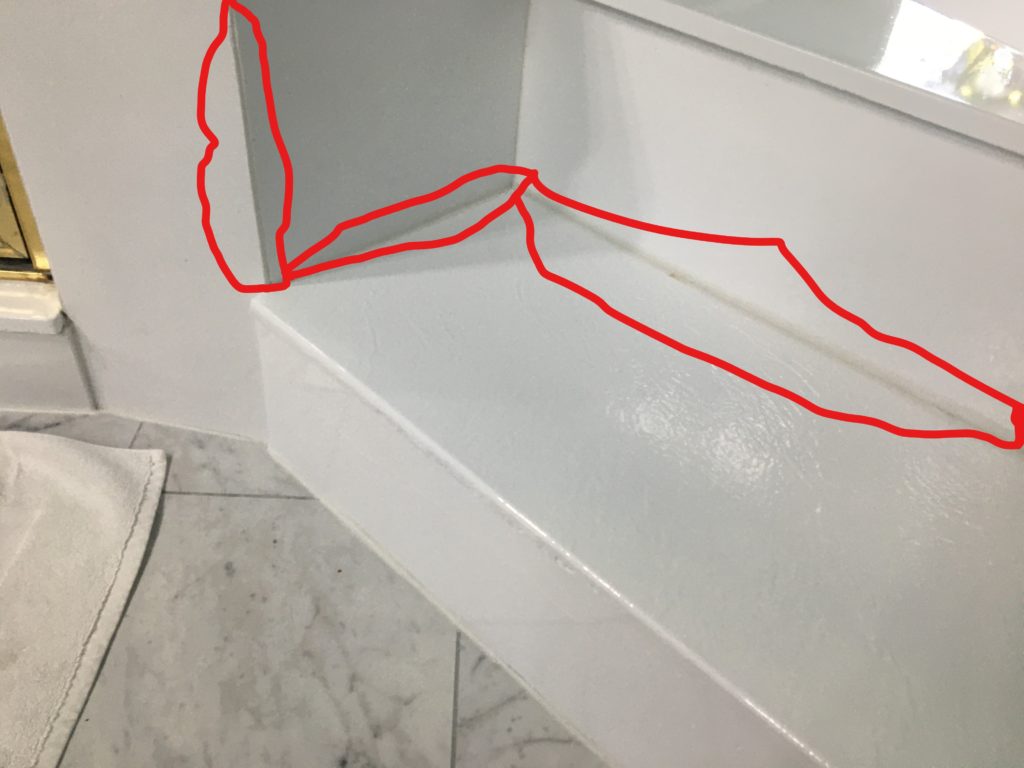
There are two methods for applying caulk, by hand or with a caulking gun.

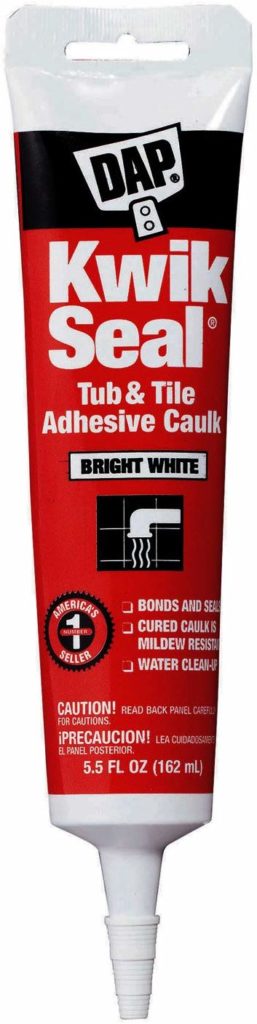
To apply caulk by hand you just squeeze a tube of caulk along the line you want to caulk. The type of caulk you would use is shown below and you can find it out Amazon here: Dap 18001 Kwik Seal Caulk with 5.5-Ounce Tube, White

The other way to apply caulk is to using a caulking gun. This requires getting caulk in a tube which has a back which gets compressed when you hit the trigger of the gun, therefore pushing out the caulk.

Here is a caulking gun. When you pull the trigger the tube is compressed, pushing out the caulk.

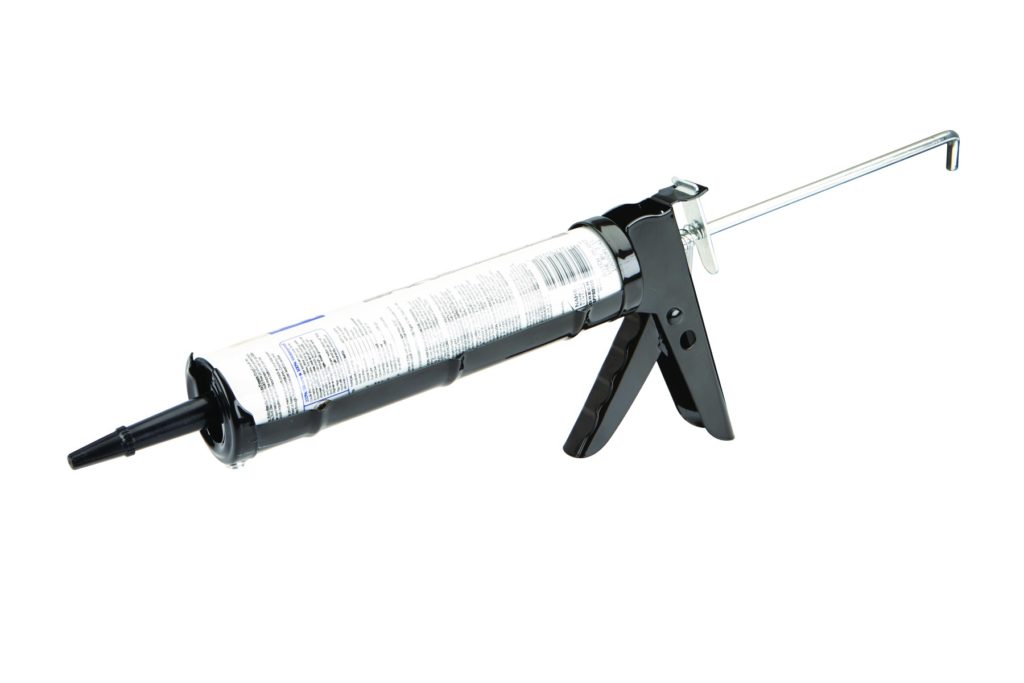
Either method works but it is generally easier and the job is more consistent if you use a caulking gun. Also, a caulking gun is not very expensive and if you get into home improvement you will be caulking often.

Electrical Outlets and Plumbing: You might have noticed that electrical outlets in areas where water is often present (bathrooms and the kitchen) often have outlets that look different than standard outlets. These are ground-fault circuit interrupter (GFCI) outlets.

This is an example of a GFCI outlet.

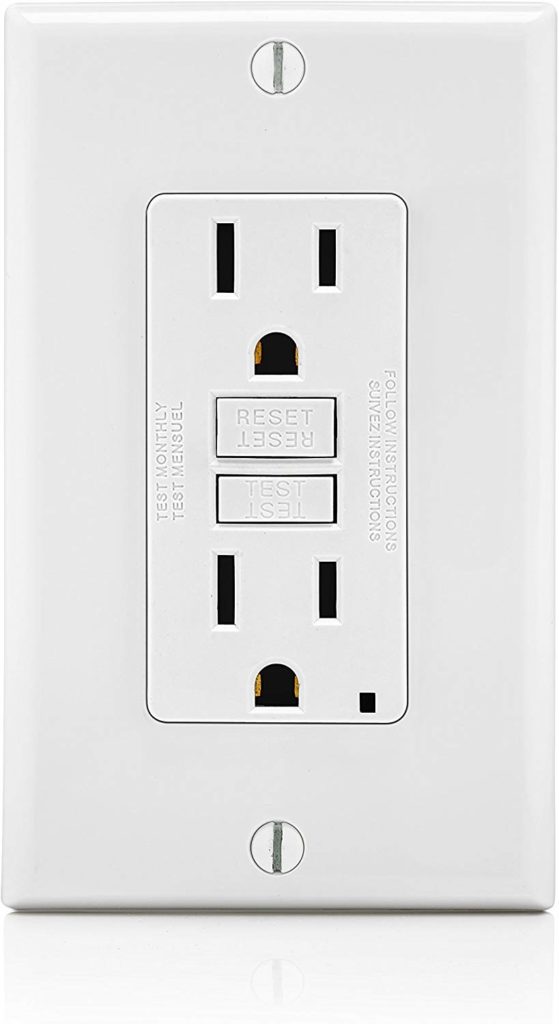
The GFCI outlets are basically there to prevent electrocution. The GFCI will measure the difference in the amount of electricity flowing into the circuit to that flowing out and quickly to trip or shut off the circuit if there is a difference. Therefore instead of tripping the circuit in the circuit breaker, it will be tripped at the actual outlet. This is why the outlet has the reset and test buttons. After the outlet gets tripped you can turn it back on with the reset button. Also, you can test that the outlet is working properly with the test button.

Posted in Home Improvement Basics

Things I like – Smart Sprinklers

October 18, 2019October 18, 2019 admin

One of the issues I had with my old electric programmable sprinkler controller was that the sprinklers would run even when it was raining. This meant if it was raining I would end up over watering my plants unless I remembered to manually change the watering schedule. Another issue was that I couldn’t remotely change the watering schedule. Therefore, if I was on vacation and an unexpected heat wave was hitting the area where I lived I was out of luck and couldn’t increase the sprinkler watering schedule.

Both of these issues are solved with a Smart sprinkler controller. These types of sprinkler controller systems can connect to Wi-Fi. This allows you to change the watering schedule anytime you want with your phone. Also, the sprinkler controller is given weather data through Wi-Fi and will automatically turn the sprinklers off when it is scheduled to rain (this is where the Smart comes in). Many water utilities will even give you a rebate towards the cost of the Smart sprinkler controllers since they save water and are more environmentally friendly.

When I installed my Smart sprinkler controller it was very straight forward, as I simply unhooked the cable from the old sprinkler controller and attached them to the new one. However, if you do not have an existing sprinkler controller the process would be much more time intensive and you might want to hire a professional.

The system I bought is the Orbit 57950 B-hyve Smart Indoor/Outdoor 12-Station. A picture of it is below and you can find it on Amazon here: Orbit 57950 B-hyve Smart Indoor/Outdoor 12-Station WiFi Sprinkler System Controller, Compatible with Alexa

Posted in Things I like

Things I like – Outlet Timers

October 17, 2019October 17, 2019 admin

Now that the holidays are coming around, many of you will be putting up your Christmas lights in the near future. For myself, one of the frustrating things about my outdoor Christmas lights has having to turn them on and off everyday. My routine was to turn the lights on at 6 pm and turn the lights off at 9 pm everyday. However, I often forgot to turn the lights off, resulting in them running all night until I turned them off in the morning.

I thought there had to be a better way, and of course there was. I found outlet timers which would turn on and off whatever was plugged into them. The ones I used are the Woods outlet timers, which are very inexpensive ($8 for two).

Woods 50006WD Indoor 24-Hour Mechanical Outlet Timer, 30 Minute Intervals

Pictured above are the Woods outlet timers I personally use

Once I bought these timers I never had to think about turning my Christmas lights off again, as they turned on at 6 pm and turn off at 9 pm automatically, I just had to depress on the dial the times I wanted the outlet to be on. I also used these timers to turn lights on and off in the house when I am on vacation.

There are more expensive versions of outlet timers which have remotes and other advanced features, but the ones I currently have are all I have ever needed.

Posted in Things I like

Home Improvement Basics – What you need to get started

October 16, 2019October 17, 2019 admin

If you are getting started in home improvement, you are going to need some basic tools to get started.  You can buy more advanced tools (such as a mitre saw or an electric sander) as your interest in home improvement progresses, but the list below contains the most basic tools which you will like need to tackle very simple home improvement projects.

  1. Tape Measure
  2. Work Gloves (to avoid splinters, etc.)
  3. Flathead screwdriver
  4. Phillips screwdriver
  5. Hand Saw
  6. Hammer
  7. Pliers
  8. Wood glue (you want glue stronger than the Elmer’s glue you might have lying around the house)
  9. Clamp (to hold in place boards which are being glued together or otherwise keeps things in place)
  10. Paint brushes
  11. Duct Tape: Comes in handy in so many places.

With these items you will be able to handle a lot of projects and see if home improvement is for you.  Note that doing projects with all these hand tools might get frustrating, especially the hand saw and manual screwdrivers.  With a handle saw it can take 5 minutes (and tire out your arm) to saw through a board which could be cut be a mitre saw in literally one second.  Also, it can get tiring manually screwing a screw into a piece of wood when an electric drill could drill it in in just a few seconds.

Posted in Home Improvement Basics

DIY project – Building a Simple but Stylish Bench

October 13, 2019October 17, 2019 admin

The goal of this project is to build a simple but stylish bench. The one I built (and will show you how to build) is pictured below, but yours may be different based on the materials you select.  My time estimate to create a bench like this is 10-20 hours.

Step 1: Decide on the dimensions for your bench.

Before you do any cutting or buying of materials decide on the dimensions you want of your bench (length, width and height). I am building a bench for our entry way and decided on a bench 3 ft long, 2 ft high and 1.5 feet wide.

Step 2: Make the top of your bench

As indicated in step 1, the top of the bench was to be 3 ft long and 1.5 feet wide. I didn’t have two boards that were 1.5 feet wide combined (well I did but they were warped and would not look could). Therefore, I took four 2 by 4s and used those. I made sure they were exactly the same length, as shown in the photo below.

Here is the top of my bench

Step 3: Build / develop the legs for your bench

The next step would be to build/ develop the legs for your bench. I bought metal hairpin legs from Amazon which I used as the legs for the bench. However, I needed a board to connect to the bench top and keep those four boards together. Therefore, I made a platform for the legs and screwed the legs into this platform. This platform has made of two 2 x 4s which were the width of the four boards. Below is a picture of how this platform looked.

If you like these metal hairpin legs you can find them on Amazon here:

Heavy Duty Hairpin Legs (Satin Black) – Mid Century Modern – Set of 4 Table Legs

Step 4: Connect the legs to the top of the bench.

Next step is to connect the legs to top of the bench. I clamped the legs to the bench top and clamped the four boards which composed the top of the bench (six clamps in all) before drilling holes for the bolts to connect the table to the legs.

Here is the bench with the legs clamped on (six clamps in all)

I prefer using bolts with washer and nuts to connect the legs to the top of the bench instead of screws, as the bolts are easier to adjust and provide a sturdier fit.

The bolts I used can be found here on Amazon:

Hillman 812626 1/2X6 Carriage Bolt, 1/2 x 6-Inch

Step 5: Sand and stain (or paint) the bench

This is the final step of the making the bench. I sanded the wood using a random orbit sander until it felt smooth and had no rough edges. Then I stained it using a light brown stain but you could always paint it if you prefer.

And that’s it, you have created a simple but stylish bench!

Posted in DIY projects

About Me

October 12, 2019November 17, 2019 admin

I am a married father of two with a keen interest in home improvement, DIY and life hacks.

When I bought our first house, things would break and I wouldn’t know what to do. So I would call a professional and they would fix the problem in 5 mins and charge me $100+. I remember once I had to pay an electrician $120 for simply hitting the reset button on an outlet. This is what led me to learn more about woodworking, electrical work and plumbing, so I could fix minor things on my own. Soon I realized I actually liked and got excited about fixing and building things, which led to become a DIYer.

So what is a life hack? According to Merriam Webster, a life hack is a usually simple and clever tip or technique for accomplishing some familiar task more easily and efficiently

With regards to life hacks, two things I love are saving money and efficiency and life hacks involve both. There are so many things in your house which you can use outside of their advertised function to save time and money.

If you have any questions or comments you can contact me at lifehackanddiycontact@gmail.com

Posted in About Me

Things I Like – Painters Tape

September 27, 2019October 16, 2019 admin

If you are not familiar with painters tape, it is tape created for the purpose of covering a surface next to the surface are you painting. Therefore any drippage or mis-strokes will paint the tape and not the surface you don’t want painted.

Here is an example of the use of painters tape. The base board is being painted, so the tape is being applied to the surface above the baseboard so that it won’t get inadvertently painted as well.

One of the good things about painters tape is that it only adheres lightly to the surface. This way you can remove it from the wall without causing any damage. In this sense it is similar to post it notes.

Due to its light adherence painters tape has a lot of other uses besides painting. You can use the tape for taping up pictures, kids artwork or other such items which would normally get destroyed if you used scotch tape. You can also use painters tape to create removable labels.

Note that if you are going to use painters tape for actual painting the best painting tape I have found is Frog Tape. You can find in on Amazon at the following link: Frog Tape 1396748 Multi-Surface Painting Tape.94 Inches Wide x 45 Yards Long, Green

Posted in Things I like

DIY Project – Scooter Board Cart

September 26, 2019October 22, 2019 admin

One thing I have created which I think others may find useful is the scooter board cart. At first I made it so my kids would have a “vehicle” to push each other around in. But later it was shown to be useful for other reasons, such as transporting groceries from the front door to the kitchen or transporting other large items throughout the house.

This is how the Scooter Board looks – side view
This is how the Scooter board looks – bottom view

The steps to make a scooter board cart are pretty simple. Also, the materials required are only a scooter board, a bin and some bolts, so the materials shouldn’t cost more than $25-$30.

To make the scooter board cart first buy a scooter board. I found the one below on Amazon for $18, see the following link: hand2mind Plastic Scooter Board with Safety Handles for Physical Education Class or Home Use, Blue

Next, purchase a bin to place on top of the scooter board. Then drill two holes in the bin, one to go through the middle of the scooter board and on to go through one of the handles. Try to make sure that the bin is centered on the scooter board so it won’t tip over. Then tighten the bolts and you should be done. The whole project can be done in 15-30 minutes.

Here is a video I placed on YouTube which shows the process of making the scooter board cart from start to finish.

Posted in DIY projects

Things I Like – Non-Contact Voltage Tester

September 11, 2019April 10, 2020 admin

One item I have come across which is very useful is a non-contact voltage tester. It can test if there is any active current coming from an outlet, bulb, appliance, etc. without actually touching the item being tested (which could potentially result in you getting shocked). They way they typically work is that you hold a button to turn on the voltage tester and it will beep if it detects voltage and be silent when no voltage is detected.

I use mine often when doing any type of electrical work, it is much easier then having to plug something in or something like that.

Here is an example of a voltage tester

You can purchase the voltage tester shown above for roughly $20 on Amazon, see the following link:

Milwaukee 2202-20 Voltage Detector with LED Light

I highly recommend that everyone gets one. Even if you don’t really do electrical work much, it is useful to have one of these to be able to tell if an outlet is receiving power.

The following video provides some tips on using the voltage detector.

Posted in Things I like

Impact Driver vs Regular Electric Drill

September 10, 2019October 16, 2019 admin

An impact driver is relatively new on the home improvement scene. It is essentially an electric drill with an electric hammer component. Due to this impact driver is better and more adept at drilling in screws. Also the impact driver has more torque than a standard electric drill and can screw in screws with a standard electric drill cannot.

However, this additional power comes an a price. The impact driver is typically more expensive than a traditional electric drill and it also more difficult to use.

Here is a standard impact driver

In my experience, unless you are drilling into a lot of dense material, than a standard electric drill is all you need.

I have never needed any more power than was already found in my Hitachi 18 volt lithium drill.

This drill can be found on Amazon here, and a picture is below: Hitachi DS18DBFL2S 18V Cordless Lithium Ion Brushless High Torque Driver Drill (Includes One 3.0Ah Compact Battery)

This is a picture of the Hitachi drill (standard drill, not an impact driver)

Posted in Things I like

Posts navigation

Older posts
Newer posts

Life Hack and DIY Facebook Page

Get more stuff

Subscribe to our mailing list and get interesting stuff and updates to your email inbox.

Thank you for subscribing.

Something went wrong.

We respect your privacy and take protecting it seriously

Proudly powered by WordPress | Theme: x-blog by wpthemespace.com