Skip to content

Life Hack and DIY Lifestyle

  • Things I like
  • Life Hacks
  • DIY projects
  • Home Improvement Basics
  • About Me
  • Resources
  • Lego
  • 3D Printing

Author: admin

Home Improvement Basics – How to Countersink a screw

July 31, 2020July 31, 2020 admin

When working on your project you want your screw to be flush against the wood, not sticking out in any way. To accomplish this you will want to countersink the pilot hole before drilling in the screw. Countersinking means “to enlarge and/or bevel the side of a hole to allow any given fixing to be sunk below the surface of that hole.” Basically, you want the top portion of the pilot hole (not the entire hole) to be wide enough to fit the head of the screw. They have bits specific for countersinking, but I just use normal drills bits to accomplish this. I drill a small pilot hole and then drill a few millimeters on the top of the pilot hole with a wider drill bit to make room for the screw.

This picture will give you a better idea of how countersinking a screw works:
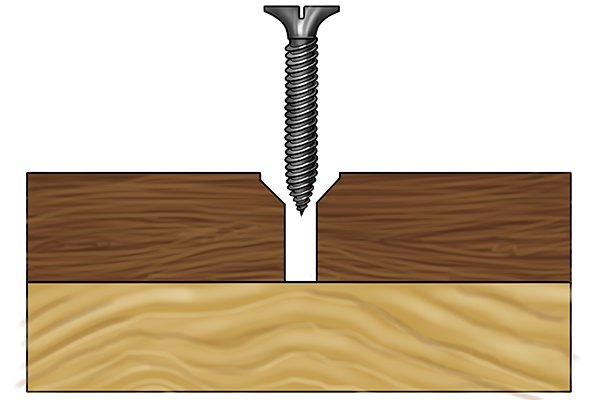
This shows the concept of countersinking, with the wider space at the top of the pilot hole to fit the screw head.

In this video I describe countersinking further and show an example of countersinking a screw.
Posted in Home Improvement Basics

DIY Project – Two Tier Plant Stand

July 18, 2020July 19, 2020 admin

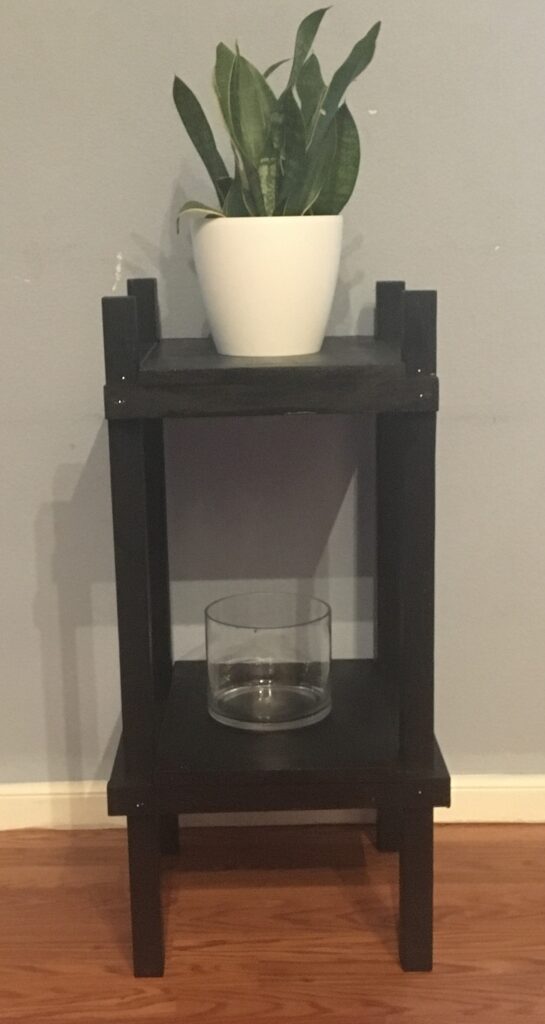
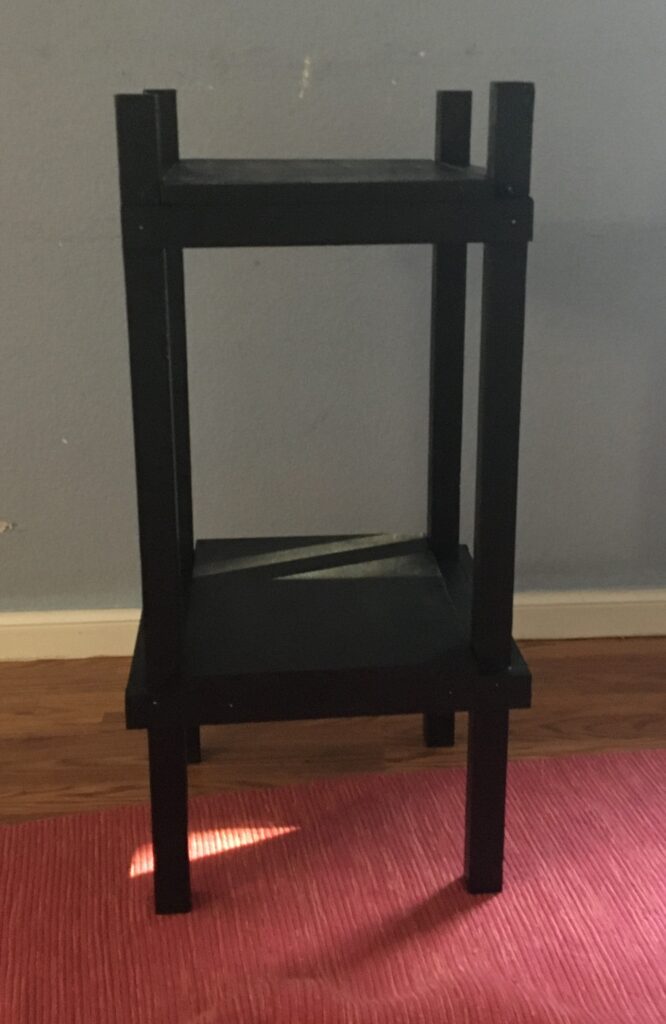
This project is a two level plant stand. It could also be used as a display stand or a combo display stand / plant stand (such as having a plant on the top level and a picture on the bottom level).  It is a pretty useful thing to have in your house, you could also use it as a side table but would likely want to shorten the legs. The materials were inexpensive, I think total materials cost less than $15. The project came out pretty well, this is how the final project looks.

The dimensions of my plant stand are: 34 inches height (for the four posts), 20 inches in width and 20 inches in depth.

The steps to make the plant stand are pretty simple (See below). Also, before attaching anything I would sand it as it is easier to sand boards before they are attached.

Step 1: Cut the four legs (which are 34 inches long in this case): The legs I used were from a 1 inch by 1 inch square pole. An eight foot pole of this wood cost about $4 (wood was cheap).

Step 2: Cut the support boards and attach to the legs: These boards are the horizontal boards which will support the two shelves. I had two support boards per shelf. I screwed these into the legs using Robertson screws (I prefer Torx screws but have a ton of Robertson screws lying around).

Step 3: Cut and attach the two shelves: In this step you cut the shelves to the right size and screw them into the support boards. The wood I used for the shelf was one wide board but you could make each shelf using two boards.

Step 4: Attach stability boards under the shelves to make the plant stand stable.: To avoid the plant stand leaning I attached boards connecting the legs to each other. I attached four of these for each shelf (essentially making a square with the support boards). This kept the plant stand very stable. You can see these in more detail in the video.

Step 5: Paint the plant stand (optional): I hate painting but really took my time painting this project. It worked well, as the blotching / pooling of the paint was minimal.

Those are all the steps to make this. Including painting I would estimate making this project to take 3-6 hours.

The following video provides more details on building this project:

Posted in DIY projects

Life hack – Make your own Mitre Saw dust hood

July 2, 2020July 13, 2020 admin

If you ever had a mitre saw, you have probably run into the issue of how much saw dust it creates and how to clean it up.  My mtire saw came with a dust collection bag, but it doesn’t really work and the dust gets everywhere.  Previously I just vacuumed up the saw dust with a shop vac, but it seemed like a lot of effort.  I tried connecting the shop vac hose to the mitre saw dust collection port and turning it on when sawing with the mitre saw.  This reduced the saw dust by a little bit but the saw dust still shot out of the sides and front, so it didn’t help that much.

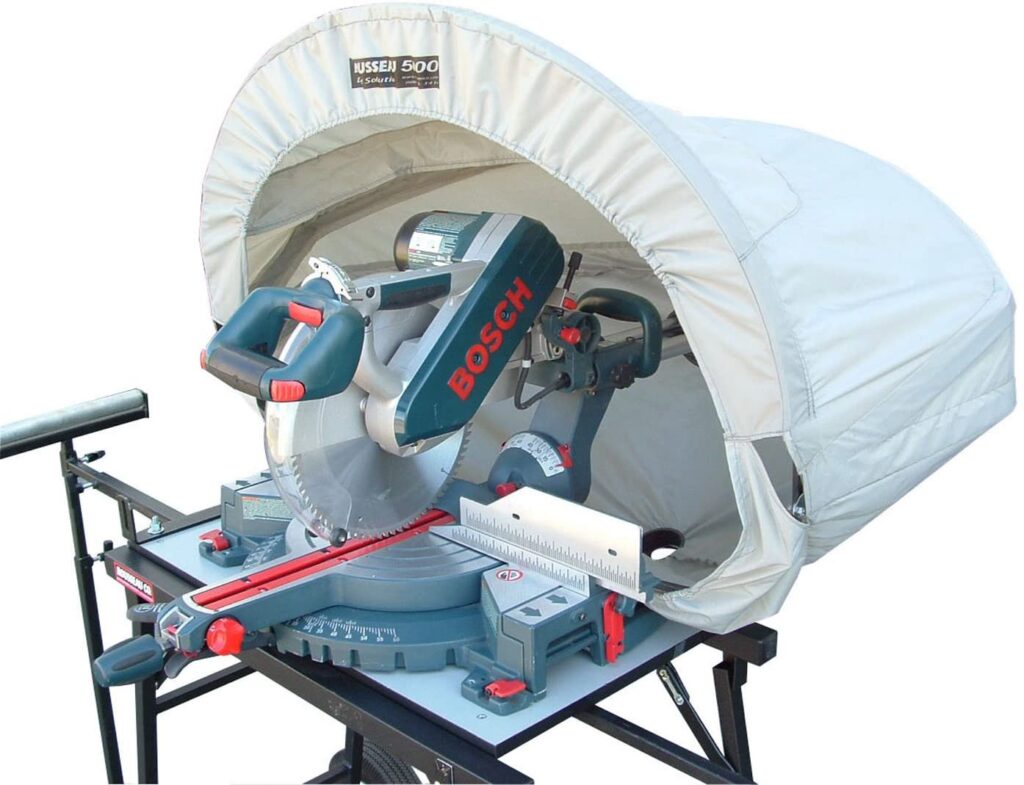
I asked on message boards what others had done and it seemed that the most common solution was to use a mitre saw hood.  This is a covering to block the saw dust from going beyond the mitre saw hood, and kind of looks like a tent.  Companies do make these mitre saw hoods for sale and they can be found on Amazon.  However, on Amazon these hoods are $150 or more which seems like a lot for such a simple product.  An example of a mitre saw hood can be found here, note the price of $160.

This saw dust hood for a Mitre saw sells for $160 on Amazon.

Besides the price these hoods seem really bulky.  My current mitre saw backs up to the wall and there is only a few inches of space behind it.

I then saw some messages about people who made their own mitre saw hood out of a baby tents (a very small tent used to protect babies from the sun).  I looked into this, but the cheapest baby tents on Amazon were still $40 or more.

So I started to think of my own solutions.  All I really needed was something lightweight and fairly flexible to cover the mitre saw and contain the saw dust when in use.  What immediately came to mine was an Ikea bag, as I already use an Ikea bag to cover the Mitre saw when it is not in use so me kids don’t try to touch it.  Ikea bags are cheap, you can get a 10 pack of Ikea bags at Amazon for $20, see the following link: Amazon Ikea Bags

People pointed out the bag handles could get caught in the saw so I cut all of those off. I have one bag on each side of the mitre saw, with the bag held up by a cut pool noodle. The pool noodle has a screw inserted which also connects to the bag so that they stay in place. So far having these bags on the sides to collect saw dust has worked really well. Also the best part is the materials only cost $5 ($2 per bag and $1 for the pool noodle). This is how the final product looks:

This is the dust collection system with a bag on each side of the Mitre saw and enough space provided to avoid any accidental tangles.
This shot shows the pool noodle supporting the bag to keep it open.

The following video describes this in more detail.

Posted in Life Hacks

Things I Like / Life Hack – Car Touch Up Paint

June 27, 2020June 27, 2020 admin

Over time your car is guaranteed to get some scratches here or there.  In addition, as the car ages the paint will begin to oxidize, turning white and flaking off.  Finding paint that matches the car paint can be difficult.  However, from Amazon you can order touch up paint that will exactly match that of your car.

Simply do a search in Amazon for your car make (Honda, etc.) and the color and you can get an exact match.  I have a royal blue Honda Civic with fading paint.  I did a search on Amazon for the touch up paint and came up with the following.

The paint is around $16 and can be found here on Amazon:

Dupli-Color AHA1003 Royal Blue Pearl Honda Exact-Match Scratch Fix All-in-1 Touch-Up Paint – 0.5 oz.

The paint comes in a tube and is very easy to use. It has a pen like applicator and also a brush applicator.

Note that while the paint is the exact same type as what was used in the car, it might not exactly match due to the sun wearing down the color of the paint on the actual car over time. These car paint touch up tubes are a great thing to have! The following video provides some details:

Posted in Things I like

Life Hack – How to have ice water while on the go

June 21, 2020June 21, 2020 admin

This is a useful life hack for the summer time when going on a long hike, or anytime you need to keep water cold for a few hours when you won’t have access to a fridge or cooler.

The life hack is to take a fill a water bottle half way with water, lay it on its side and leave it in the freezer. Then right before you leave for your outing fill the other half of the bottle with water. This will keep the water cold and over time the ice melt and you will just have icy water. The only tricky park is it takes some planning to freeze the water beforehand.

This brief video shows this in more detail.

Posted in Life Hacks

Life Hack / Things I like – Laminators

June 13, 2020June 13, 2020 admin

One product when is pretty cheap and also very useful is a laminator.

Here is a photo of a standard laminator

I bought one back in 2013 and it is still going strong. Basically the laminator makes any sheet of paper you have tear proof and very difficult to destroy.

I use it to help preserve awards my kids get at school or camps, which are often just a piece of paper and usually get ruined really quickly. 
Also I have made signs with it for high traffic areas for the kids to remind them to take their shoes off, lift the seat up in the bathroom and things of that nature. In addition, I use it to preserve my kids art projects.

An inexpensive laminator on Amazon can be found here (for $30):

Swingline GBC Laminator, Inspire, Thermal, 9 inch Max Width, Quick Warm-Up (1701855)

In general you can get a servicable laminator for $30 or less.

Here is an example of a sign I made with the laminator.

The laminator has a ton of uses and is a great thing to have. I go in a little more detail in the following video:

Posted in Life Hacks, Things I like

DIY Project – Squirrel Picnic Table

June 9, 2020June 17, 2020 admin

A craze which was been circulating is the concept of the squirrel picnic table. If you look on Amazon you will see dozens of squirrel picnic table options, most for $25 or more.

This is a squirrel picnic table I found on Amazon (Selling for $40!)

The construction of the table seemed fairly simple so I decided to try to make my own.

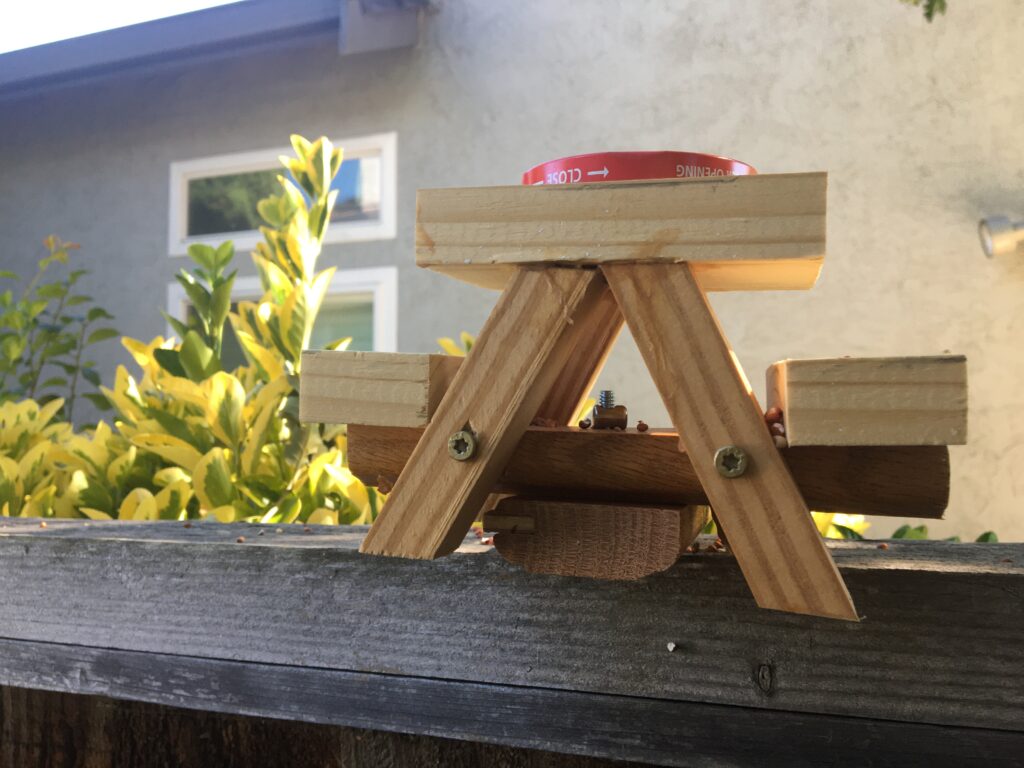
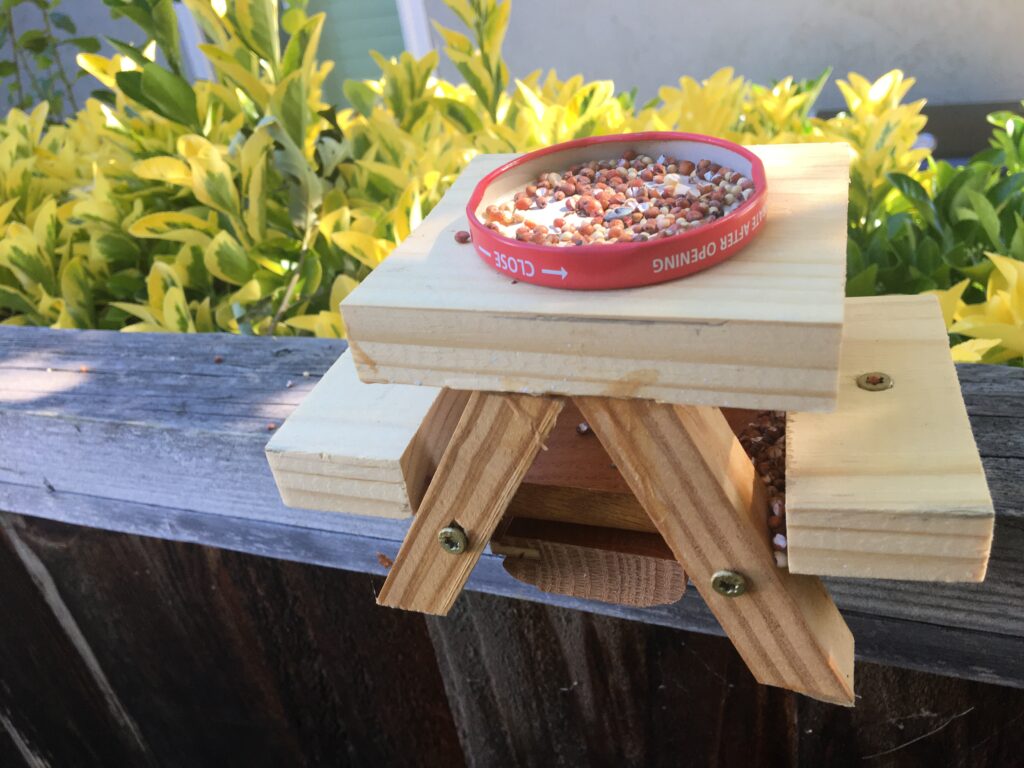
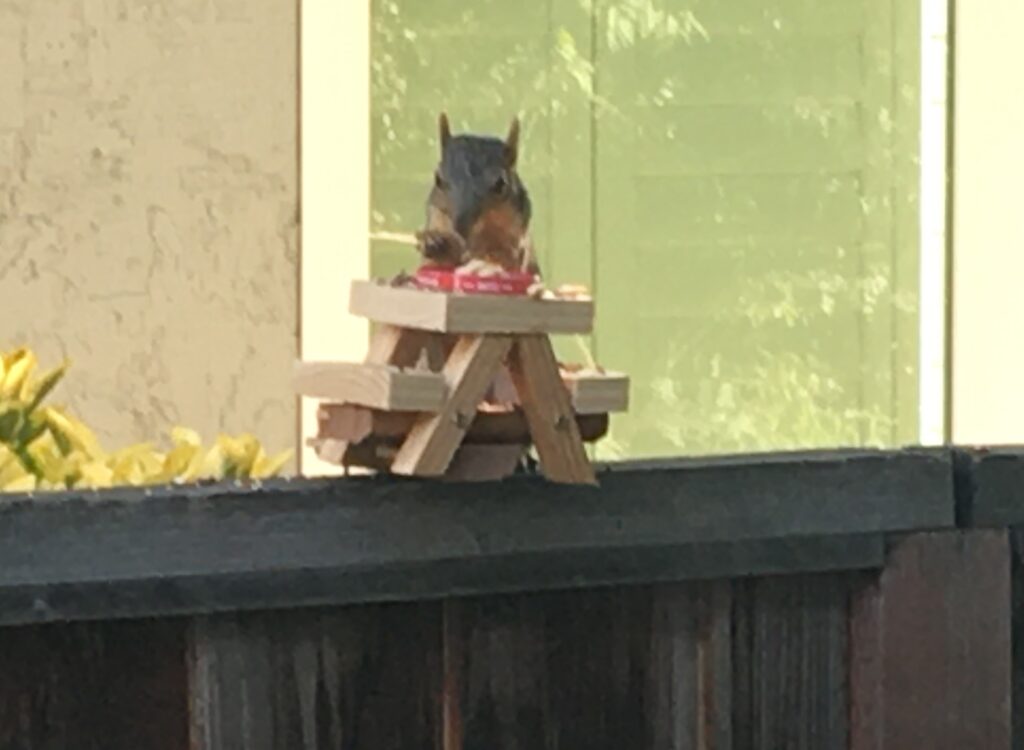
This is the end result, I am pretty happy with how it turned out.

Picnic table in action!

Here are the steps to make the squirrel picnic table.

  1. Create the table legs: This is really simple, just cut four legs at an angle. Make sure the legs are all cut at the same length and the same angle. I used a Mitre saw for all of this, you could use a circular saw but it would make it more difficult to make the cuts exact.
  2. Create the table base: The table base is the board (or boards) which will support the benches and will attach to the legs. In the photo from Amazon the base is two boards while in the table I built it is one board. You just need to cut the boards long enough to support both benches and have the boards be wide enough to attach to the legs.
  3. Attach the table base to the table legs: This step is pretty simple, just screw the table legs into the table base. Make sure to drill a pilot hole as the legs are thin and they could split if too much force is applied.
  4. Create the table top: For this step you just need to cut a board to be the size you want your table top.
  5. Attached the table top to the legs: To attach the table top to the legs I used wood glue and clamped it in place overnight. You could instead use screws but since the legs attach to the table top at an angle there is a decent chance the wood will split so I wouldn’t recommend it.
  6. Create the benches and attach the benches to the table base: For this step you need to cut the two pieces which will serve as the benches. Next screw the benches to the table base.
  7. Attach a board to connect the picnic to the fence: I added a board which would connect the table base to the fence, going perpendicular from the table base. If you go online you will see that there are multiple ways to connect the bench to the fence (other than the method I used).
  8. Attach a container to hold the squirrel food: In the picnic table I made I attached a pasta sauce lid with a screw which will hold bird seed and nuts to feed the squirrels.

And that’s it! It seems like a lot of steps, but the steps are short. From start to finish the project should only take an hour or so.

The video below summarizes the steps to build the squirrel picnic table.

Posted in DIY projects

Life Hack – Salvaging wood from things you get for free

May 26, 2020June 3, 2020 admin

To cut down on costs and avoid having to go to the store, I thought of other ways to get wood for my projects. What I have started doing is getting furniture for free on Nextdoor (a neighborhood app where people can post things for sale or things they are giving away for free, among others) and then using that wood for woodworking projects. Note I would only do this for projects that don’t need to be that exact or pretty. The recent project I did were planter boxes which were going to be painted and full of dirt anyway, so didn’t need to be that pretty.

Make sure the wood is solid and not something hollow (like an Ikea table, you can see more on this in the post here: https://lifehackanddiy.com/ikea-table-main-ingredient-cardboard/)

It takes some work to isolate the wood into something you can use. For example, I got a dining table and had to remove some of the molding and leg fasteners. However, the wood is solid and sturdy.

This is an example of some wood I have salvaged. I started sawing the table top into boards and was also going to salvage some cabinet doors.

Here is some stuff I made out of the salvaged wood:

This stool is made out of table legs. I know it is ugly, but it is functional.
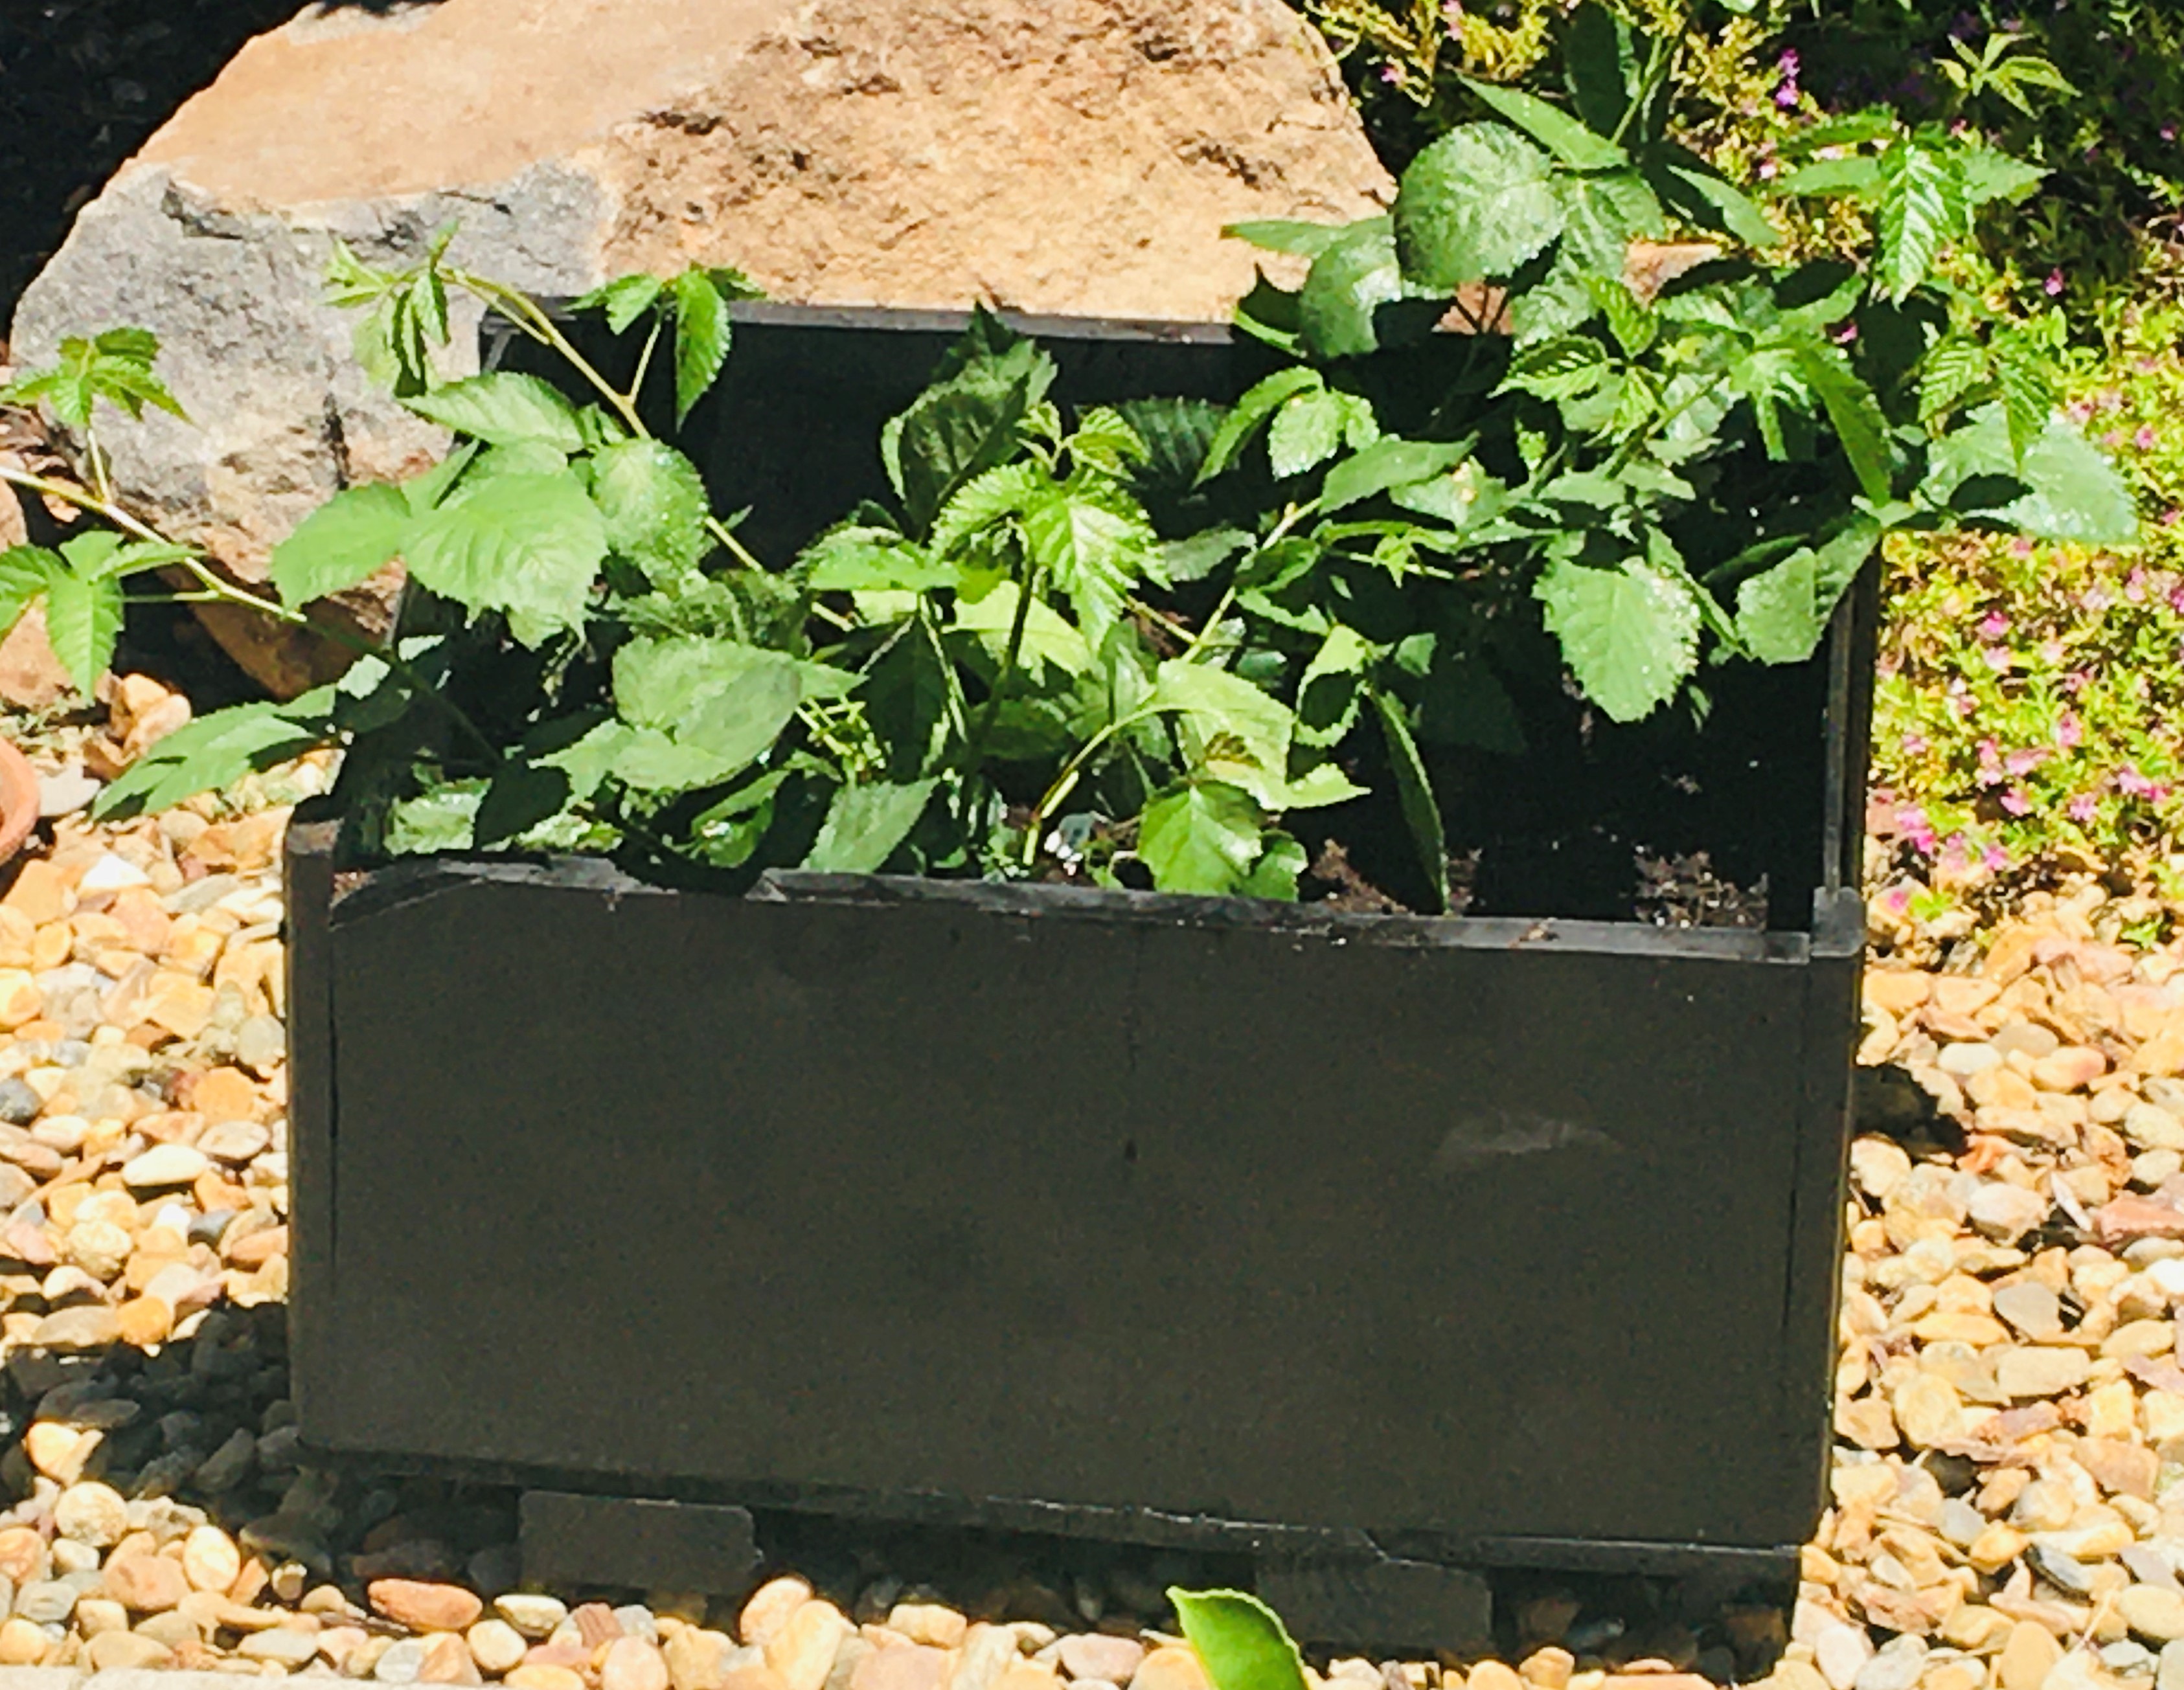
This planter box is made out of cabinet doors, pieces of a dining table and some shelves.

I got over salvaging wood in more detail in the following video:

Posted in Life Hacks

Life Hack – Get money for reducing your energy use with OhmConnect

May 26, 2020May 26, 2020 admin

This life hack is an easy way to get some extra cash. OhmConnect is a company which will give you rewards points (which you can redeem for cash) if you reduce your energy use during your designated Ohm Hour (a one hour block of time). The way it works is that during certain hours PG&E may have to fire up its dirtiest, most polluting power plants. To prevent this, OhmConnect tries to reduce energy use during these peak hours. More details on how it works can be found here: https://www.ohmconnect.com/how-it-works

If you are able to reduce your energy use to below what is forecast during you Ohm Hour, you will get points. 100 points equal 1 dollar. You don’t have to pay anything up front or purchase any additional equipment, you just need to provide your PG&E account info.

Also, if you sign up under me I get a $20 referral bonus and you get a $10 bonus. So sign up, here is the link: https://login.ohmconnect.com/ref/780225

Posted in Life Hacks

DIY Project – Building a Hanging Planter Box

May 23, 2020May 23, 2020 admin

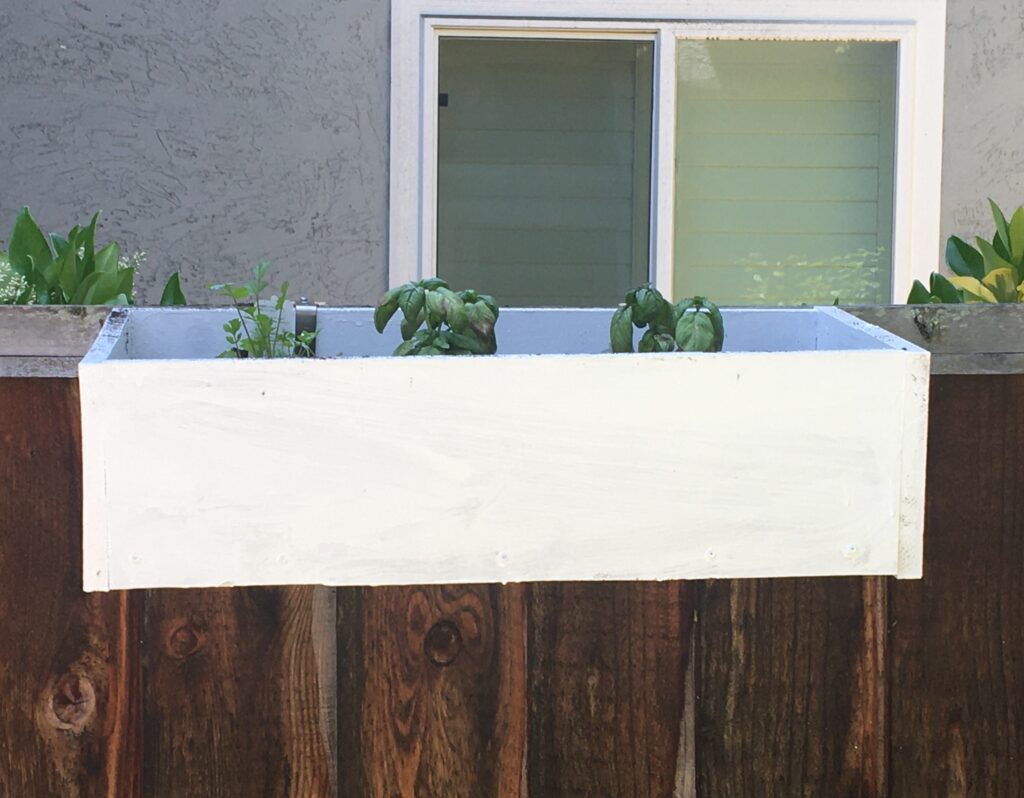
This planter box which I made is a real space saver, as it hangs from the fence instead of taking up space on the ground.

Here is a picture of the planter box

By hanging it on your fence instead of the ground you accomplish two things:

1. The plants will get more sun, as they will be above other plants which might block the sun.

2. You will free up more space on the ground for other plants.

The only downside is that you will have to water the plants by hand as sprinklers likely won’t reach high enough.

The construction of the planter box is very simple, it is just a four sided box.  I won’t get into the construction but the dimensions of the box were 12 inches high by 16 inches deep by 24 inches wide.

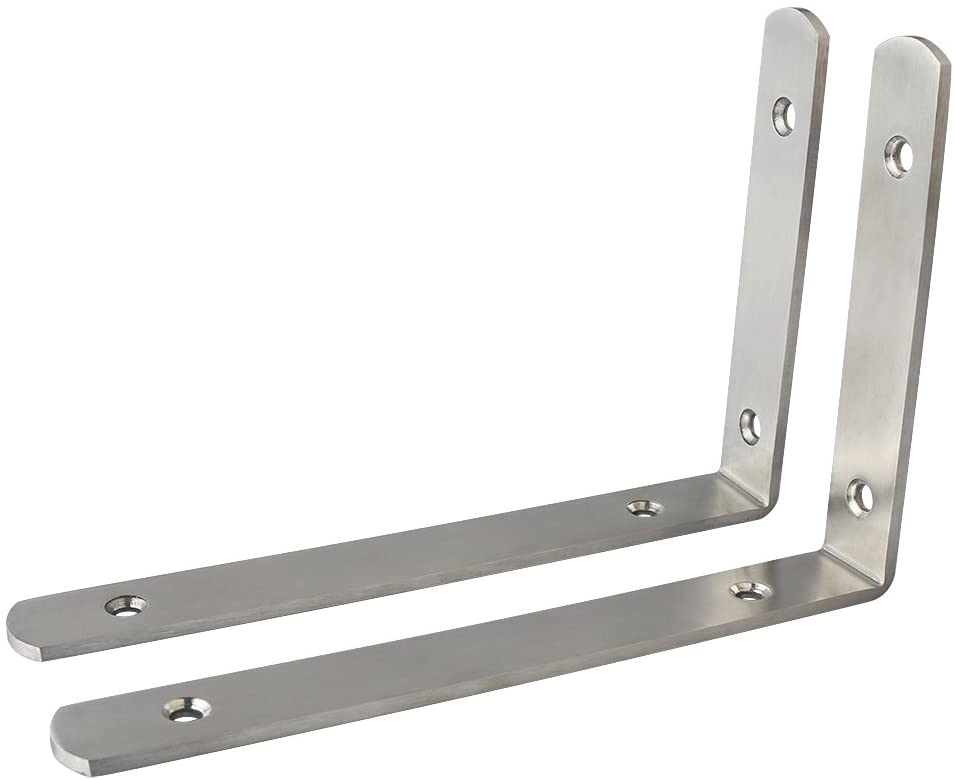
The more complicated part was developing a system to hang the box to the fence.  To hang the planter I used shelving brackets.  The ones I used appeared very sturdy, so they should be able to support the weight of the planter and the dirt and plants which will be added.  Here is a picture of what the brackets look like, they can be found on Amazon here: https://www.amazon.com/gp/product/B01MTPRUGQ/ref=ppx_yo_dt_b_search_asin_image?ie=UTF8&th=1

I attached the brackets to the back of the planter box with nuts and screws, tightening the nuts as tight as possible.  I then screwed the bracket into the fence with one screw for each bracket.  At the end of the bracket I attached a block of wood which had a screw going through it to hold it in place. A nut at the end of the screw held the block of wood firmly in place.  The block of wood meets flush with the fence to hold the planter box firmly in place. 

This shows how the planter box is held to the fence. It is screwed into the fence. More importantly, at the end of the bracket a wooden block flush to the fence holds the bracket in place.

I describe the planter box and the process to make it and hang it to the fence in more detail in the following video:

Posted in DIY projects

Posts navigation

Older posts
Newer posts

Life Hack and DIY Facebook Page

Get more stuff

Subscribe to our mailing list and get interesting stuff and updates to your email inbox.

Thank you for subscribing.

Something went wrong.

We respect your privacy and take protecting it seriously

Proudly powered by WordPress | Theme: x-blog by wpthemespace.com