Skip to content

Life Hack and DIY Lifestyle

  • Things I like
  • Life Hacks
  • DIY projects
  • Home Improvement Basics
  • About Me
  • Resources
  • Lego
  • 3D Printing

Category: DIY projects

DIY Project / Life Hack – Creating a backdrop for conference calls

November 20, 2019November 20, 2019 admin

One of the issues I have run into with working from home is the need to be on camera in a room which might be used by others, who would appear in the background. In particular, our office space in the house has a closet behind it which my wife or I would need to use to get clothes or other items, resulting in one of us appearing in the webcam shot of the other.

I wanted to come up with a way of adding a screen or backdrop to cover the closet so we could use the closet while the other person is on the webcam and no one would know. The photo below shows what I came up with.
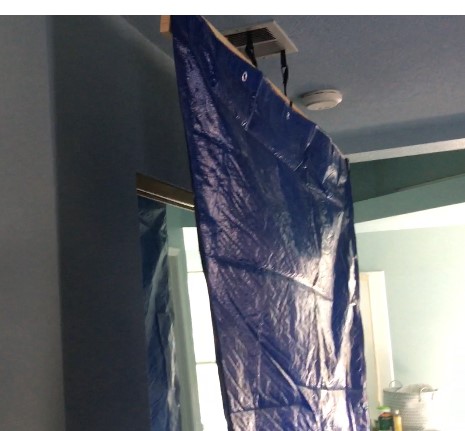
The backdrop is a thick tarp attached to a board via screws. The tarp is then hung up to the ceiling with Velcro strips attached to the board attached to the tarp, which connect to Velcro strips I tied to the heating vent in the ceiling. I love Velcro strips, you can learn more about Velcro strips in my blog post found here. The thick blue tarp I bought I found on Amazon here: Tarp Cover Blue, 2-Pack Heavy Duty Waterproof, Great for Tarpaulin Canopy Tent, Boat, RV Or Pool Cover!!! (8X10, Heavy Duty)

The backdrop works pretty well, below shows how it would look from a webcam perspective with and without the tarp.

No backdrop
With backdrop

I created a video summarizing the steps to create the backdrop and how the backdrop looks which is below:
This video summarizes the backdrop project.
Posted in DIY projects, Life Hacks

DIY Project – Building a Fence

November 13, 2019November 13, 2019 admin

For this project, I replaced a section of fence which had fallen down. The complete section had fallen down and the only remaining pieces were the fence posts and a board which spanned the bottom of the section.

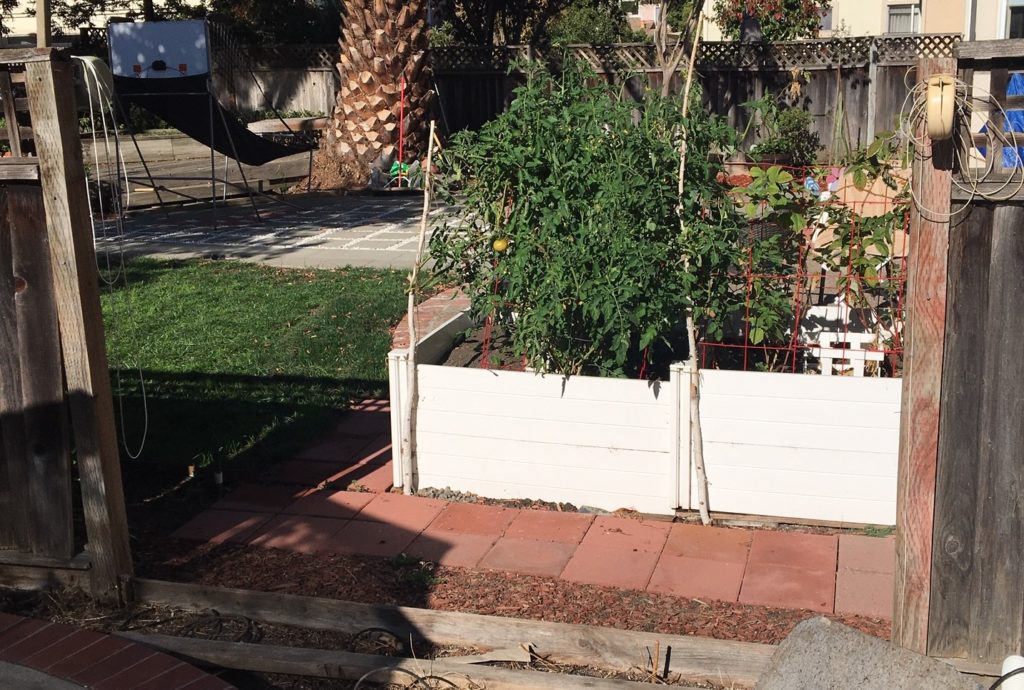
This is the missing fence section, you can see the fence posts on each side.

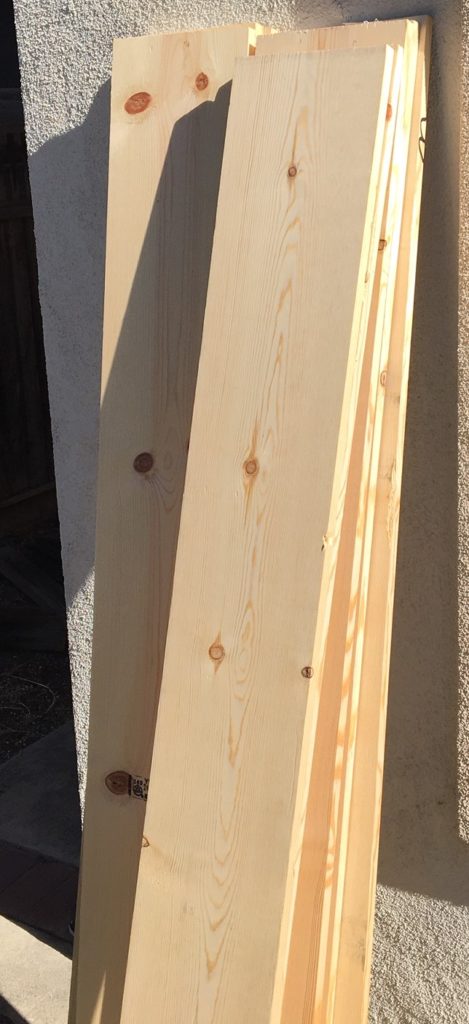
To replace the fence section I chose boards 9 inches wide and 6 feet tall which I would stack across the missing span of fence section.

These are the boards I used for the vertical section of fenceto

To keep the fence stable I also bought a 2 x 4 to go horizontally across the span of new fence, which would be screwed into each individual board. The old fence also had a top board with a groove in the middle to fit the boards in. I wanted to use this board as another method for keeping the fence stable.

When the project is finished the fence will be very sturdy as it will be held in place in three different areas:

-Held in place by the base board at the bottom of the fence (with two torque screws per vertical wood plank)

-Held in place in the middle of the board with the 2 x 4 (with two torque screws per vertical wood plank)

-Held in place by the top board which is on the top of the vertical plank boards (held in place by the groove in the middle of the board)

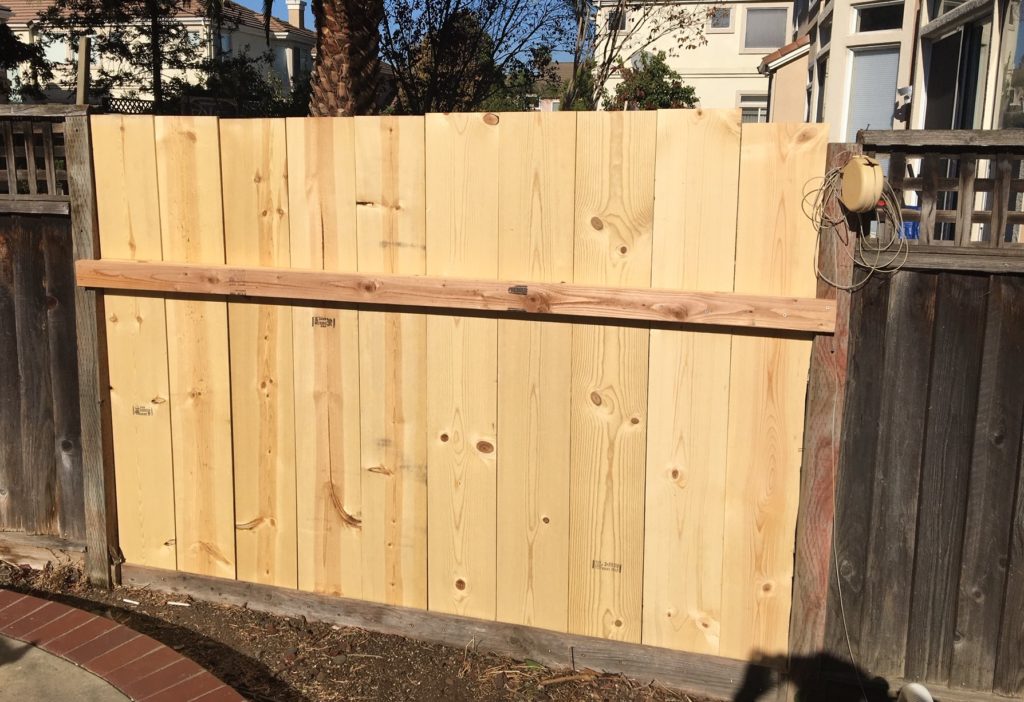
Once the plan was set, creating the fence was pretty straight forward. I cut the boards to size, as the top of the fence was about 5.5 feet but the board were 6 feet tall. Then I placed in the boards spanning the missing section and attached them to the base board and the board at the middle height of the fence. This resulted in the fence looking like the following:

As shown in the picture, the boards heights were uneven. Much of this was due to the ground being uneven, as it sloped downwards. Therefore, I had to trim the top of the boards to match the downward slope so that the top board would fit properly. To trim the top of the boards I used a small circular saw which could be operated with one hand, as opposed to the more bulky, larger circular saws. This is the exact circular saw I used, it worked pretty well and I would recommend it, you can find it here on Amazon: WORX WORXSAW 4-1/2″ Compact Circular Saw – WX429L

This is the Worx circular saw which cane be operated with one hand, unlike many circular saws which require two hands.

After cutting the boards to the appropriate height I was able to attach the top board. This was the final step and then the fence was complete. I was pretty happy with the result, you can see the end result of the project in the picture below. In the picture the slant is more apparent now that the top board is attached.

And that’s it, replacing the fence section has been completed.

Posted in DIY projects 1 Comment on DIY Project – Building a Fence

DIY Project – Bench with built in shelf

November 1, 2019November 19, 2019 admin

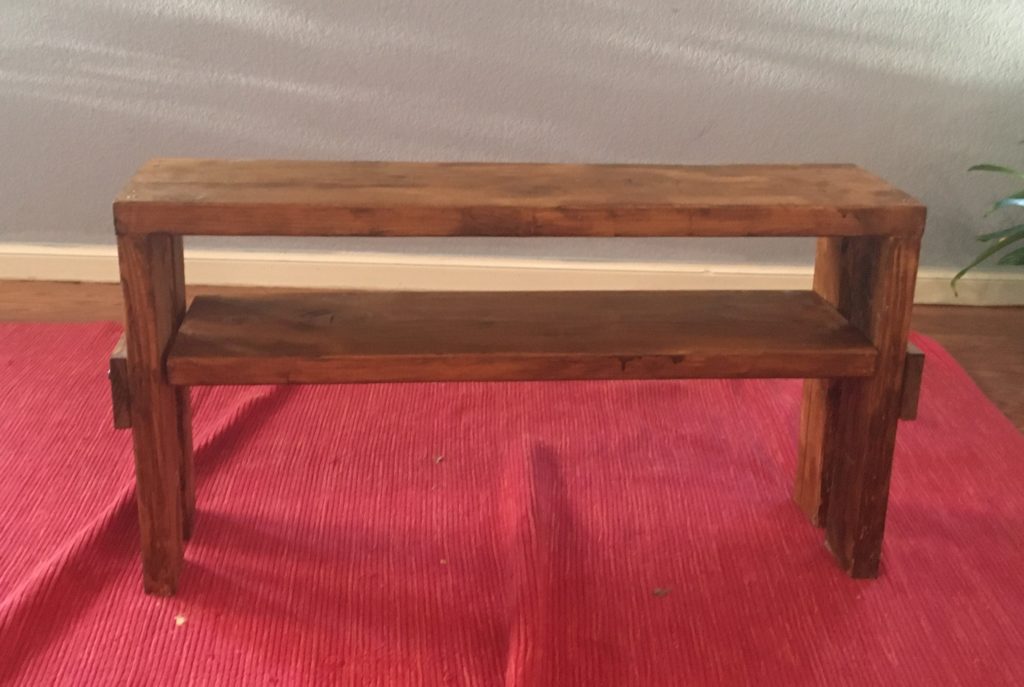
In this project I built a bench with a built in shelf. The shelf could be used for anything, I personally use it as a shoe rack.

The finished project – bench with built in shelf

The construction of this project is fairly straight forward, the steps are listed below.

Step 1: Determine the dimensions you would like for your bench (height, width and depth): For my bench the dimensions were 20 inches high, 36 inches wide, and 9 inches deep.

Step 2: Create the top of the bench: This step was pretty simple for me, as I used a single board and cut it to the proper length. Make sure the board(s) you select are strong enough to support a few people’s weight. This is the board I used (shown after being sanded and stained).

Step 3: Attach the legs: For my legs I just attached two 2 x 4’s to each side. If you want you could use a wide single board for each side instead, just make sure the legs are strong enough to support weight.

Step 4: Create the supports for the shelf: In the bench I made I created a cross board for each set of legs to keep the legs in place. Then I had the bolt which extends through the cross board serve as the support for the shelf. You could drill holes in the legs and use pegs to make the height of the shelf adjustable if you wanted to go that route.

Step 5: Add the shelf. For my bench this step was very easy as I just cut a board like the one on the top that was the correct length to be the shelf.

Step 6: Sand and stain (or paint) all the surfaces. You should sand the surfaces, at the very least sand the top section which people will actually sit of as you want that to be smooth. The other sections are less important to sand but sanding them will give the bench a more finished look. It may be easier to sand and stain each piece before you attached it to the shelf.

And that’s it, you have made a bench with a built in shelf!

A video summarizing the project can be found here:

Posted in DIY projects

Life Hack and DIY Project- Pegboard Belt / Tie Rack

October 26, 2019October 26, 2019 admin

A long time ago I bought a pre-made belt rack, which was a horizontal piece of metal with a bunch of hooks. The issue I had with the belt rack was that often things wouldn’t fit right, such as being too big to fit. Also, I couldn’t adjust the spacing of the hooks on the rack at all.

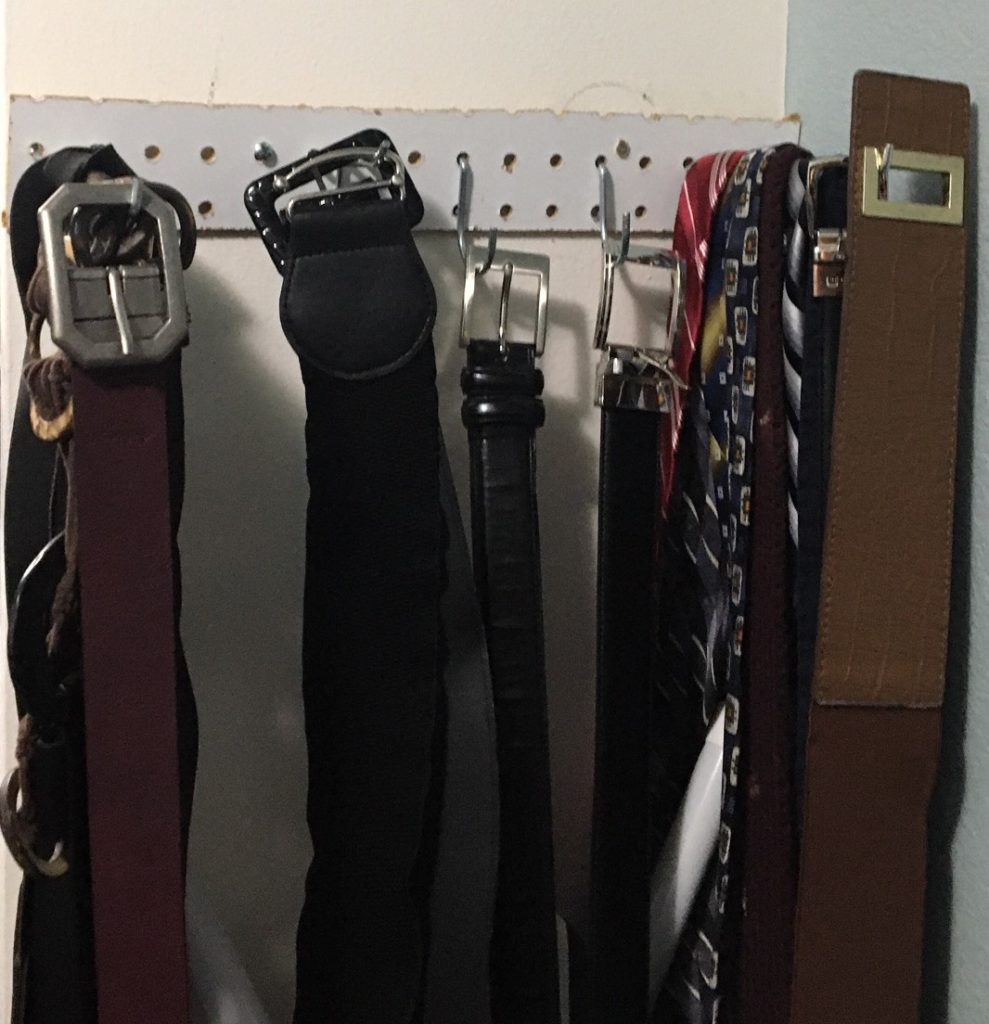
A simple solution I came up with was to make my own belt/tie rack out of pegboard as shown below:

The pre-made belt rack I am referring to looks like the following picture:

This is a typical pre-made belt rack.

Creating the pegboard belt rack was very easy, I just cut some pegboard to size, attached it to the wall and insert pegboard hooks where needed. One thing to remember is not to screw the pegboard flush into the wall, you want the pegboard about a centimeter from the wall so that the hooks can fit in the holes and come through the back. You can purchase pegboard hook sets on Amazon, which provide hooks in various sizes. You can find a good set of assorted pegboard hooks on Amazon here: Pegboard Hooks Assortment, 54Pcs Pegboard Hook Organizer Accessories Set with 20Pcs Peg Locks.

Here is an example of the various types of hooks you will get in this type of set:

The pegboard belt rack has two advantages over the pre-made belt rack.

  1. It’s cheaper as pegboard it very inexpensive
  2. It’s easily customizable, unlike the pre-made belt rack. For example, you can easily adjust the spacing of the hooks, or swap out a hook for a different type of hook and so on

Here is video summarizing the steps to create the pegboard belt rack.

Hope you find this life hack / DIY project useful. As always, if you have questions e-mail me at lifehackanddiycontact@gmail.com.

Posted in DIY projects, Life Hacks

DIY project – Building a Simple but Stylish Bench

October 13, 2019October 17, 2019 admin

The goal of this project is to build a simple but stylish bench. The one I built (and will show you how to build) is pictured below, but yours may be different based on the materials you select.  My time estimate to create a bench like this is 10-20 hours.

Step 1: Decide on the dimensions for your bench.

Before you do any cutting or buying of materials decide on the dimensions you want of your bench (length, width and height). I am building a bench for our entry way and decided on a bench 3 ft long, 2 ft high and 1.5 feet wide.

Step 2: Make the top of your bench

As indicated in step 1, the top of the bench was to be 3 ft long and 1.5 feet wide. I didn’t have two boards that were 1.5 feet wide combined (well I did but they were warped and would not look could). Therefore, I took four 2 by 4s and used those. I made sure they were exactly the same length, as shown in the photo below.

Here is the top of my bench

Step 3: Build / develop the legs for your bench

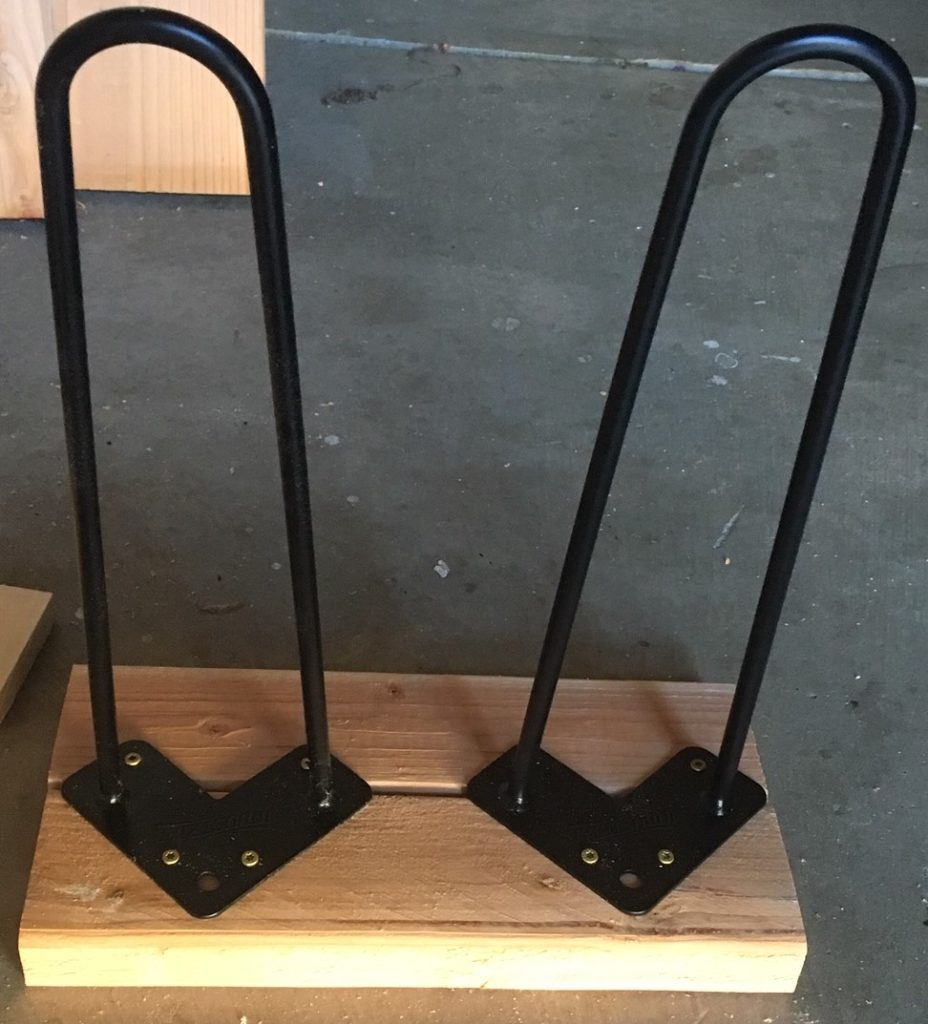
The next step would be to build/ develop the legs for your bench. I bought metal hairpin legs from Amazon which I used as the legs for the bench. However, I needed a board to connect to the bench top and keep those four boards together. Therefore, I made a platform for the legs and screwed the legs into this platform. This platform has made of two 2 x 4s which were the width of the four boards. Below is a picture of how this platform looked.

If you like these metal hairpin legs you can find them on Amazon here:

Heavy Duty Hairpin Legs (Satin Black) – Mid Century Modern – Set of 4 Table Legs

Step 4: Connect the legs to the top of the bench.

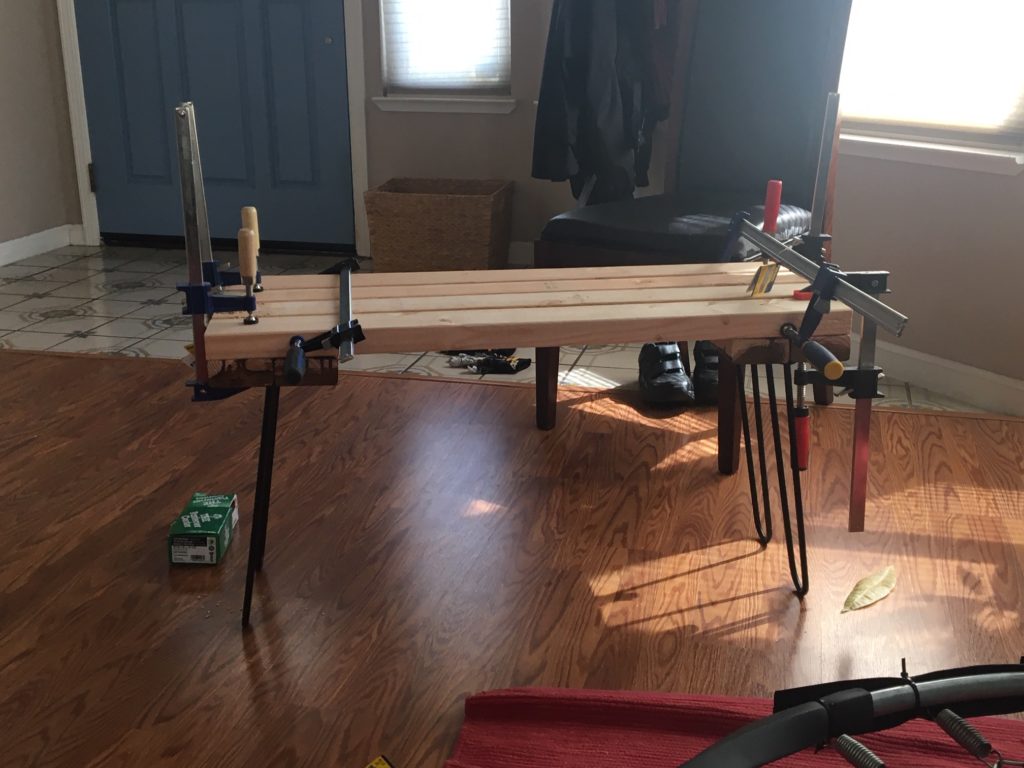
Next step is to connect the legs to top of the bench. I clamped the legs to the bench top and clamped the four boards which composed the top of the bench (six clamps in all) before drilling holes for the bolts to connect the table to the legs.

Here is the bench with the legs clamped on (six clamps in all)

I prefer using bolts with washer and nuts to connect the legs to the top of the bench instead of screws, as the bolts are easier to adjust and provide a sturdier fit.

The bolts I used can be found here on Amazon:

Hillman 812626 1/2X6 Carriage Bolt, 1/2 x 6-Inch

Step 5: Sand and stain (or paint) the bench

This is the final step of the making the bench. I sanded the wood using a random orbit sander until it felt smooth and had no rough edges. Then I stained it using a light brown stain but you could always paint it if you prefer.

And that’s it, you have created a simple but stylish bench!

Posted in DIY projects

DIY Project – Scooter Board Cart

September 26, 2019October 22, 2019 admin

One thing I have created which I think others may find useful is the scooter board cart. At first I made it so my kids would have a “vehicle” to push each other around in. But later it was shown to be useful for other reasons, such as transporting groceries from the front door to the kitchen or transporting other large items throughout the house.

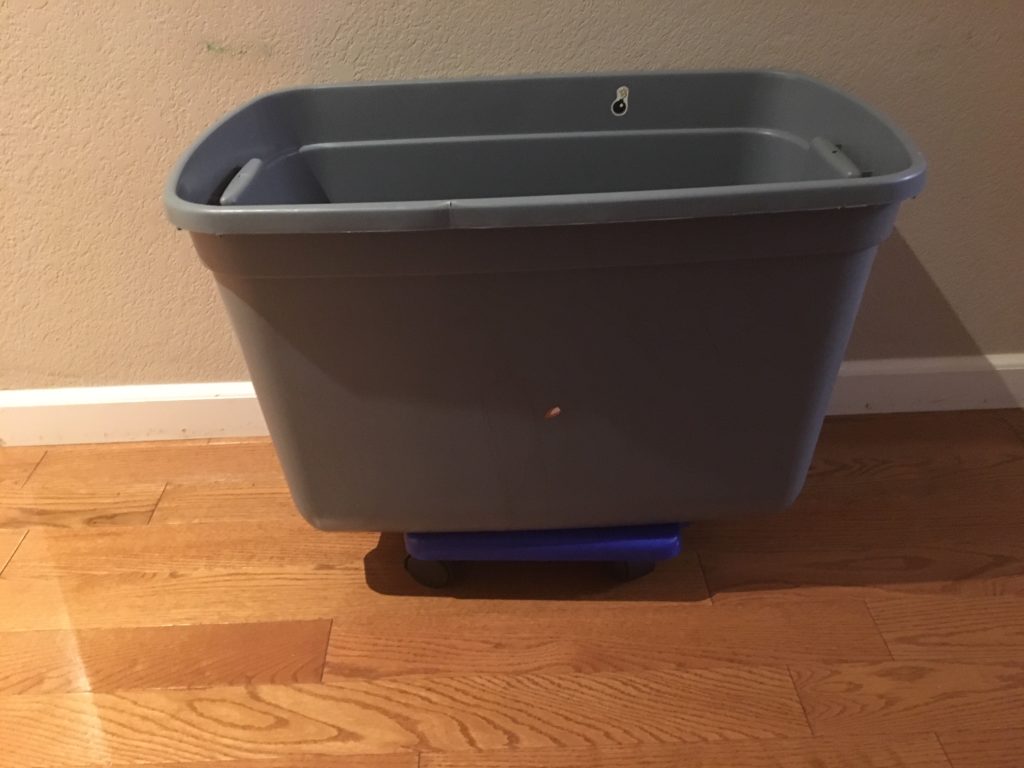
This is how the Scooter Board looks – side view
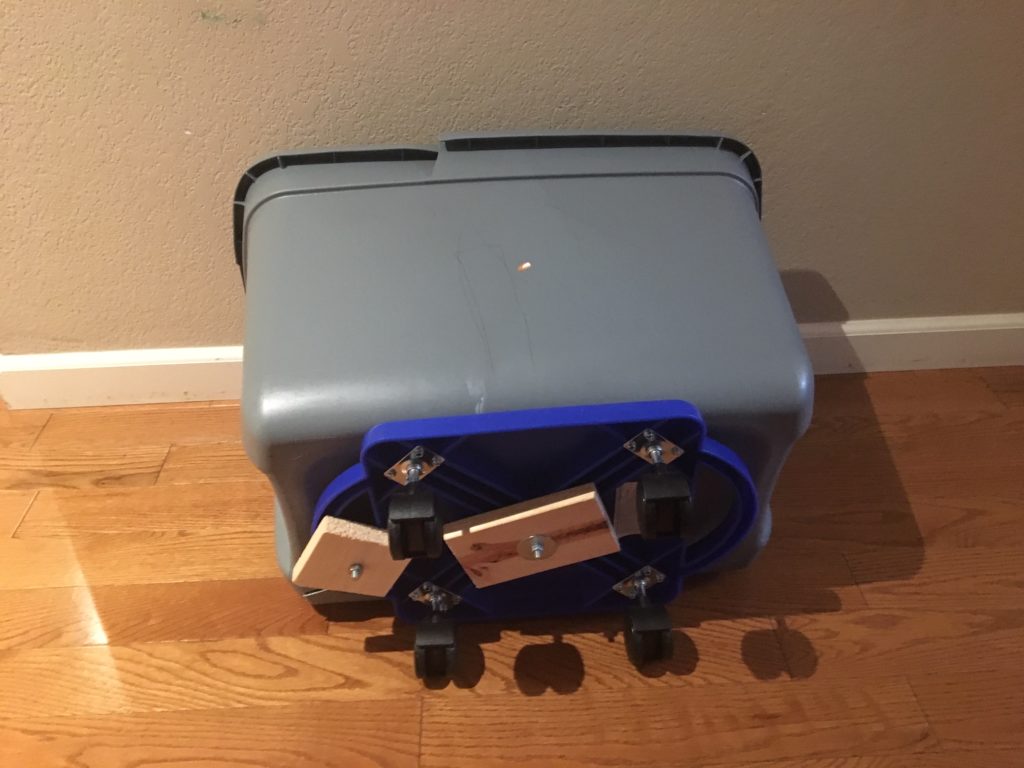
This is how the Scooter board looks – bottom view

The steps to make a scooter board cart are pretty simple. Also, the materials required are only a scooter board, a bin and some bolts, so the materials shouldn’t cost more than $25-$30.

To make the scooter board cart first buy a scooter board. I found the one below on Amazon for $18, see the following link: hand2mind Plastic Scooter Board with Safety Handles for Physical Education Class or Home Use, Blue

Next, purchase a bin to place on top of the scooter board. Then drill two holes in the bin, one to go through the middle of the scooter board and on to go through one of the handles. Try to make sure that the bin is centered on the scooter board so it won’t tip over. Then tighten the bolts and you should be done. The whole project can be done in 15-30 minutes.

Here is a video I placed on YouTube which shows the process of making the scooter board cart from start to finish.

Posted in DIY projects

Posts navigation

Newer posts

Life Hack and DIY Facebook Page

Get more stuff

Subscribe to our mailing list and get interesting stuff and updates to your email inbox.

Thank you for subscribing.

Something went wrong.

We respect your privacy and take protecting it seriously

Proudly powered by WordPress | Theme: x-blog by wpthemespace.com