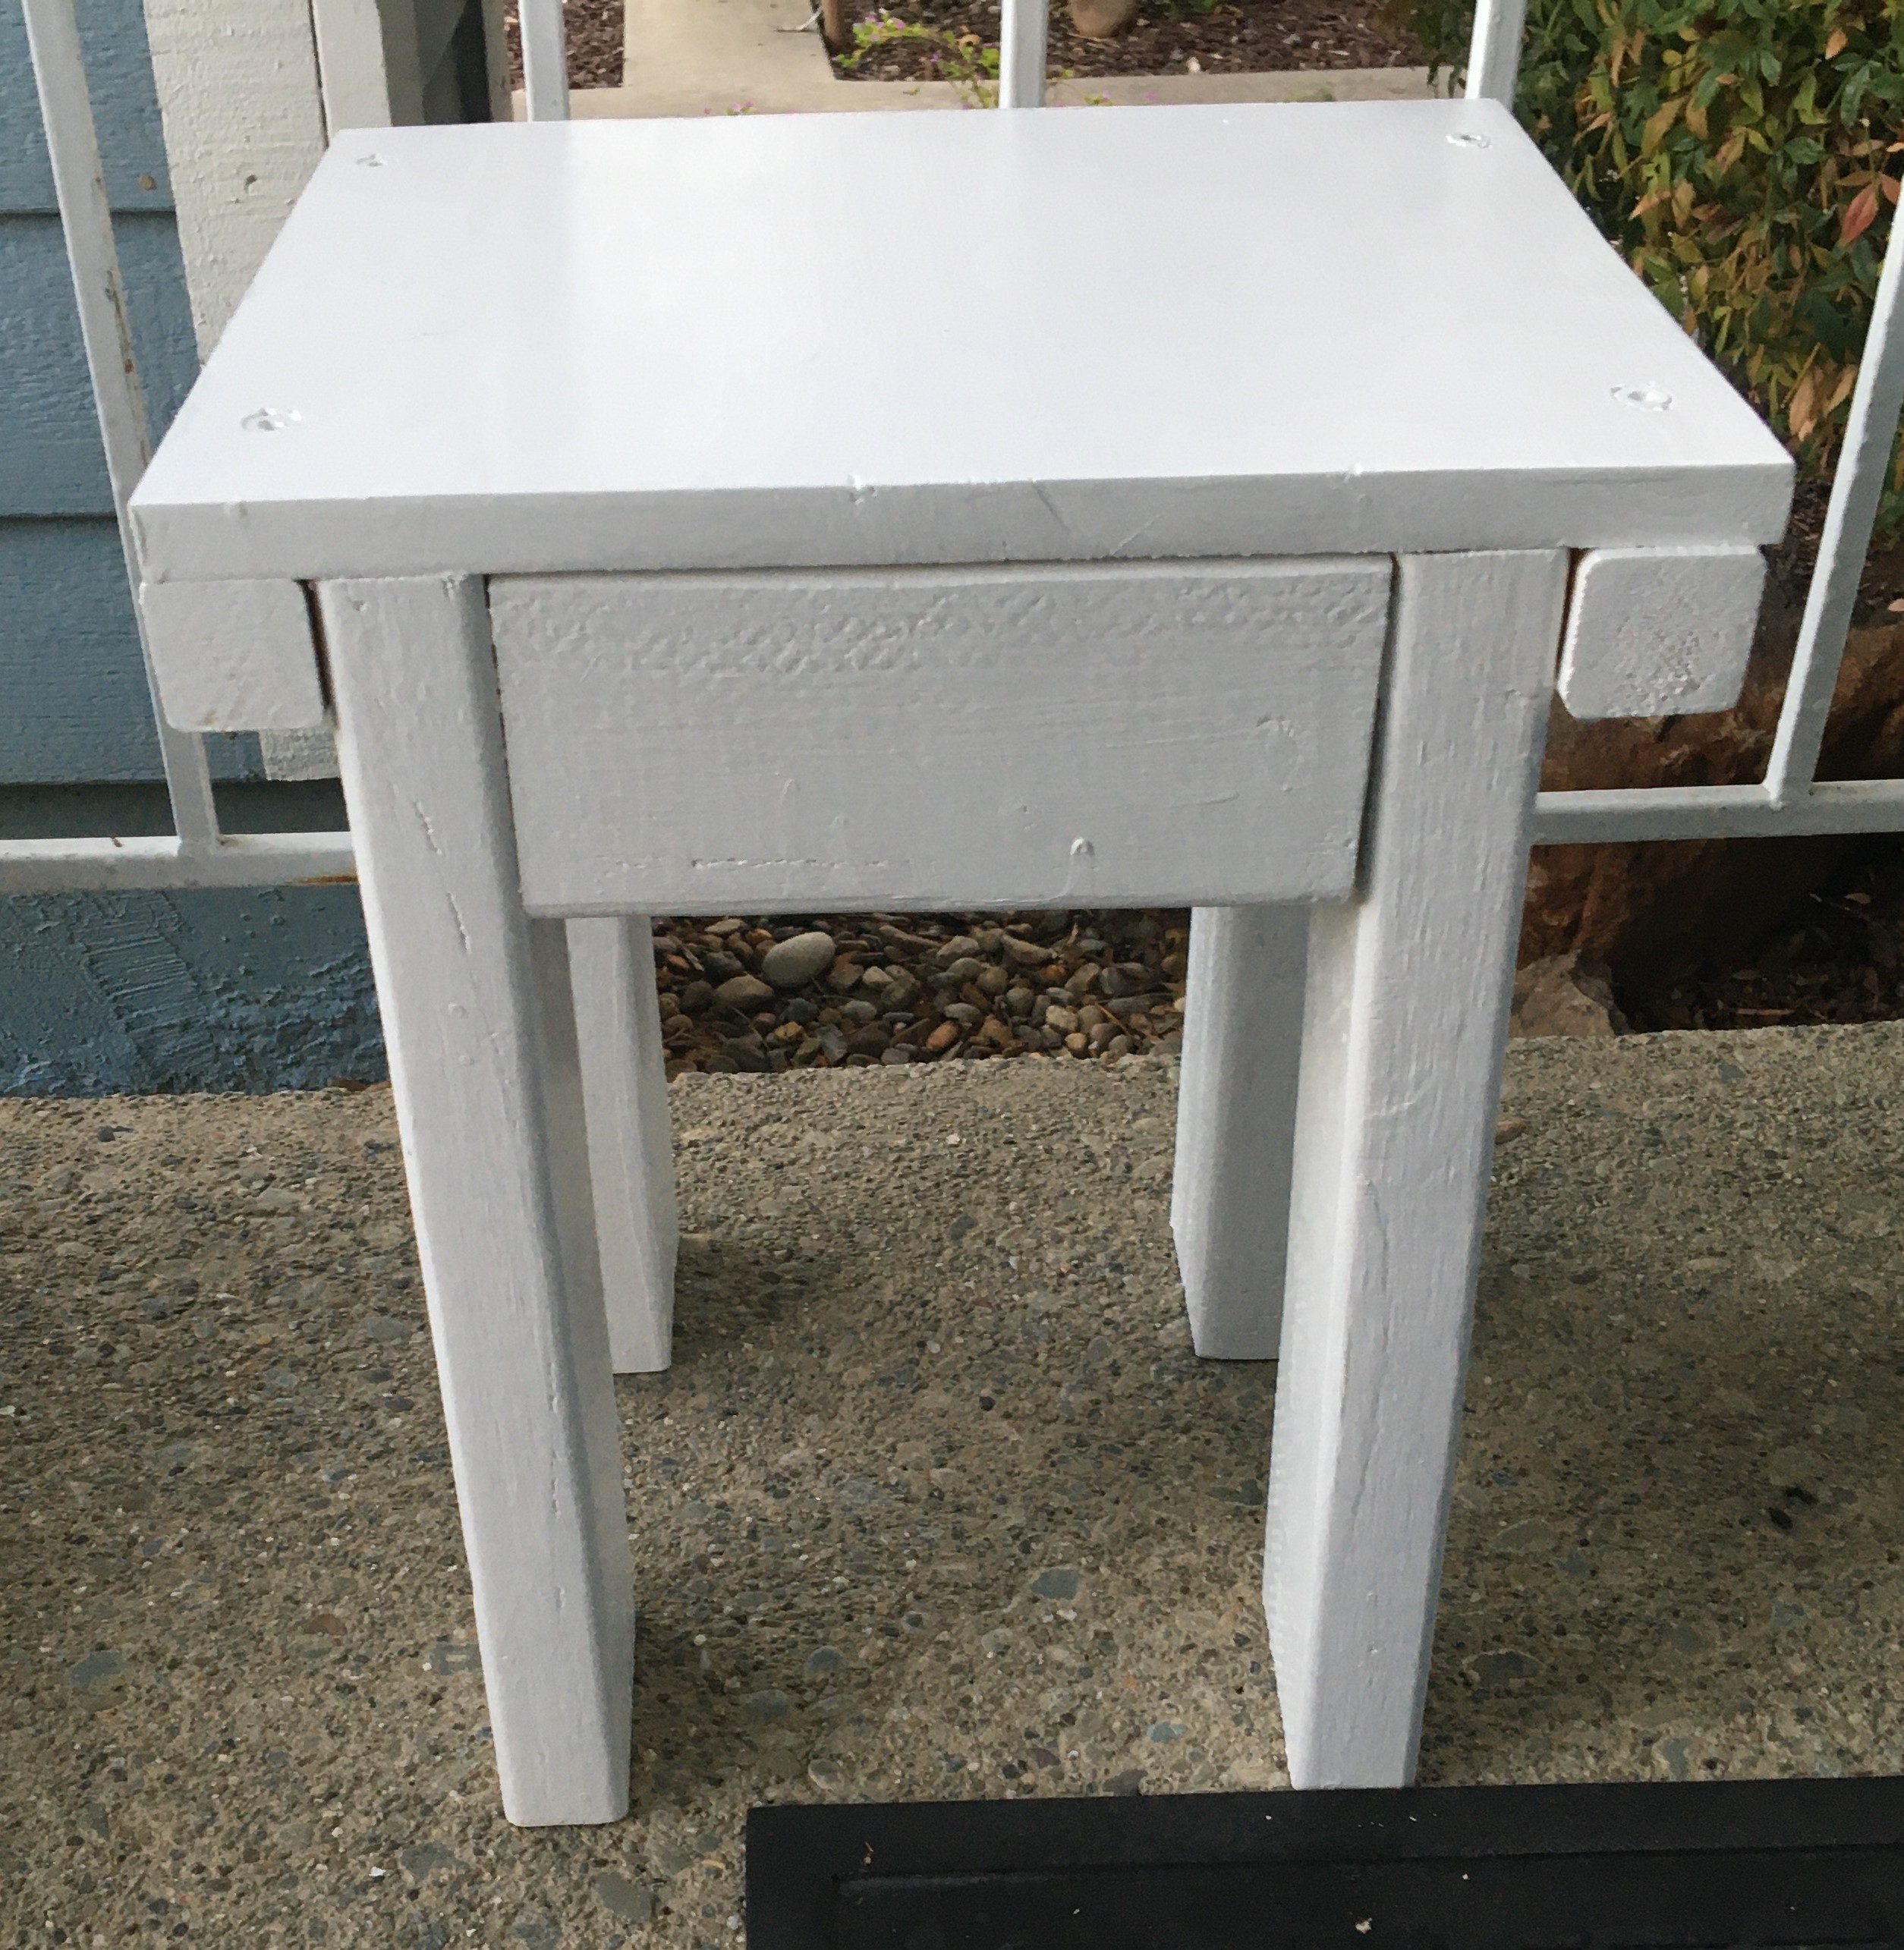
For this project I built a stool for my front porch. I didn’t have any seating in my front yard since I moved the bench off my porch to inside my house to serve as a workout bench. Therefore I decided to make another stool, which could also serve as a chair. I made it the proper height so that you could sit on it comfortably. I didn’t build a chair on its own as the one chair I built didn’t turn out that well as I didn’t arch the backrest. Either way, I prefer stools to chairs since they are more versatile and so much easier to make.
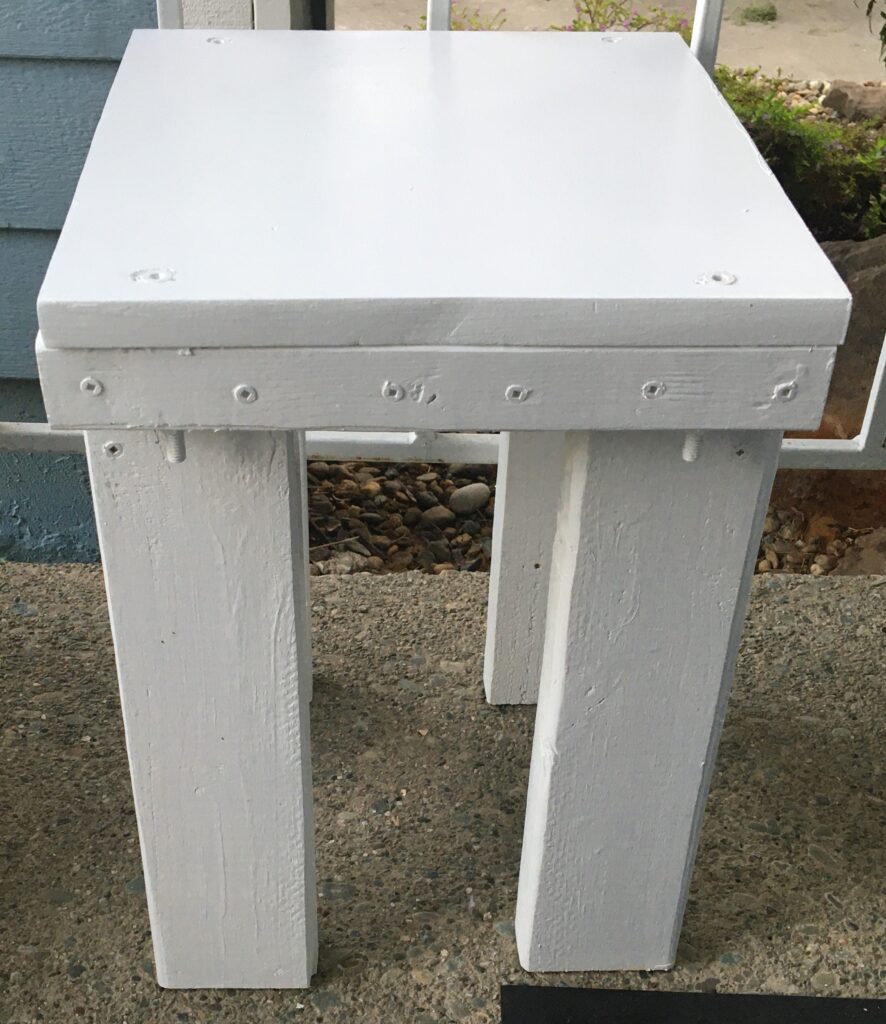
The stool came out pretty well, see pictures below:


Building the stool was pretty simple and consisted of the following steps. Note that before I added any wood pieces I sanded them down first, as it was easier to sand them at that point then after they were connected to the project.
Step 1: Cut the stool top to size. The first thing I did was cut the piece that was going to serve as the top of the stool. This piece was a rectangle measuring 19 inches by 21 inches.
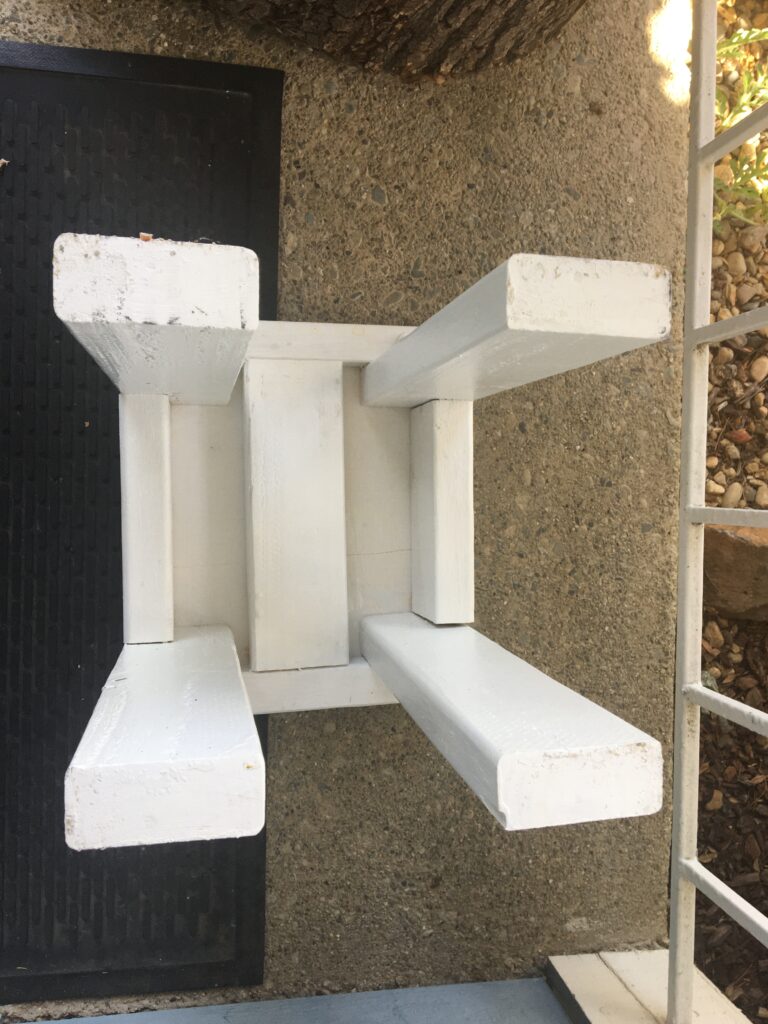
Step 2: Attach the leg anchors. I am not sure what else to call these, I cut two pieces of 1 by 1 to match the length of the stool top. Then I drilled two holes in each 1 by 1 and used a nut and bolt to secure them to the stool top. Note that I counter sinked the holes on the stool top so that the bolts would be flush or beneath the wood so you wouldn’t feel them when sitting on the stool top. These leg anchors are the only things connected to the stool top, all the other pieces (legs and support pieces) connect to the leg anchors and not the stool top.
Step 3: Attach the legs. The legs were just 2 x 4s which I cut to length. Then I positioned the legs to support the table top but attached them to the leg anchors with two screws per leg.
Step 4: Attach the cross supports. To make the stool more stable I added cross supports on the sides of the stool without the leg anchors. These were made out of 2 x 4’s. The cross supports prevented the legs from leaning or the stool otherwise becoming unstable. I also added an additional cross support across the middle of the top board, which you can see from the photo above of the stool upside down. This board was added to support the top of the stool so that it wouldn’t crack or bend if a lot of weight was put on the stool.
Step 5: Paint or stain the stool (Optional): Since the stool was going to be outside I wanted to protect the wood so I decided to paint it. Painting is the thing I like the least when building something out of wood but it is a necessary evil. The paint I used had separated as it was watery at the top, requiring me to get creative to mix the paint well, see more details on how I did this here.
That’s it, the steps to make this stool are pretty simple. It has come in really handy, and due to the thick legs and support beams it is very stable.
See more details on the stool and how to build it in this video: