Skip to content

Life Hack and DIY Lifestyle

  • Things I like
  • Life Hacks
  • DIY projects
  • Home Improvement Basics
  • About Me
  • Resources
  • Lego
  • 3D Printing

Life Hack – Fixing netting with zip ties

July 25, 2022July 29, 2022 admin

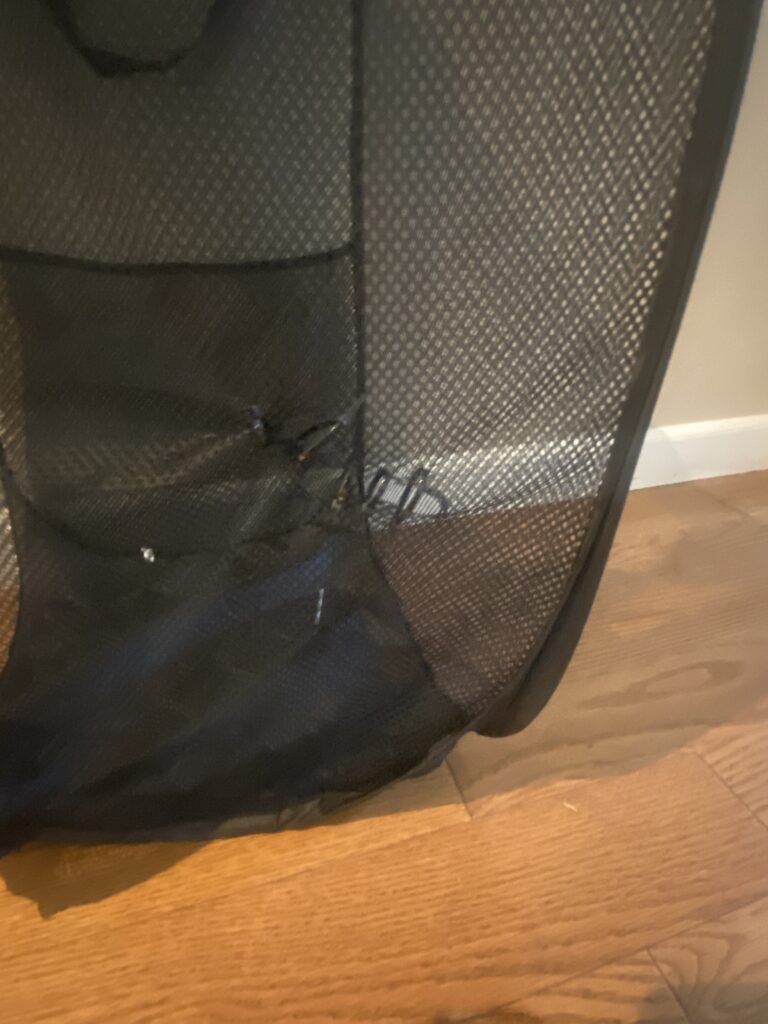
This is an easy life hack for fixing netting or mesh lining. An example would be the netting on the side of a lunch bag for holding a drink in place. My kids had their netting get ripped and I didn’t want to buy a whole new bag so instead I just fixed the netting. So to fix it I used zip ties to keep the netting closed which had been cut open. Its very simple to do as black zip ties are pretty common. The whole procedure is putting a zip tie through the hole and then cut off the excess.

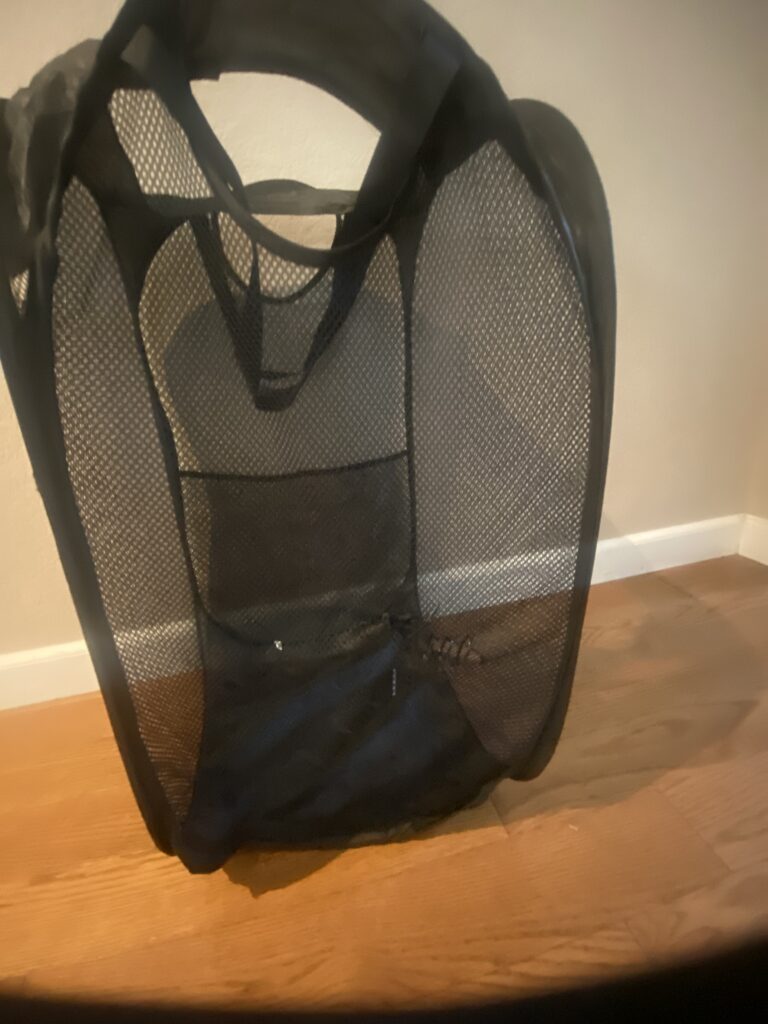
I also recently did this for a laundry bag, see pictures below.

You can see the zip ties fixing the laundry bag in the bottom right.
Here is a zoom-in, you can see how I fixed the mesh with zip ties.

Anyway, this is a simple but useful life hack. You can find more details in the following video:

Posted in Life Hacks

DIY Project- Building a three level printer stand

June 30, 2022June 30, 2022 admin

In this project I built a 3 level printer stand.

This is how it looked when finished:

Here is the finished printer stand.

Here are some details on the finished stand:

-Level 1 was to hold printer supplies. I made this level five inches off the ground. The level itself was 8 inches tall.

-Level 2 was to hold my laser printer. The printer is pretty big and heavy. This level was 13 inches off the ground and was 24 inches tall.

-Level 3 was to hold my 3D printer. The printer is tall but not that heavy or wide. I placed it at the top so that nothing would get in the way of the printer’s height. I made level 3 36 inches tall, as this is the same level as my dresser.

General structure: The general structure of the printer stand is that the four legs would be made by 2 x 4s, and each level would have a horizontal 2 x 4 (or 1 by 1 on the first level) to support a plywood rectangle. The rectangle was almost a square, the dimensions were 22 inches wide and 24 inches deep.

Steps to build it:

  1. Cut the platform pieces to the correct size: This might not have been the ideal first step, but I cut the platform pieces (which were 22 inches by 24 inches) first and based everyone on these pieces. If I had to do it again I would probably cut each platform piece as needed which would allow for the fit of the platform pieces to be more exact. Regardless, my platform pieces were made of plywood. I had a few thicknesses of plywood to use and used the thickest plywood for the laser printer platform as that was the highest piece.
  2. Cut the legs: This was pretty simple, I cut four 2 x 4s to be 40 inches long. The top platform will be 36 inches high so the legs will extend beyond the top platform by about 4 inches.
  3. Build platform one: This platform was 5 inches off the ground. I cut two one by ones to support the platform. I drilled a hole and secured these to the legs with a hex bolt and nut. Then I screwed the platform to the one by one support, using Torx screws. Last, I added one board to each of the sides without the supports. These boards were to keep the legs more stable.
  4. Build platform two: This has the same steps as building platform one except I used a 2 x 4 for the platform support.
  5. Build platform three: This has the same steps as building platform one except I used a 2 x 4 for the platform support.
  6. Sand and paint all the wood: I sanded all the wood (to get it ready for painting), and then I painted everything black.

And that’s it! It took a while to make but I am pretty happy with how it turn out. You can see more details in the following video:

Posted in DIY projects

Strengthening a bookcase which was falling apart

June 2, 2022June 25, 2022 admin

This is a simple project where I renovated / fixed a bookcase. The bookcase was old and had the following problems:

  1. The shelf was sagging
  2. The top was sagging
  3. The sides were drifting apart

The sides drifting apart made me wory the whole thing might collapse. I decided to strengthen it by screwing in a permanent shelf. For this shelf I used a thick board I had lying around, which I painted black.

I screwed it into the bookcase, using the holes for the existing bookshelf stoppers. This extra board made the whole bookcase feel much more secure. I think that now it will last many more years. See details in the following picture:

This is how the bookshelf looked after adding the permanent shelf.

This was really easy and a great way to add extra life to the bookcase. If I have similar issues with my other bookcases I will do the same thing. See more details in the following video:

Posted in DIY projects

Renovating a dog house

May 14, 2022June 2, 2022 admin

In this project I took an old dog house I found on the street and made it look like new.

This is how the dog house looked before I fixed it up

The dog house was in relatively good shape except for the following three things:

  1. The roof was falling apart
  2. The paint was dirty and faded
  3. The roof hinges were falling apart

The first thing I did was make a new roof, using the existing roof frame but replacing the rest of the roof. Next I sanded all the wood down to remove the dirt and get the wood ready to be painted. Then I replaced the hinges with some door hinges I had lying around.

Next I gave the dog house a fresh coat of paint. This is how it turned out, I am pretty happy with the result:

This is how the dog house looked after fixing the roof and giving it a new coat of paint.

You can see more details in the following video:

Posted in DIY projects

Things I like – wood filler

April 30, 2022April 30, 2022 admin

One useful item I like is wood filler. It is like a cement which you can use to fill in cracks or gouges in wood. Application is easy, you just spread it around with a putty knife. Once it dries you can sand it and paint it.

This is an example of what wood filler looks like,

Wood filler is very useful and easy to use. You can see more details in the following video.

Posted in Things I like

Life Hack – Making your own compost bin

March 15, 2022June 25, 2022 admin

This is a really simple life hack. We have lots of leftover food bits after cooking and eating. We have a compost bin which we got from the garbage company. However, the bin had three main problems.

  1. The bin was small and would need to be emptied almost every other day.
  2. The bin was not airtight, so it would attracts fruit flies and other bugs.
  3. The bin wasn’t very stable and would get knocked over easily, spilling everything inside.

Therefore I made my own compost bin as shown below:

This is the compost bin I came up with, it is about 10 inches by 16 inches.

I made my own compost bin which fixed these problems. First, I found a good sized plastic bin with an attaching lid which would latch on. Then I bought extra large compost bags on Amazon. You can get 9 gallon compost bags (equivalent to a tall kitchen garbage bag) for about 10 cents on Amazon. Simply use these compost bags in the plastic bin and you have your own large air tight compost bin.

See more details in the following video:

Posted in Life Hacks

DIY Project – Making your own dog food and water bowl stand

March 4, 2022June 25, 2022 admin

In this simple project I made a stand for my dog’s food bowl and water bowl. This is how it looked.

It was a really simple project. First I took a wide flat board, about 12 inches by 20 inches. Then I cut some legs from a 2 x 4 to be two inches wide. Next I screwed the legs into the board, sanded everything, and then painted everything. That’s was basically it. The stand is useful as it raises the bowls off the ground so they are less likely to be stepped on or knocked over. Also, if there is a spill if will be easier to spot.

Here is a video which provides more details.

Posted in DIY projects

Life Hack – Build your own extra long ceiling cleaner.

February 26, 2022June 25, 2022 admin

In this life hack I build my own extra long ceiling cleaner. I needed to clean spider webs from my ceiling which are over 20 feet high.

To build the cleaner, I attached a standard cleaner to a board by drilling through both and attaching them with a screw and some velcro strips. Then I attached additional boards with screws to make it even longer. The finished product is about 10 feet long, as shown in the picture below.

Here is how the finished product looked for building the extended ceiling cleaner

More details are in the following video:

Posted in Life Hacks

Using a crayon as a candle

January 24, 2022January 25, 2022 admin

This is a simple life hack, but if you are desperate you can use a crayon as a candle. I personally have tested this out and it does work.

Here is an how a crayon looks as a candle. Impressive flame size!

However, two things to know are:

  1. It takes a while for a crayon to start burning (about a minute). I think the paper on the crayon helps so cutting the top of the crayon off might make the process faster.
  2. The crayons do not burn long. In my test the crayon burned out in 10 minutes and when I tried again it burned out in 15 minutes

See more details in this video:

Posted in Uncategorized

The Beauty of Binder Clips

January 3, 2022January 16, 2022 admin

In this post I go over some of the many uses of binder clips. I love these versatile items, second only to velcro strips (see more about velcro strips here).

Use 1: Securing trash bags to the trash can. If you have ever had your trash bag collapse in the trash can, you know how annoying this can be. Use binder clips to secure your trash bag to the trash can and this will never happen again.

The trash bag will always stay in place when secured by binder clips, as shown in the photo above.

Use 2: Closing an opened food bag (like a Chip Clip). Once you open a bag of potato chips or something similar you might just fold it, or use a rubber band, or maybe even use something like a chip clip. However, using a binder clip to keep the bag closed works great! And binder clips are much cheaper than a Chip Clip.

Here I am using a binder clip to keep this bag of rice closed (after I have opened it).

Use 3: Hanging up artwork (or other light things). Often I will want to hang up something my kids made in school, but don’t want to tack or nail it up as this will damage the artwork. So instead I use binder clips to hang up the artwork. This has the advantage of not damaging the artwork and it can still be hung up on a nail.

Here is an example of how you can use a binder clip to hang up artwork / kids papers etc. without damaging the artwork or having to put up more nails.

Use 4: Organize cords: Binder clips can be used to organize cords (as shown in the following picture). However, I think using a velcro strip is a better option.

Here is an example of using a binder clip to organize cords.

Here is a video talking more about the beauty of binder clips.

Posted in Life Hacks

Posts navigation

Older posts
Newer posts

Life Hack and DIY Facebook Page

Get more stuff

Subscribe to our mailing list and get interesting stuff and updates to your email inbox.

Thank you for subscribing.

Something went wrong.

We respect your privacy and take protecting it seriously

Proudly powered by WordPress | Theme: x-blog by wpthemespace.com