Skip to content

Life Hack and DIY Lifestyle

  • Things I like
  • Life Hacks
  • DIY projects
  • Home Improvement Basics
  • About Me
  • Resources
  • Lego
  • 3D Printing

Life Hack – Motion Light Sensor in the Garage (or elsewhere)

May 16, 2020May 18, 2020 admin

One issue I have run into is that when I park my car in the garage at night, I have to fumble around in the dark to find the door to the house and end up tripping on various obstacles.

I had to think of a way to have a light turn on when I pull into the garage (other than the garage door light which doesn’t stay on long enough and is not very bright).


The solution I came up with was to install a motion sensor light in my garage. The one I used was the Mr Beams light, which is battery operated, and therefore has the advantage of not needing a power supply line.  In my experience the batteries last 6 months or more before they need to be replaced.


Here is a pic of what it looks like. This brand is Mr. Beams and it can be found on Amazon through the following link: Mr. Beams MB380, 400 Lumen Version, Weatherproof Wireless Battery Powered Led Ultra Bright Spotlight with Motion Sensor, 1-Pack, White


One downside with this light is that it is a little too heavy to stand on its own, so it needs to be secured to something to prevent it from falling over.  This was pretty easy to solve, I just screwed it into a piece of a 2 by 4 for stability, see picture below.  Now I can move it anywhere I want with ease.

The light can be used anywhere obviously, not just the garage. You could use it in your backyard or elsewhere, and it does have a mounting bracket to mount to walls if needed. There are more details in the following video.
Posted in Life Hacks

Ikea table: main ingredient = Cardboard!

May 15, 2020May 15, 2020 admin

This isn’t really a think I like, but it is something I think is interesting.  If you ever have gone to Ikea, you are probably impressed by their prices and have a sense that the quality of some of the furniture isn’t that great.  The following story explains why Ikea can keep their prices so low.

A few days I was going to use the table top of an Ikea desk for other wood working projects.  The plan was to cut the table top into pieces, essentially making boards out of the table top.  However, I noticed the table top felt very light, even though it appeared to be made out of wood. 

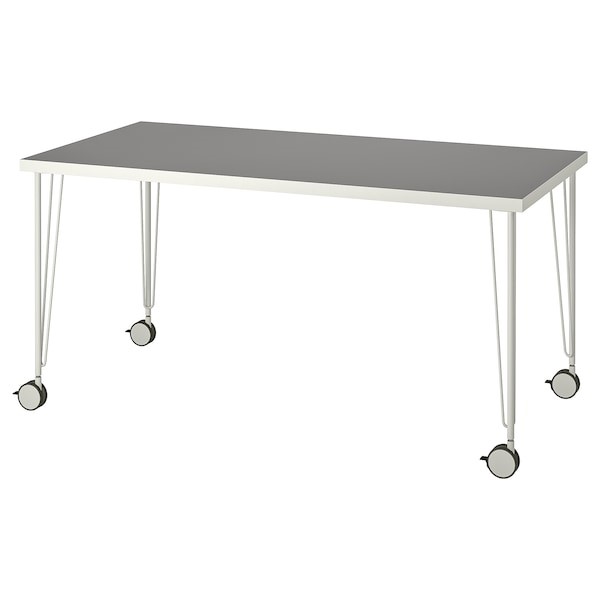
Here is a typical Ikea table.

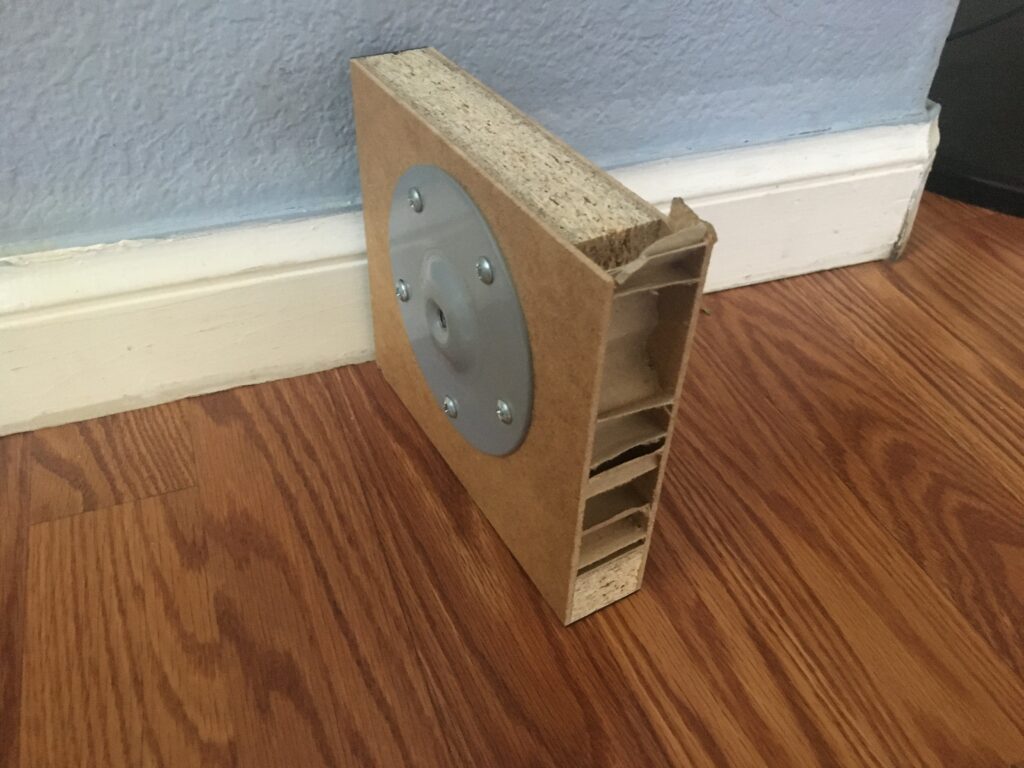
To test it I cut off a corner piece of the table to see the wood inside.  I was pretty surprised by what I found.  As shown in the picture, the corner piece is particle board where the leg connects to the table.  Particle board is cheap, heavy and brittle but at least it is real wood.  The surprising part was what the rest of the table is made of.  As shown in the picture, the rest of the table top is plywood on the top and bottom with cardboard as the filler in the middle.  That’s right, the majority of the table top is made of cardboard! 

You can see the particle board of the left and the cardboard on the center and right.
The cardboard from another angle.

You can see in the photo the leg bracket which is support by particle board and the cardboard sticking out for the rest of the table.  I was pretty shocked, the table was more cardboard than wood.  I will probably still shop at Ikea but will be much more wary of the durability and quality of the products.

Posted in Uncategorized

Life Hack – The Ideal Car Trash Can

May 9, 2020May 9, 2020 admin

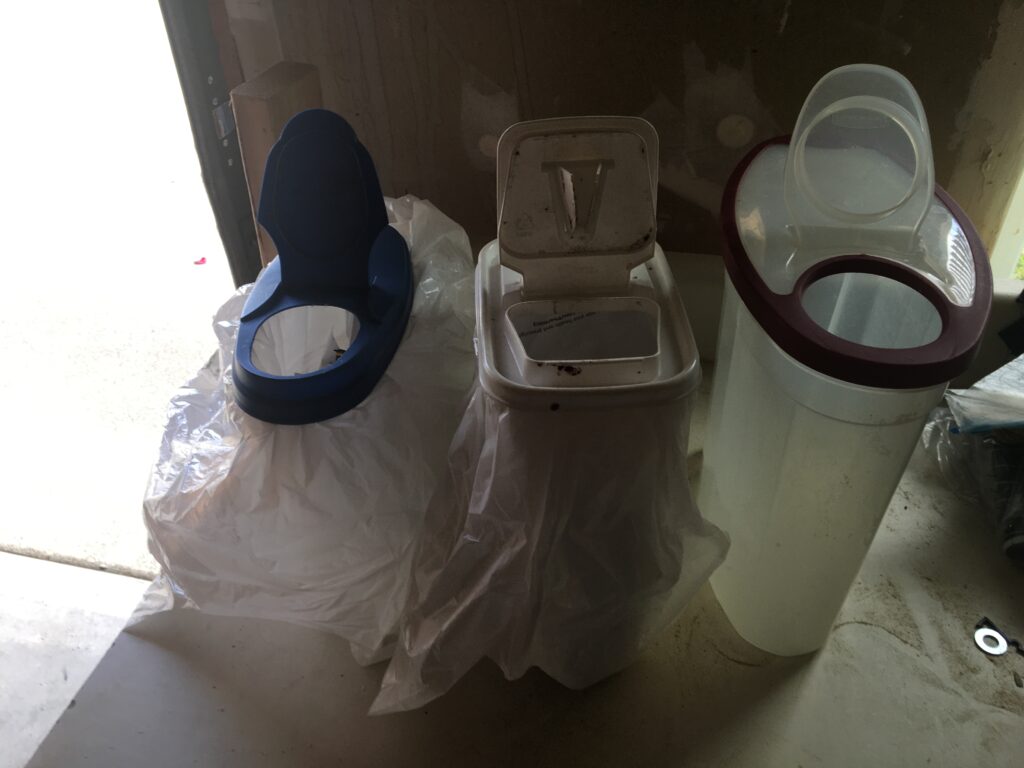
This is an easy life hack but it is super useful. I used to have a standard trash can in my car, but it had the issue of falling over and the trash spreading out on the car floor when I made sharp turns. However, the solution to this issue is very simple. Instead of using a typical trash can, you can use a cereal container with a lid. This way the trash will be contained and won’t spill anywhere as the lid will keep everything contained. Also to make clean up easier line the cereal container / trash can with a small garbage bag. Below are some trash cans ideas:

The left two are my actual trash cans while the right is a potential option

Here is a video describing the ideal car trash can in more detail.

Simple idea but this is probably the most useful life hack I know of.

Posted in Life Hacks

DIY Project – Building a Wooden Stool which can serve as an extra seat

April 30, 2020May 2, 2020 admin

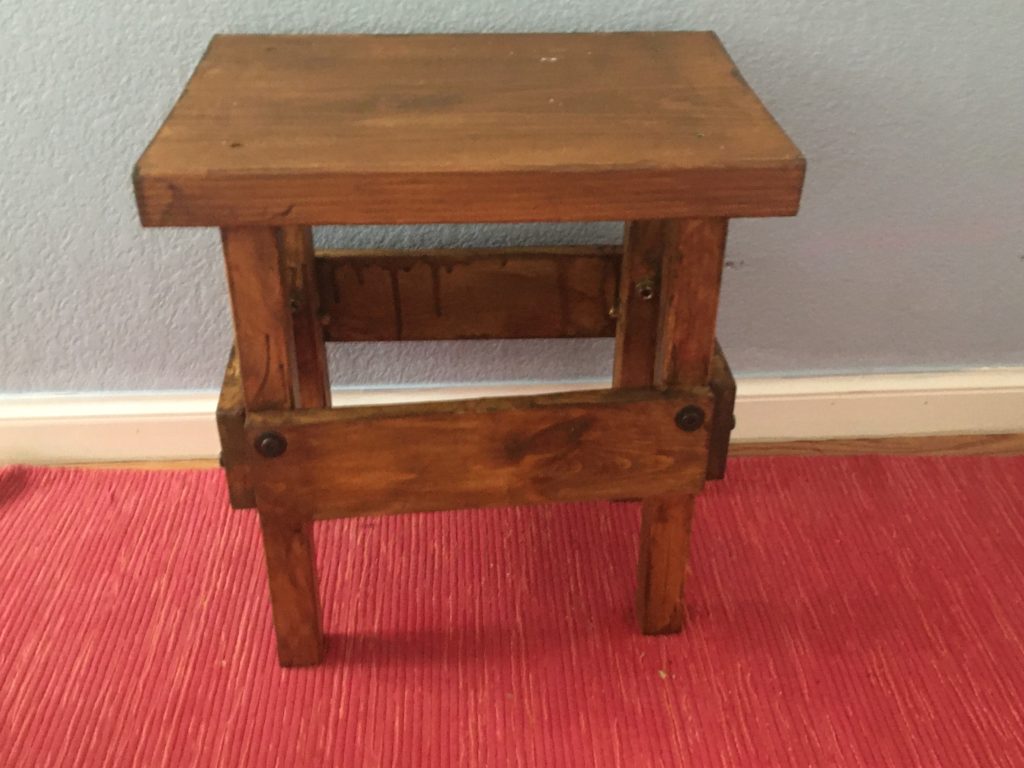
In my house we have several small kiddie stools, but none of them were tall enough for my kids to reach the top shelves. This resulted in my kids climbing on the counters or unsafely manipulating the existing stools to reach what they wanted. Also, we would often run out of seating. Therefore, I decided to build a tall stool that would be high enough for the kids, while also being wide enough to serve as a seat it needed. This is what the result of the project looks like:

The steps to build the stool are as follows. Also, I would sand each piece before attaching it, as that will be much easier than sanding the stool once all the pieces are attached.

Step 1: Cut the stool top to size: For this step I already had a board which was 11 inches wide so I only needed to cut the length. The length I used was 16 inches, which is only a few inches lower than the average chair height.

Step 2: Cut the legs to length: The legs of the stool I made were 16 inches long and were made by 1 x 1s. Note that my legs were extra long to help my kids reach things and also so that the stool could serve as a seat if needed. If the legs were short (say 12 inches) it would be too low to the ground to serve as a seat.

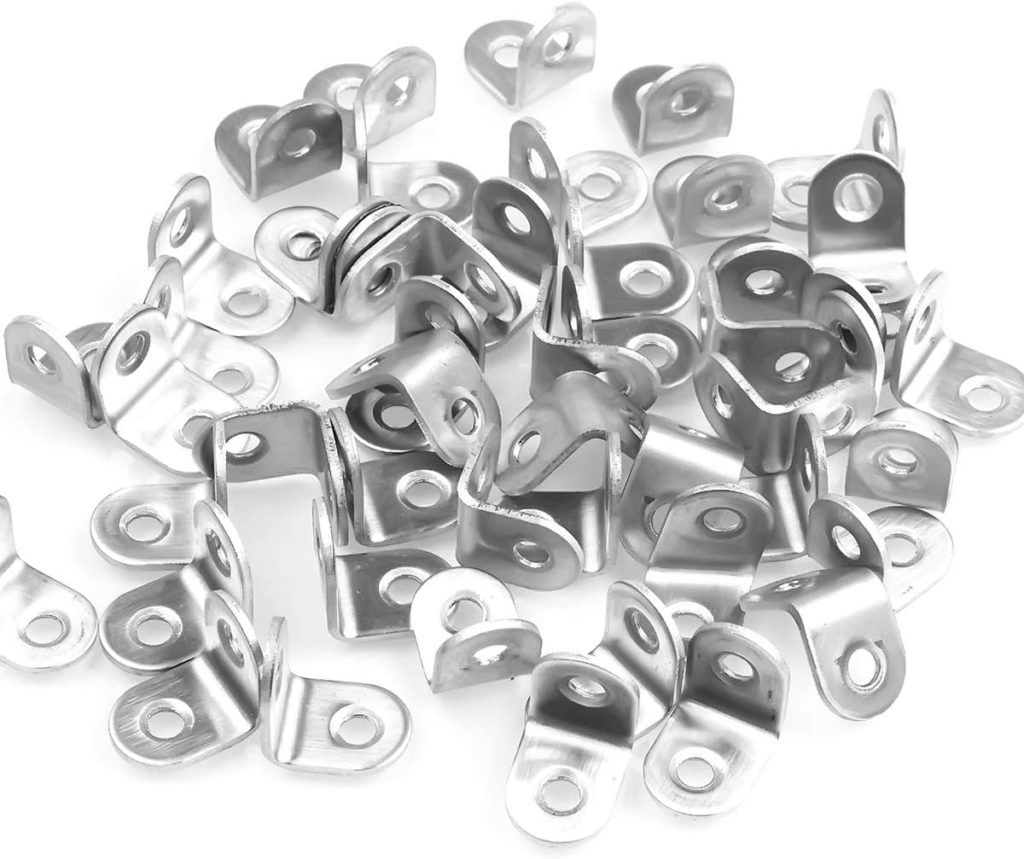
Step 3: Attach the legs to the stool top: To attach the legs to the stool top I used one torque screw per leg for the initial connection. I made each leg be one inch inward from both edges of the stool top. I knew the legs would be very wobbly with just one torx screw, so I added one bracket per leg which screwed into the leg and the stool top. These brackets are very small but are pretty useful. You can get 50 of these on Amazon for $10, they can be found on Amazon here: https://www.amazon.com/gp/product/B079BYC2S4/ref=ppx_yo_dt_b_search_asin_title?ie=UTF8&psc=1

These are the brackets I used in building the stool

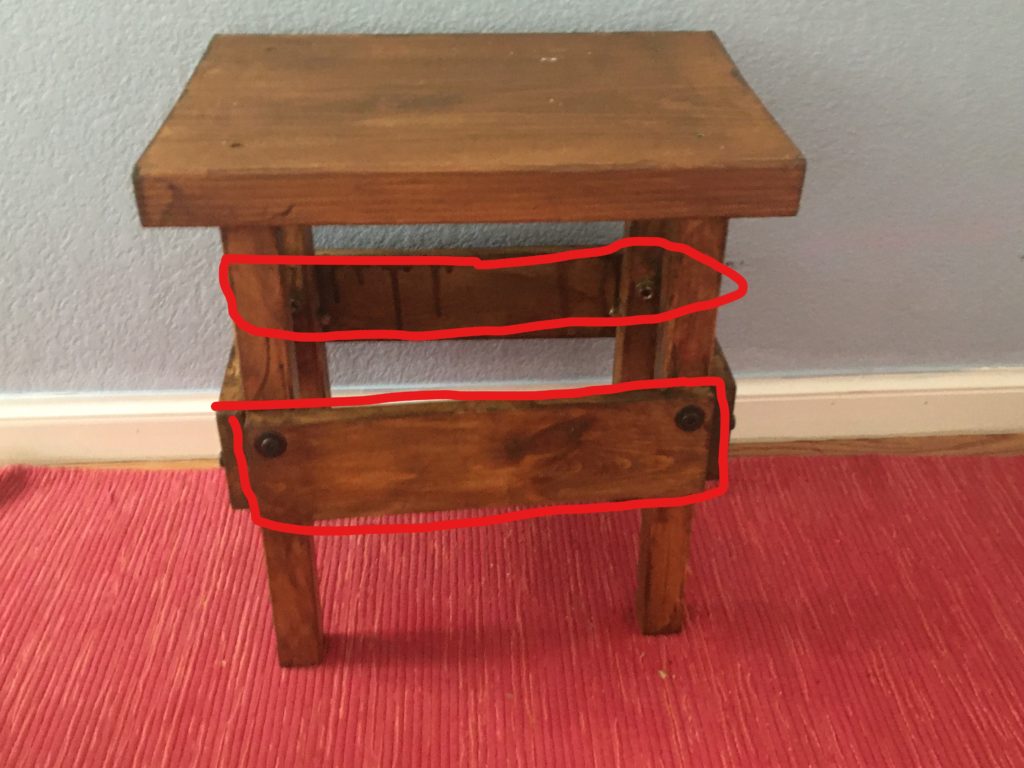
Step 4: Add cross boards to the legs to add stability: I added four cross boards to the legs to add stability to the stool. While the brackets helped, the cross boards were needed to really make the stool feel stable. Each cross board was held in place by a bolt and nut. Make sure that the bolts were at different heights so that they do not hit each other.

In this picture I have circled the cross boards.

Step 5: Stain or paint the stool: I decided to stain the stool, but the last step would be to apply some kind of stain or paint to protect the wood.

That is basically it, the steps to make the stool are pretty simple. The follow video shows all the steps described above and also provides some additional details.

Posted in DIY projects

Free $500 life hack (time sensitive)

April 27, 2020April 27, 2020 admin

This life hack can result in you getting up to $500 for free. Capital One currently has a promotion where they will give you a $100 cash bonus for every $10,000 you deposit in a new 360 Performance Savings account, with the maximum bonus being $500. Details on how this work are in the chart below.

The promotional code to get the bonus is SCORE500.

A few other things to note:

-The deal expires on May 31, 2020

-You must maintain your balance for 90 days to get the bonus. For example, to get the $100 bonus your balance must be $10,000+ the whole 90 days.

-If you had a bank account with Capital One on or after January 1, 2016 you are ineligible for the cash bonus.

The deal is really simple and it is easy to meet the criteria if you have extra money in the bank. Also, I called Capital One and confirmed the deal is still in place. So go put your money to work and look into this deal!

Posted in Life Hacks

Things I like – Razor blade holder

April 22, 2020April 23, 2020 admin

Eventually during your DIY journey you will encounter a situation where you will need to use a razorblade. Maybe you will need to scrap something of a granite counter, scrap something off glass, or some other situation. The thing is holding a razor blade with your hand is a risky proposition, as it is very easy to accidentally cut yourself.

This is where a razor blade holder comes in. The razor blade holder lets you secure the razor blade, allowing you to use the razor blade while minimizing the risk of accidentally poking or cutting yourself. Also, often they come with a cover, further reducing the risk on an accidental cut. Lastly they are relatively inexpensive, usually $5-$10.

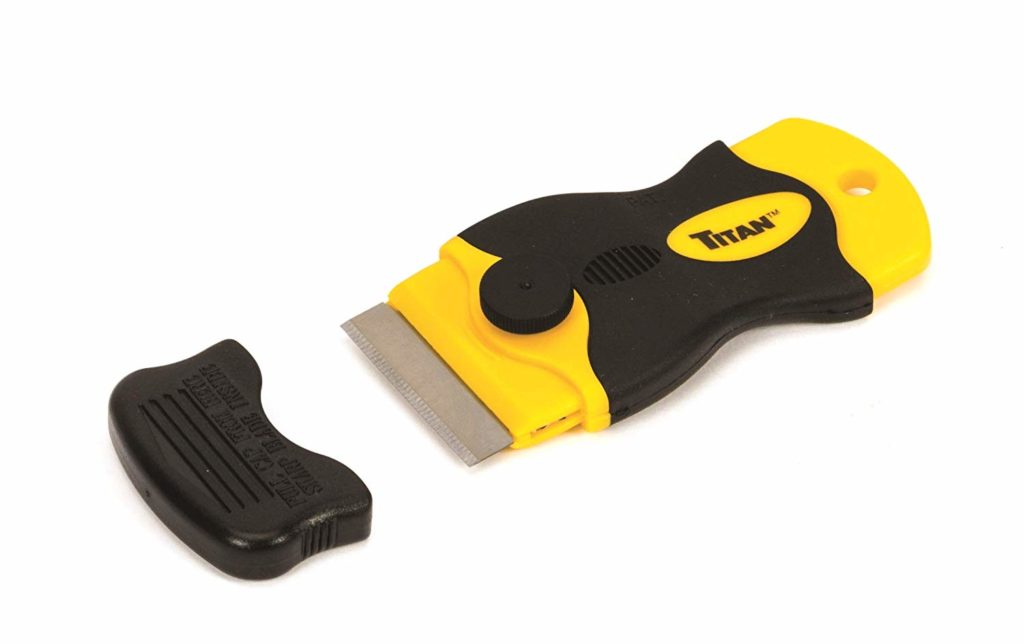
Here is an example of a typical razor blade holder. Note the cap to cover the blade while not in use.

A good razor blade holder can be found here on Amazon here:

Titan Tools 12031 4-Inch Mini Razor Scraper | Includes 1 Extra Heavy-Duty Razor Blade

These razor blade holders have a lot of uses. One of the best uses is scraping things stuck on glass (things caked on your windshield or even your shower door). Also, you can use them to scrap of paint or other uses, basically anything where you need a thin but stiff edge.

In the following video I talk more about the razor blade holder and show how to use a razor blade to remove hardened soap scum on a shower door.

Posted in Things I like

Full size Lego Man!

April 19, 2020April 19, 2020 admin

For this project I (along with my kids) made a full size Lego man made out of Lego. We made the head out of yellow Lego (the interior which can’t be seen wasn’t yellow though). For the rest of the body we just used whatever Lego we had available as we didn’t have the Lego sorted by color. I didn’t have any good Lego to serve as the hands, so the arms and hands are a little clunky. Overall I am pretty happy with how it turned out!

Here is the finished Lego man

Here is a video summarizing the Lego man and how he was built.

Posted in Lego

Life Hack – Free Hardware from things you throw away!

April 17, 2020April 17, 2020 admin

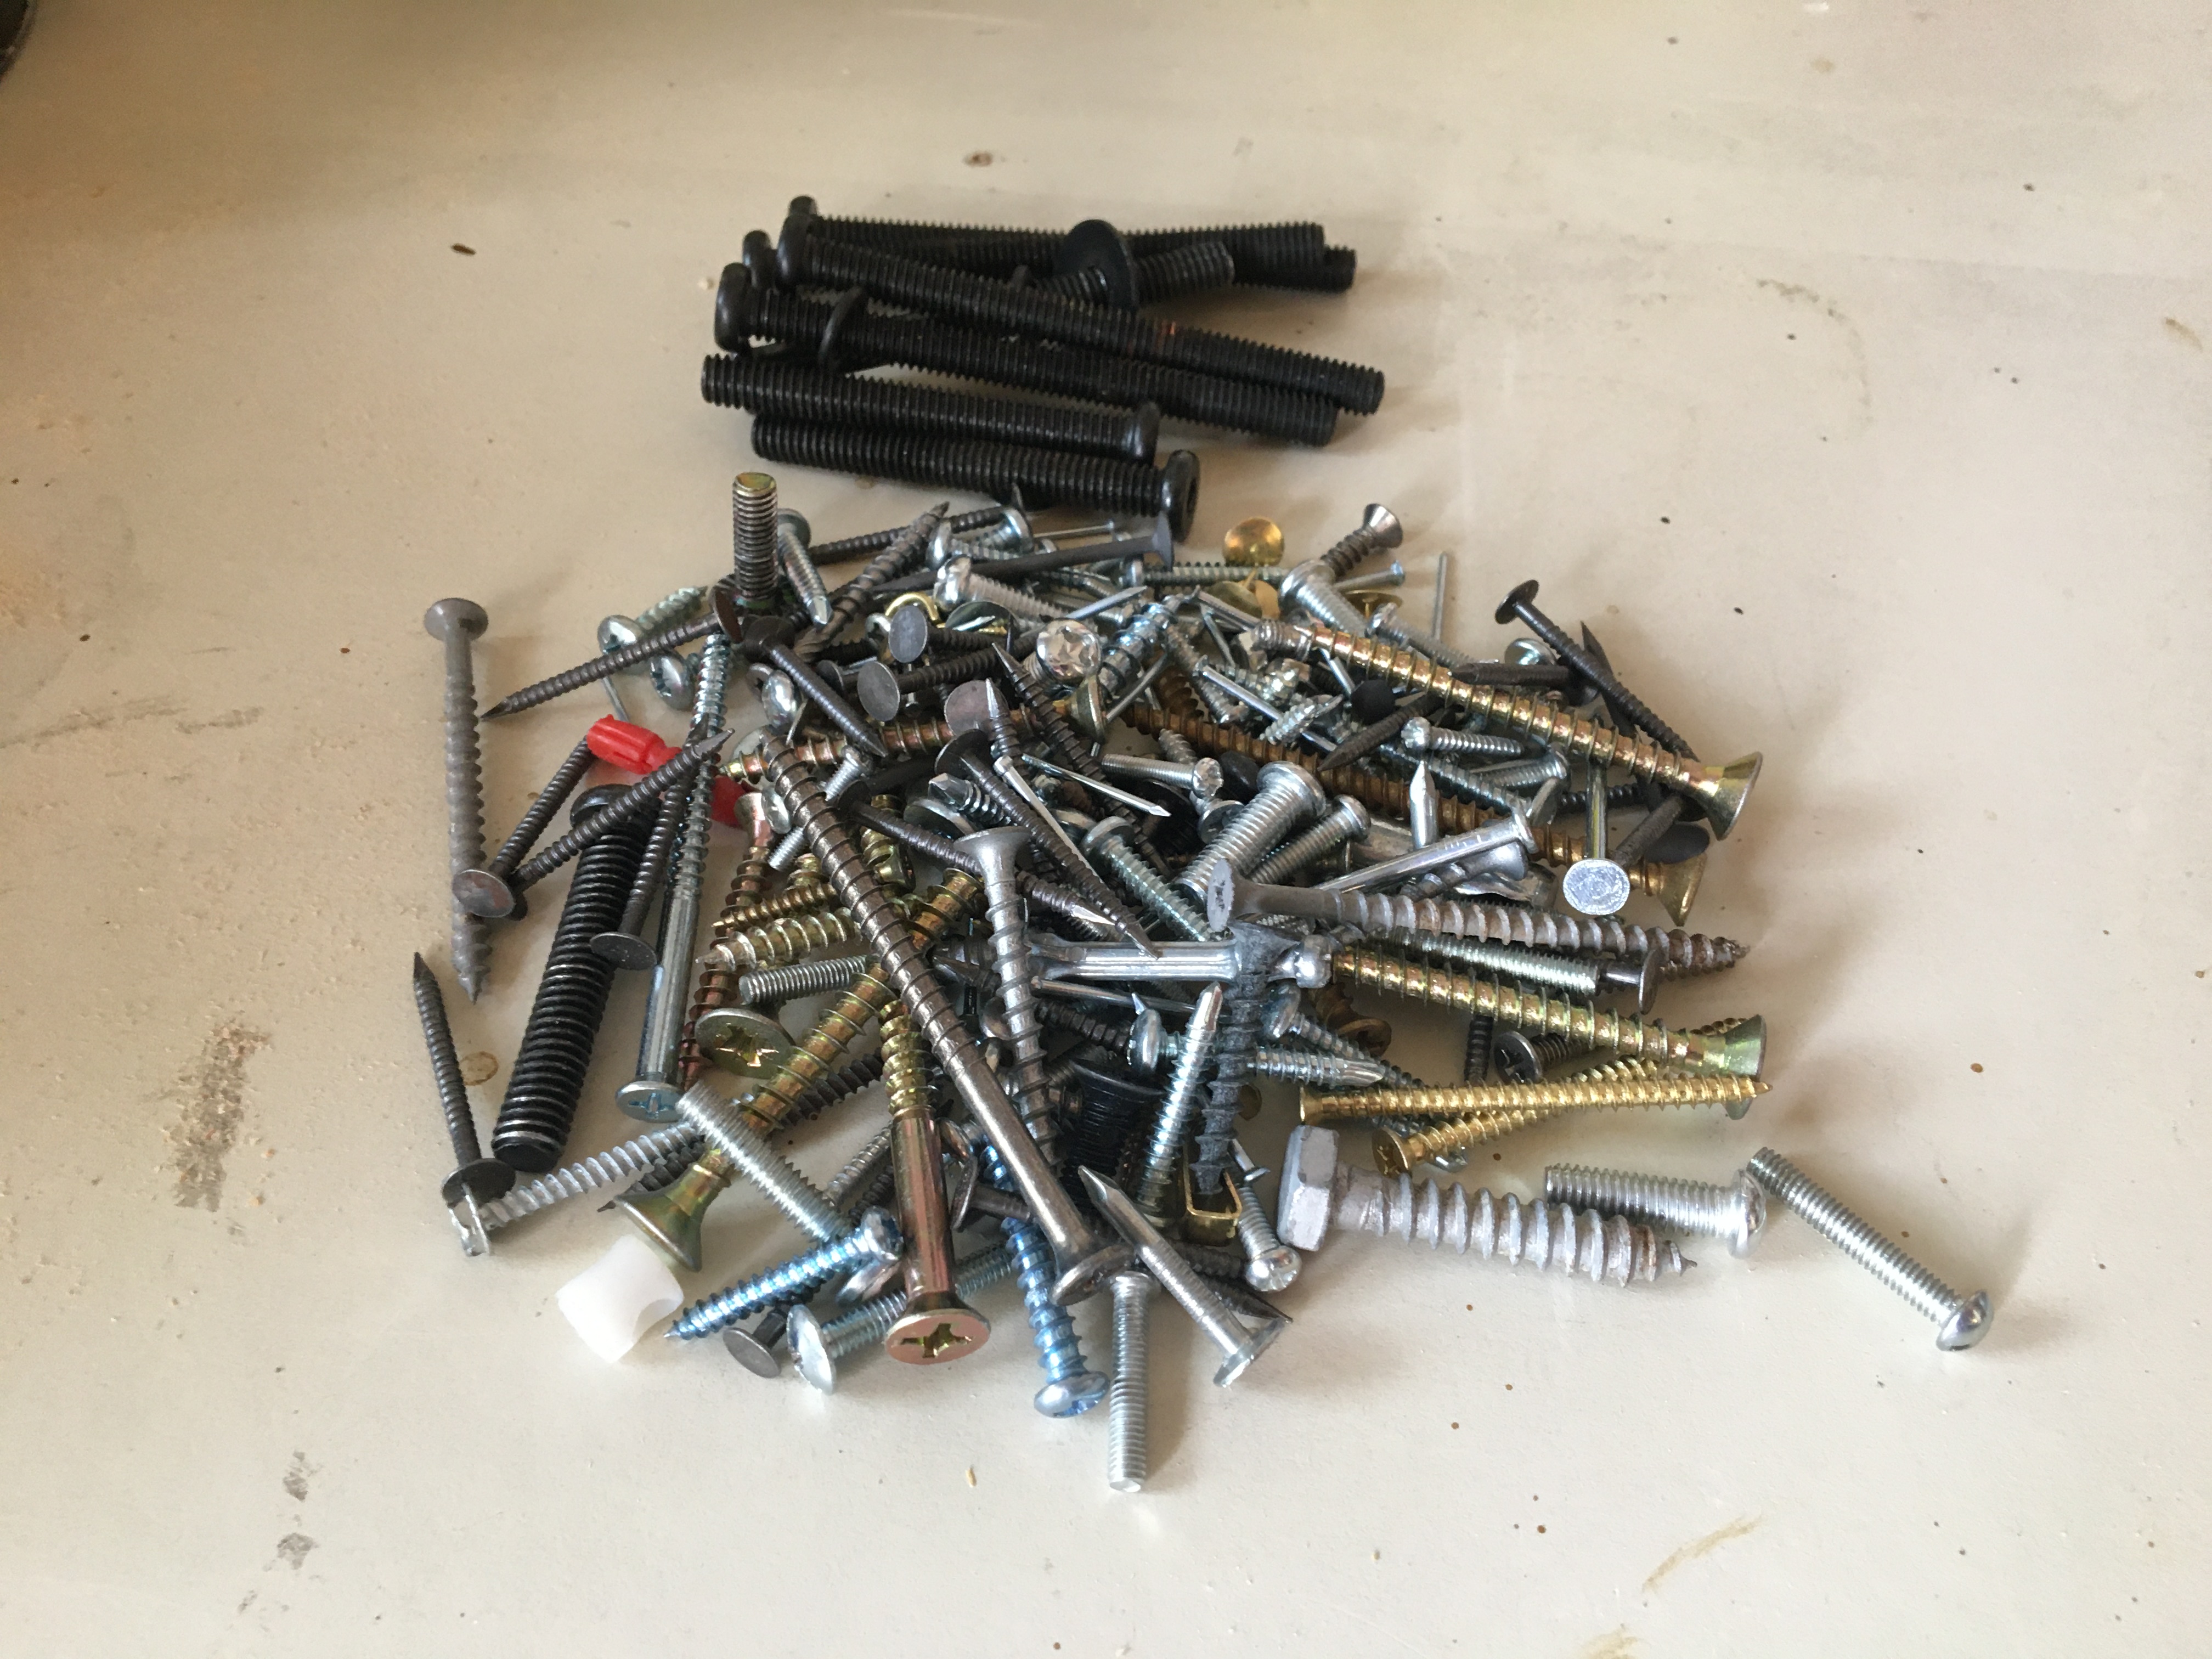
This is a pretty simple life hack but one I thought was worth pointing out. Whenever I am about to throw away any furniture, electronics or other things which might have bolts, screws or other potentially useful hardware I unscrew, unbolt or otherwise take off this hardware and store them. They come in handy for projects down the line and they are free. I especially look for hardware which is hard to find in the store, such as oddly shaped screws or bolts (ones which are especially fat or long).

Here is a picture of screws and bolts I have salvaged from things I ended up throwing in the trash.

I provide a more details in the following video:

Posted in Life Hacks

DIY Project – Building a sturdy bench

April 8, 2020April 9, 2020 admin

For this project I built a bench which is very sturdy. I built the bench about four years ago and it has held up very well. This is how the bench looks:

The bench is pretty easy to build. Including painting and sanding I would say it would take 15-20 hours to build.

Below are the steps to build the bench. I am excluding the sanding and painting steps, but I would sand each piece before I add it on to the bench and paint the bench at the very end of the project.

Step 1: Build the bench frame: The bench frame is made up of 2 x 4s. It is a rectangle with a support board down the center. The dimensions for the frame I used was 40 inches long and 16 inches wide. All the boards are held in with Torx screws, the best type of screw there is. For more details on Torx screws view my post here:

This is the shape of the frame, it is a rectangle with a support board down the middle.
Here you can see the actual frame. The legs obscure the view a bit but it is a rectangle with a center board as shown.

Step 2: Attach the legs: The legs of the bench frame are made out of 4 x 4s. The legs were about 19 inches high. Securing the legs could be difficult. To secure the legs I used an extra long drill bit so I could drill from the leg 4×4 and the frame 2×4 together. Then for each leg I put through a long bolt which went through the leg and was secured on the other side with a nut and washer. I put a bolt through each outside edge of the leg to hold it in place, so each leg had two bolts going through it.

This diagram shows the bolts going through each leg (The square is the leg)

Step 3: Attach the bench top: The top of the bench is made of thin boards which I evenly spaced on the top. I also left small gaps in between the boards. All of the boards were secured in with Torx screws. These screws were able to drill all the way through the board and slightly beneath the board so that they are below the board surface and would not touch anyone sitting on top of them.

Here is the bench top. You can see the Torx screws on the edges which are set up so that they are beneath the board surface and won’t touch whoever is sitting on the bench.

This is my favorite of the benches I have made. As stated before, it is really sturdy, it should support at least 400 pounds.

The following video shows some specifics of the bench and details the steps to make it.

Posted in DIY projects

Things I like – Torx screws (and screw face off)

March 20, 2020May 2, 2020 admin

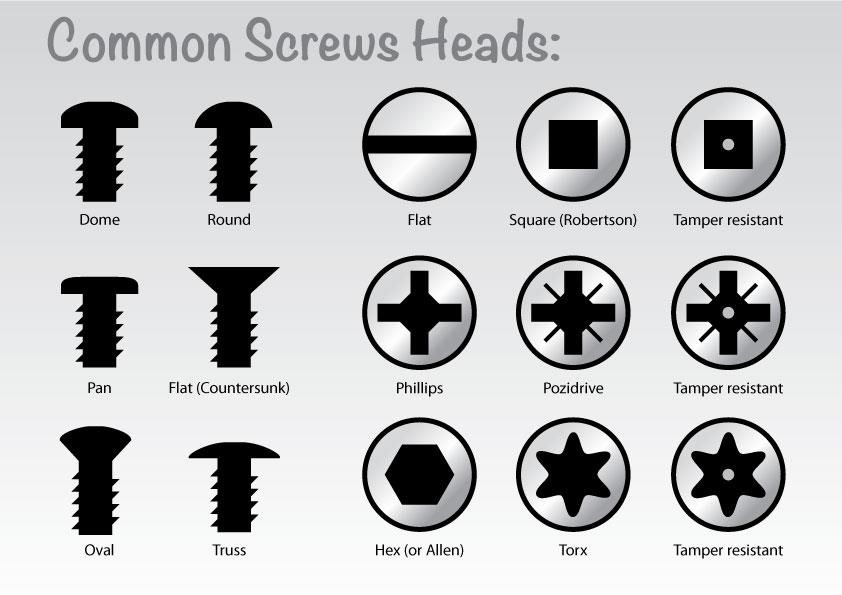
Growing up I always thought there were only two types of screws, flathead and Phillips. Turns out there are many types, as shown in the picture below:

This picture shows some common screw types. I will compare the Robertson screw, Torx screw and Phillips screw.


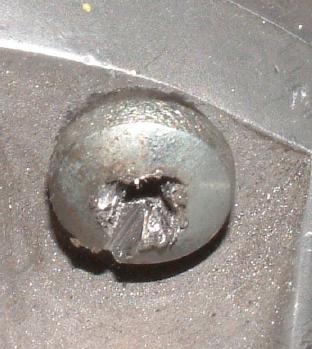
Phillips is probably what you are most familiar with, they have a X shape at the head of the screw. Thing is, these screws are not very good for woodworking. Often when using an electric driver and a Phillips screw in wood, the screw would find some resistance and the screw will stop going into the wood. When this happens often the head of the screw gets stripped with the “X” getting ground out. Then the screw driver will no longer fit and a special tool is needed to remove the stripped screw (and often even that doesn’t work).

Here is an example of what a stripped Phillips screw looks like.

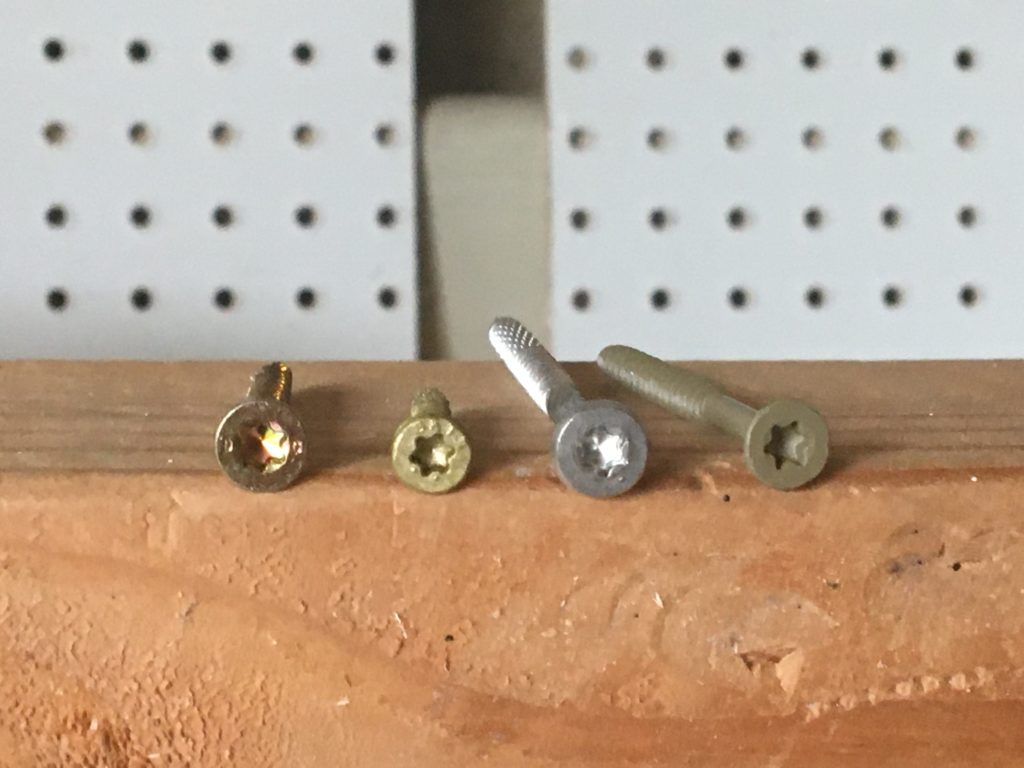
The screw I almost always use is a Torx screw. These have a star shape on the head of the screw as shown in the images below.

A variety of torque screws are shown above. They all have the star shape on the screw head.

With more points of contact and a better fit the screw driver or power drill never slips out. Using these type of screws I have never had the screw get stripped. The only thing I have had happen is that if I use too much force or the screw hist too much resistance the screw head breaks off. These screws come in various lengths and sizes. Also, when you buy them the necessary drill bit is usually included. A good set of 100 torque screws can be bought on Amazon here: Hillman Available 48594 Power Pro Premium Exterior Wood Screw, 8 X 1 1/4-Inch, 1 Pound, 8″ x 1-1/4″, 10 Piece

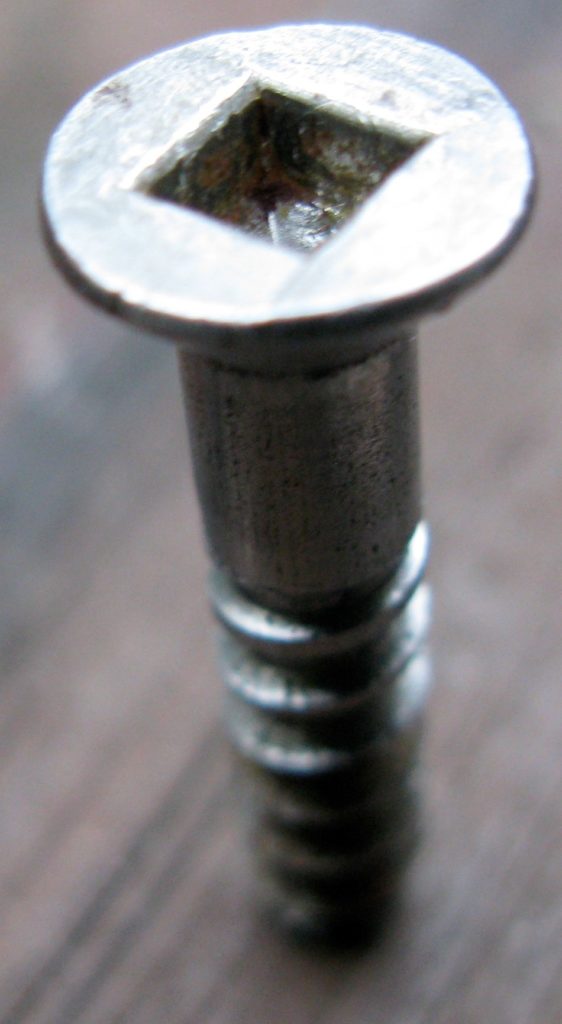
Another screw a lot of people say is good is the Robertson screw. These screw had a square shape on the end of the screw. In the US these screws are not easy to find, they are mainly found in Canada. I couldn’t find them in Lowe’s so I had to buy them online. I had never used them before but wanted to try them out.

Here is a close up of a Robertson screw, notice the square shape

I made a video comparing Torx, Robertson and Phillips screws to see which could go the furthest in a four by four before stripping. Torx screws went through the furthest, Robertson screws were second and Phillips screws were last (stripped the earliest).

Which screw type do you like best and why? Please let me know if the comments or e-mail me at lifehackanddiy@gmail.com.

Posted in Things I like 3 Comments on Things I like – Torx screws (and screw face off)

Posts navigation

Older posts
Newer posts

Life Hack and DIY Facebook Page

Get more stuff

Subscribe to our mailing list and get interesting stuff and updates to your email inbox.

Thank you for subscribing.

Something went wrong.

We respect your privacy and take protecting it seriously

Proudly powered by WordPress | Theme: x-blog by wpthemespace.com